Git Project Flow with phpstorm, Plesk and GitHub
This is an overview document to set up a web project to utilize phpstorm and a GitHub team account for collaboration on projects, incremental backups, and better recovery options while working with multiple developers. The process for deployment to live servers or other environments will be outlined at the end of the document.
Step 1: Creating the project
Create your new project in phpstorm. It doesn't matter if it is a fresh, empty directory project, or one put together from an existing site.
You may now begin your project setup. Add the system files, addons, etc. to get to an initial state ready for development. Run any local tests needed to ensure you have a good "starting point."
Setting up revision control
Now that the files are ready for development, it is time to initialize your revision control system with the git functions in phpstorm. There is more than one way to do this, but I am only outlining the way that I have done it in my projects.
-
Firstly, be sure to enable revision control for your project. You can find this option in the VCS menu in phpstorm:
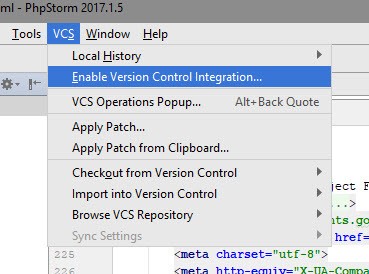
If version control was not enabled in the project already, you will be prompted which type you would like to use. Select "Git" from the options.
You may also be asked if you'd like to add the .idea files into the project. Click to add them all so that extra project information gets saved in the repository as well.
-
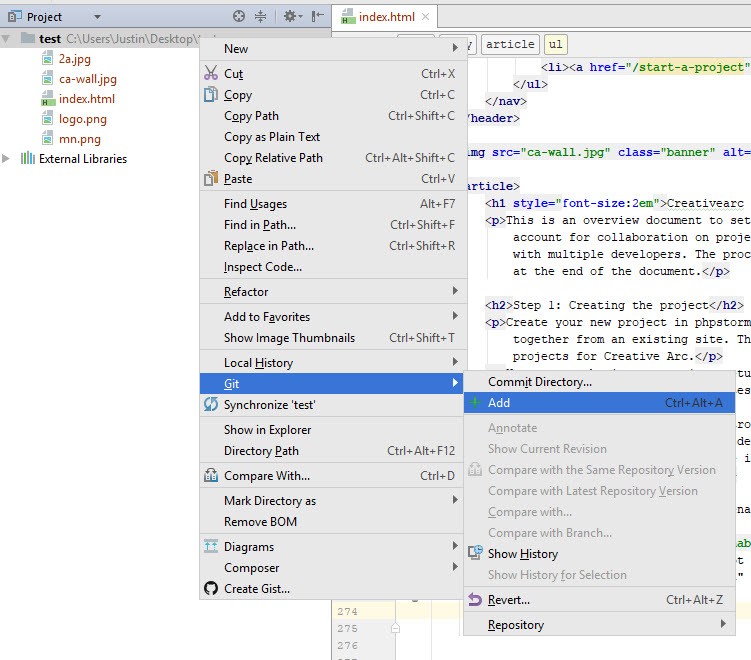
From the project pane (on left in image below), right-click on the top level of the files that you have in your project to bring up the context menu. Select Git » Add from that menu.
-
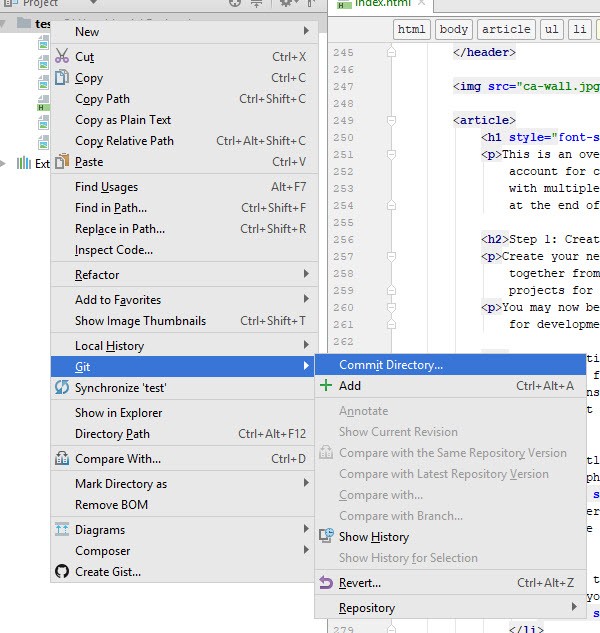
Once the files have been added to the project, it is time to create the initial state. Right-click on the project's top level again and choose Git » Commit Directory.
-
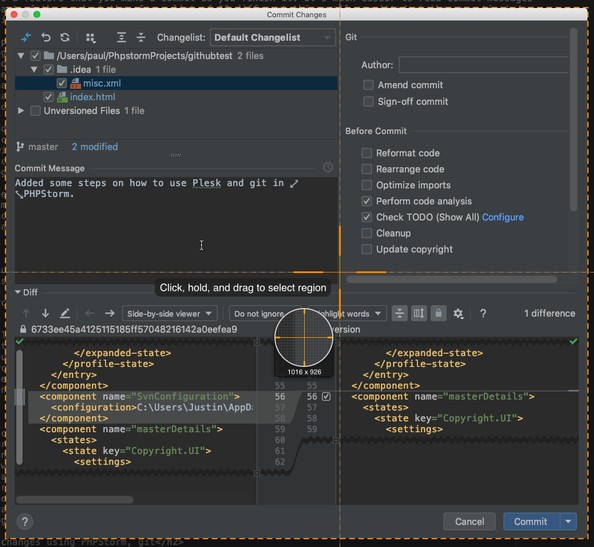
Within the Commit Changes options window, there are a number of options to be aware of. In the image below, the colored arrows point to some important and useful options. The Red arrow indicates that te code analysis option has been turned off. phpstorm will complain about eecms tags with a pop-up if you leave this on. The Gold arrow indicates a required item. You must have some kind of message for every commit. Keep it short to say what you did for this round of changes. Lastly, the Green arrow is an option to upload the committed files to one of your deployment server options. I usually don't use this option as I like to upload files manually between commits for testing anyway.
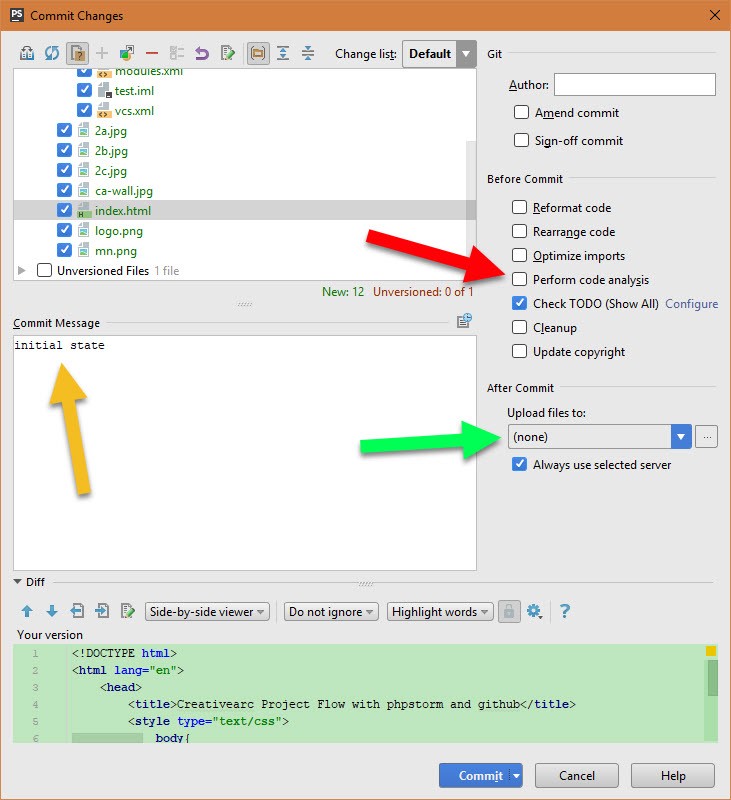
When all your options have been selected, click the Commit button to get everything into your git repository for this project.
Getting your project into GitHub
At this point, we are ready to move our repository into our GitHub account. If you do not currently have a personal GitHub account, or you would like to use one specifically for projects, it is now time to create one. When creating the account, you will only need to have the free option for this process. You may be asked to add a key for ssh into the account. Once it is all set up, we can continue.
There are a couple quick steps involved in this process, but you only have to do it one time for each project.
-
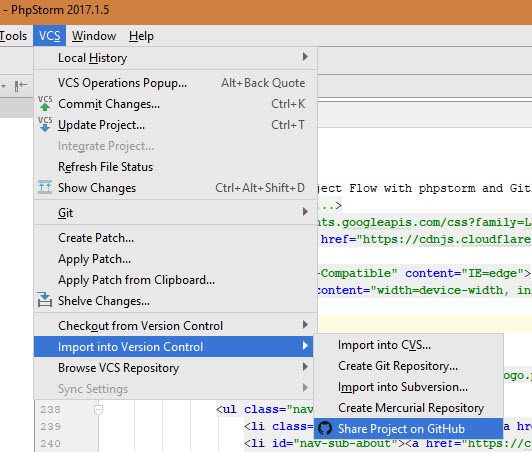
Use the VCS menu to share the project to GitHub.
-
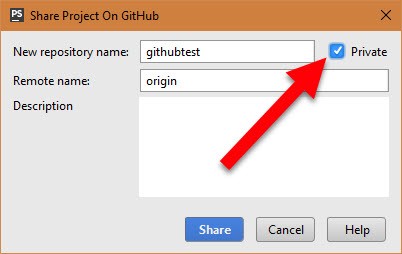
Give your repository a name to use in the team account, and be sure to mark the repository as private.
-
You will likely be asked to log into your github account at this point with your username and password to continue. The files should then all get pushed into a newly created repository in your account.
-
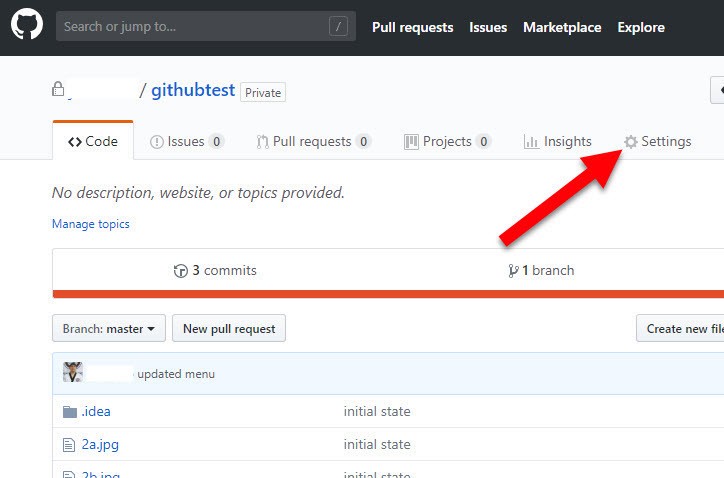
Browse into the repository and click on the settings link (red arrow in above image). Scroll to the bottom of the page for the "Danger Zone" section. Click the button to transfer the repository to another user. Enter in the repository name, the new owner's name (e.g. my-company-handle), and click the "I understand, transfer this repository." button at the bottom.
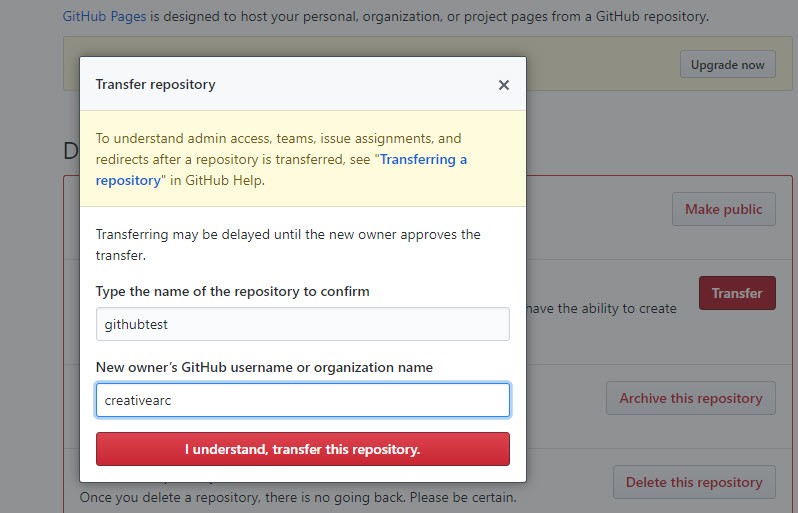
Confirm your password if asked to do so. Assuming you had permissions to create the repository in the creativearc account, you should now see your new repository listed in your account as example/repo_name instead of username/repo_name.
Development
Now it is time for you to do your development as you normally would. There is no such thing as over committing with revision control, so use it as often as you'd like. I suggest that each time you add a new feature or make changes to a feature that you make a commit as you finish it. It's much easier to read commit messages for a single part of the project than for a list of 10 different things all committed at the same time!
phpstorm's git integration is handy for seeing what you have or have not committed at a glance. In the image below, you can see there are three file names in the project pane with a red tint to them, and one that has a blue tint.
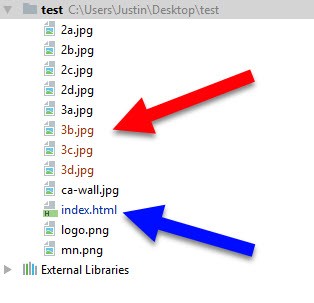
The files in red are ones that have not yet been added into git. To fix that, select the files, right-click to bring up the menu, and select Git » Add to put them into the revision control. The blue file is one that has been edited since its last commit.
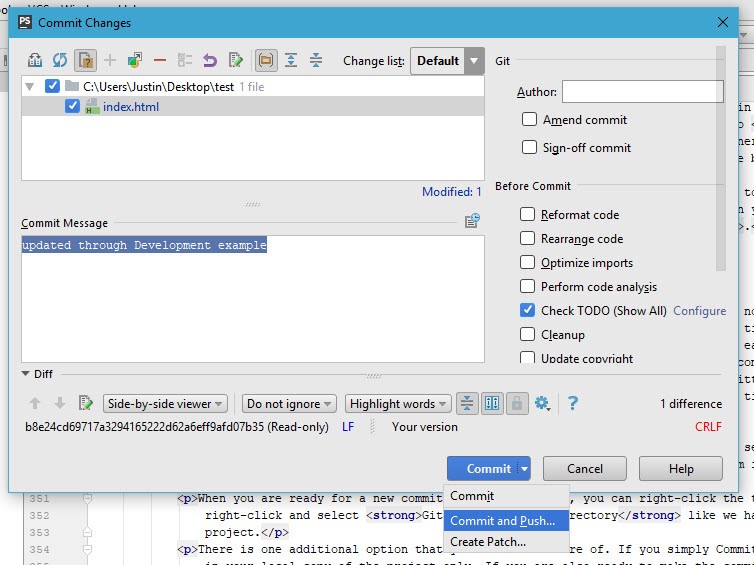
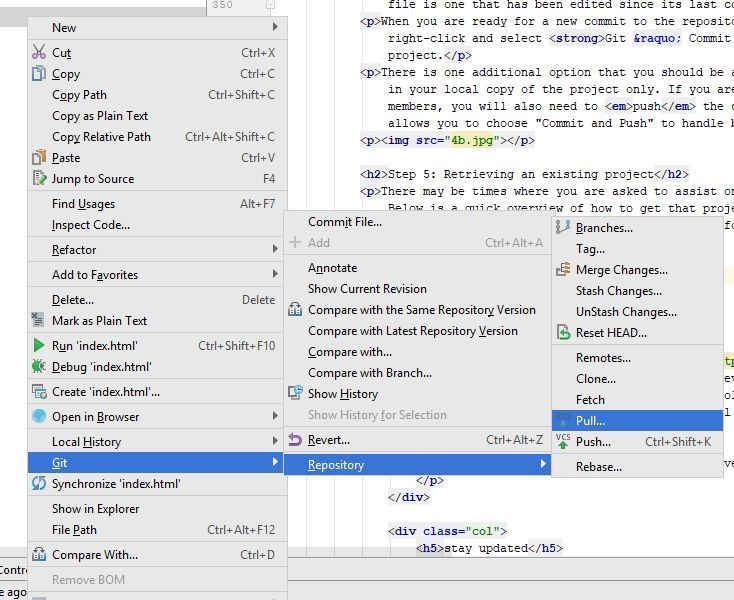
When you are ready for a new commit to the repository, you can right-click the top level of your prject, right-click and select Git » Commit Directory like we had done at the start of the project.
There is one additional option that you should be aware of. If you simply Commit, the changes are recorded in your local copy of the project only. If you are also ready to make the commit available to other team members, you will also need to push the changes. In the commit changes window, the Commit button allows you to choose "Commit and Push" to handle both tasks at the same time.
Interface Differences
Paul's version of phpstorm on the Mac has a small green checkmark icon which asks you to describe your commit.

This screenshot similiar to Justin's version above, but is for the mac version.
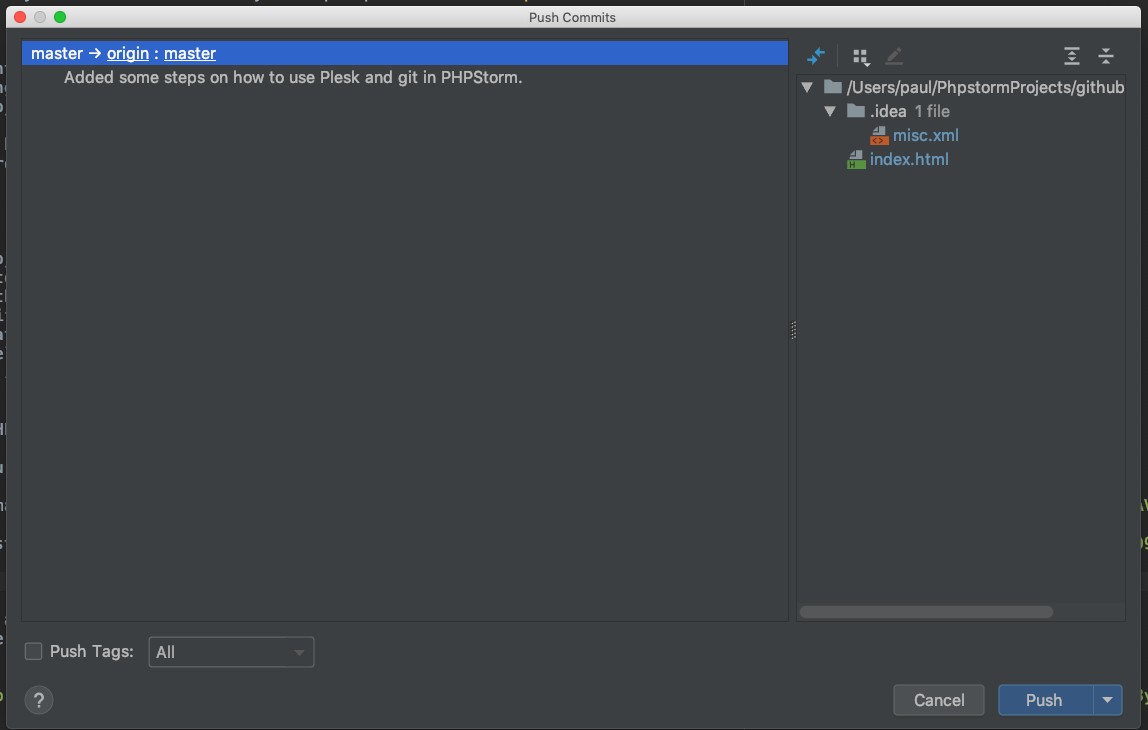
After your commit is saved (locally), let's push it to GitHub. On a Mac, the key combo is Command+Shift+K. You'll get this screen; click "Push."
Retrieving an existing project
There may be times where you are asked to assist on a project that already exists in our team github account. Below is a quick overview of how to get that project into your phpstorm setup. Following this step means someone else has already done all the project setup and likely has done development for it already as well.
-
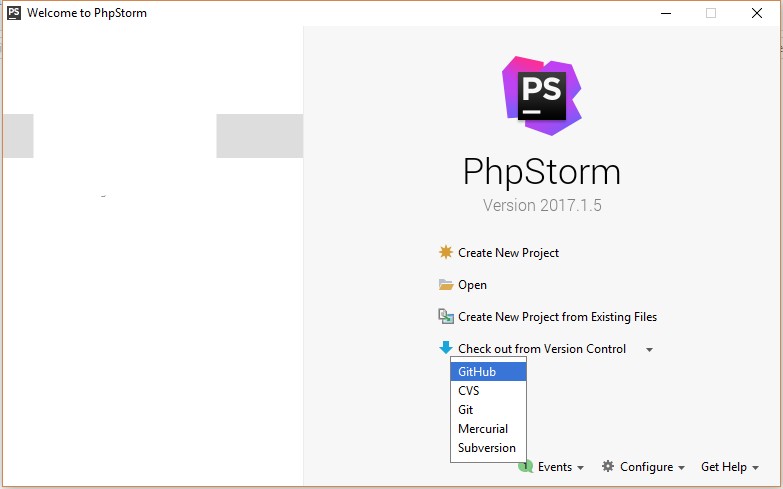
When you do not have an open project in phpstorm, you are presented with the project selection screen. On this screen there is an option to check out from version control. Click on that and choose the GitHub option. Log into your GitHub account if you're prompted to do so.
-
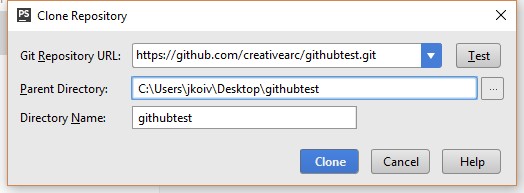
You will then be presented with a choice of repositories that your account has access to. Find the project you are wanting to work on and selected that from the dropdown. Choose the directory that you would like the project directory to be created in, and click the "Clone" button.
When the clone process has completed, you should be prompted to open the directory. If you are not you can use the new project option for phpstorm to select the project directory.
Updating your copy
When you are working on the project as other developers, you may need to use some of the other git commands to manage the files to avoid collisions. At times you will be asked to do something for a developer whle they are working on something else. To be sure you are working on the correct version of the code, be sure to do a pull request if you already have the project stored locally.
To make a pull request for updating your local copy to match the repository from within phpstorm, right-click the project and select Git » Repository » Pull. Be sure to choose the correct branch to work on in the dialog that comes up.
Deployment with plesk
With the latest Plesk offering a Git extension, the setup is easy.
-
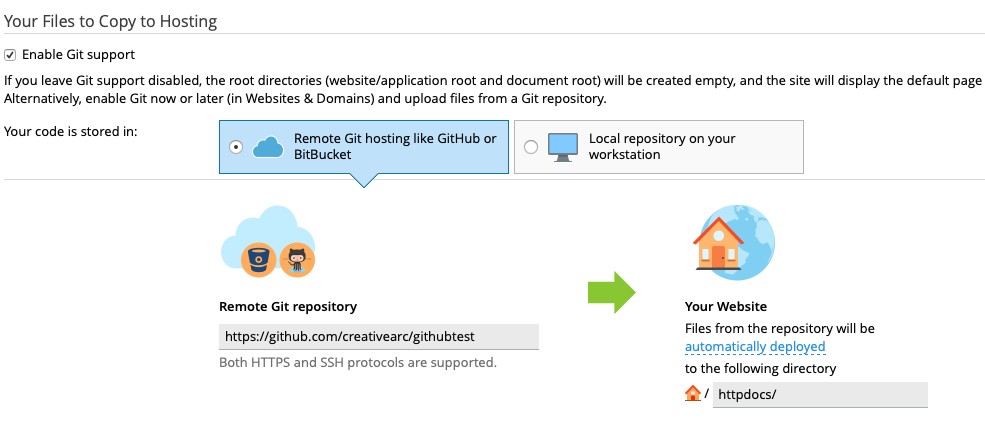
Upon adding a new subscription to plesk, you have the option to Enable Git support. Contrary to the screenshot, add the ssh URL.
-
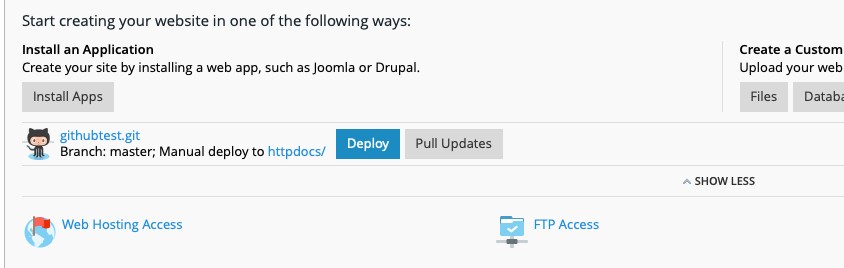
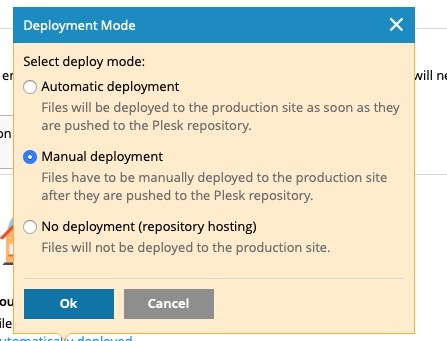
Manual Deployment is the preferred setting for this setup.
-
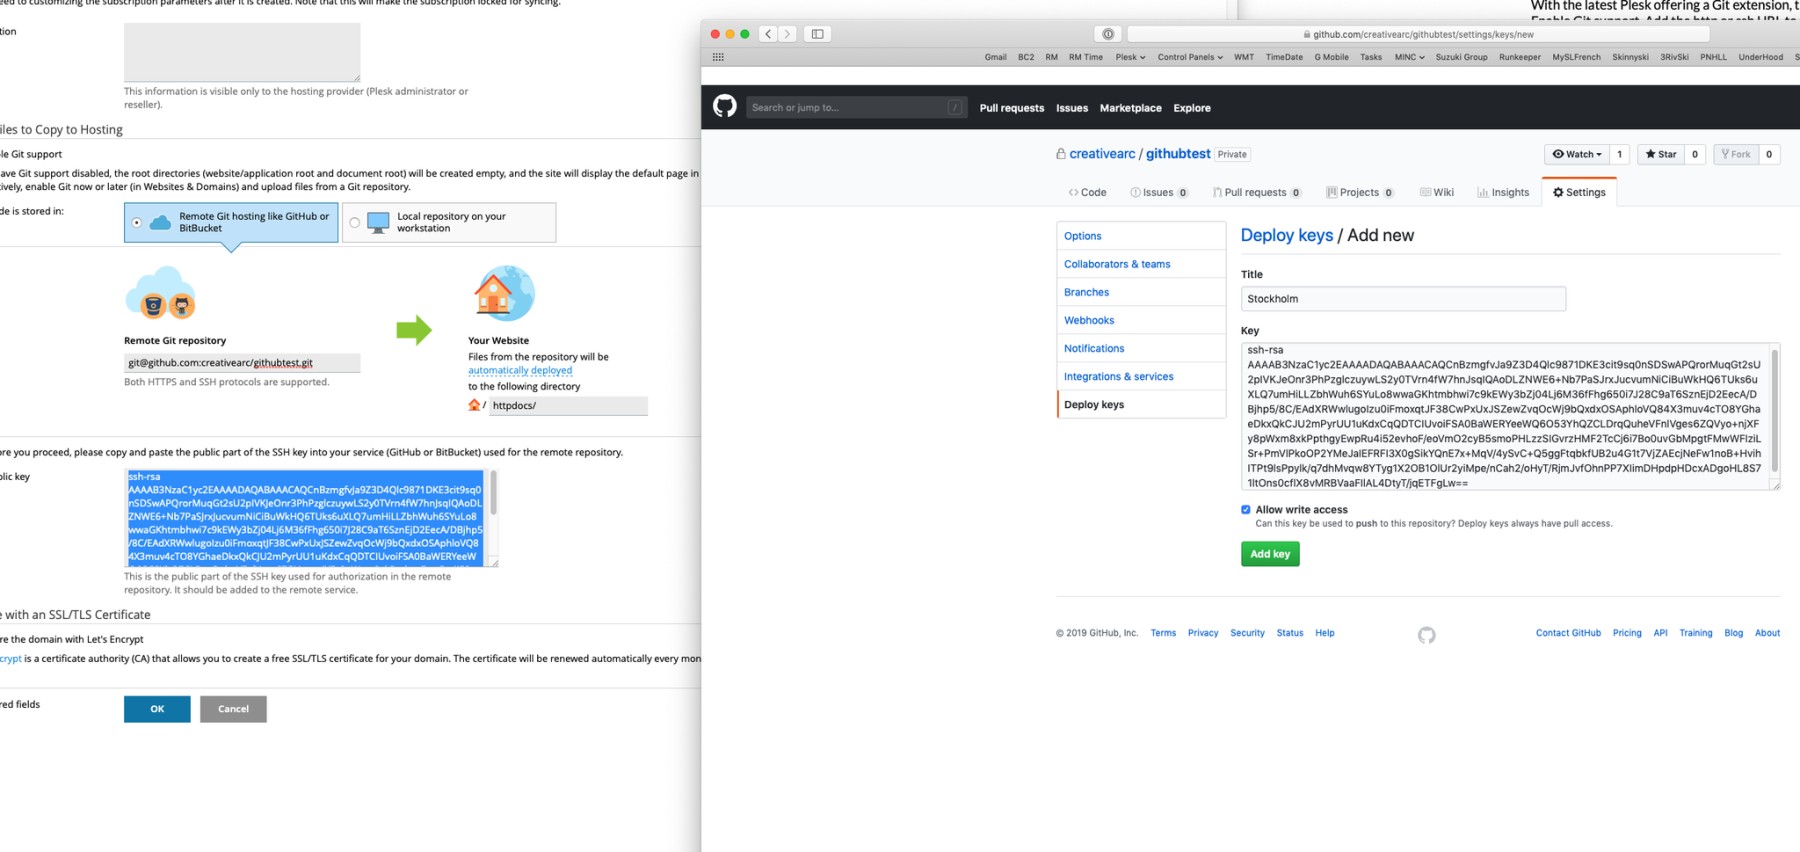
Plesk will supply an ssh key to paste back to the project GitHub. It is under the repository settings for deployment keys. Make sure to allow write access. (This would be something done from the company github account.)
-
Plesk creates the domain, and readies the domain for future usage with Github.
-
Plesk sees the latest GitHub commit and is ready to pull files.

-
Ready to deploy in one click.