1) Setting the stage
CartThrob is an ecommerce addon we’ve used for many years, building sophisticated stores that integrate with ERPs, event ticketing sites, or even basic invoice payment forms. This article provides a foundation for building a CartThrob commerce website from scratch, covering field creation, channel configuration and assignment, payments, shipping, taxes and order notifications. A high-level overview of template tags is found at the bottom of the article, and the full example templates are provided as a zip archive.
Disclaimer: This is a way to build a CartThrob store, not the way. The power of CartThrob is in how it extends ExpressionEngine. You can bring your EE skills to bear and simply extend into commerce.
Introducing our demo store, FakeBowling.shop!
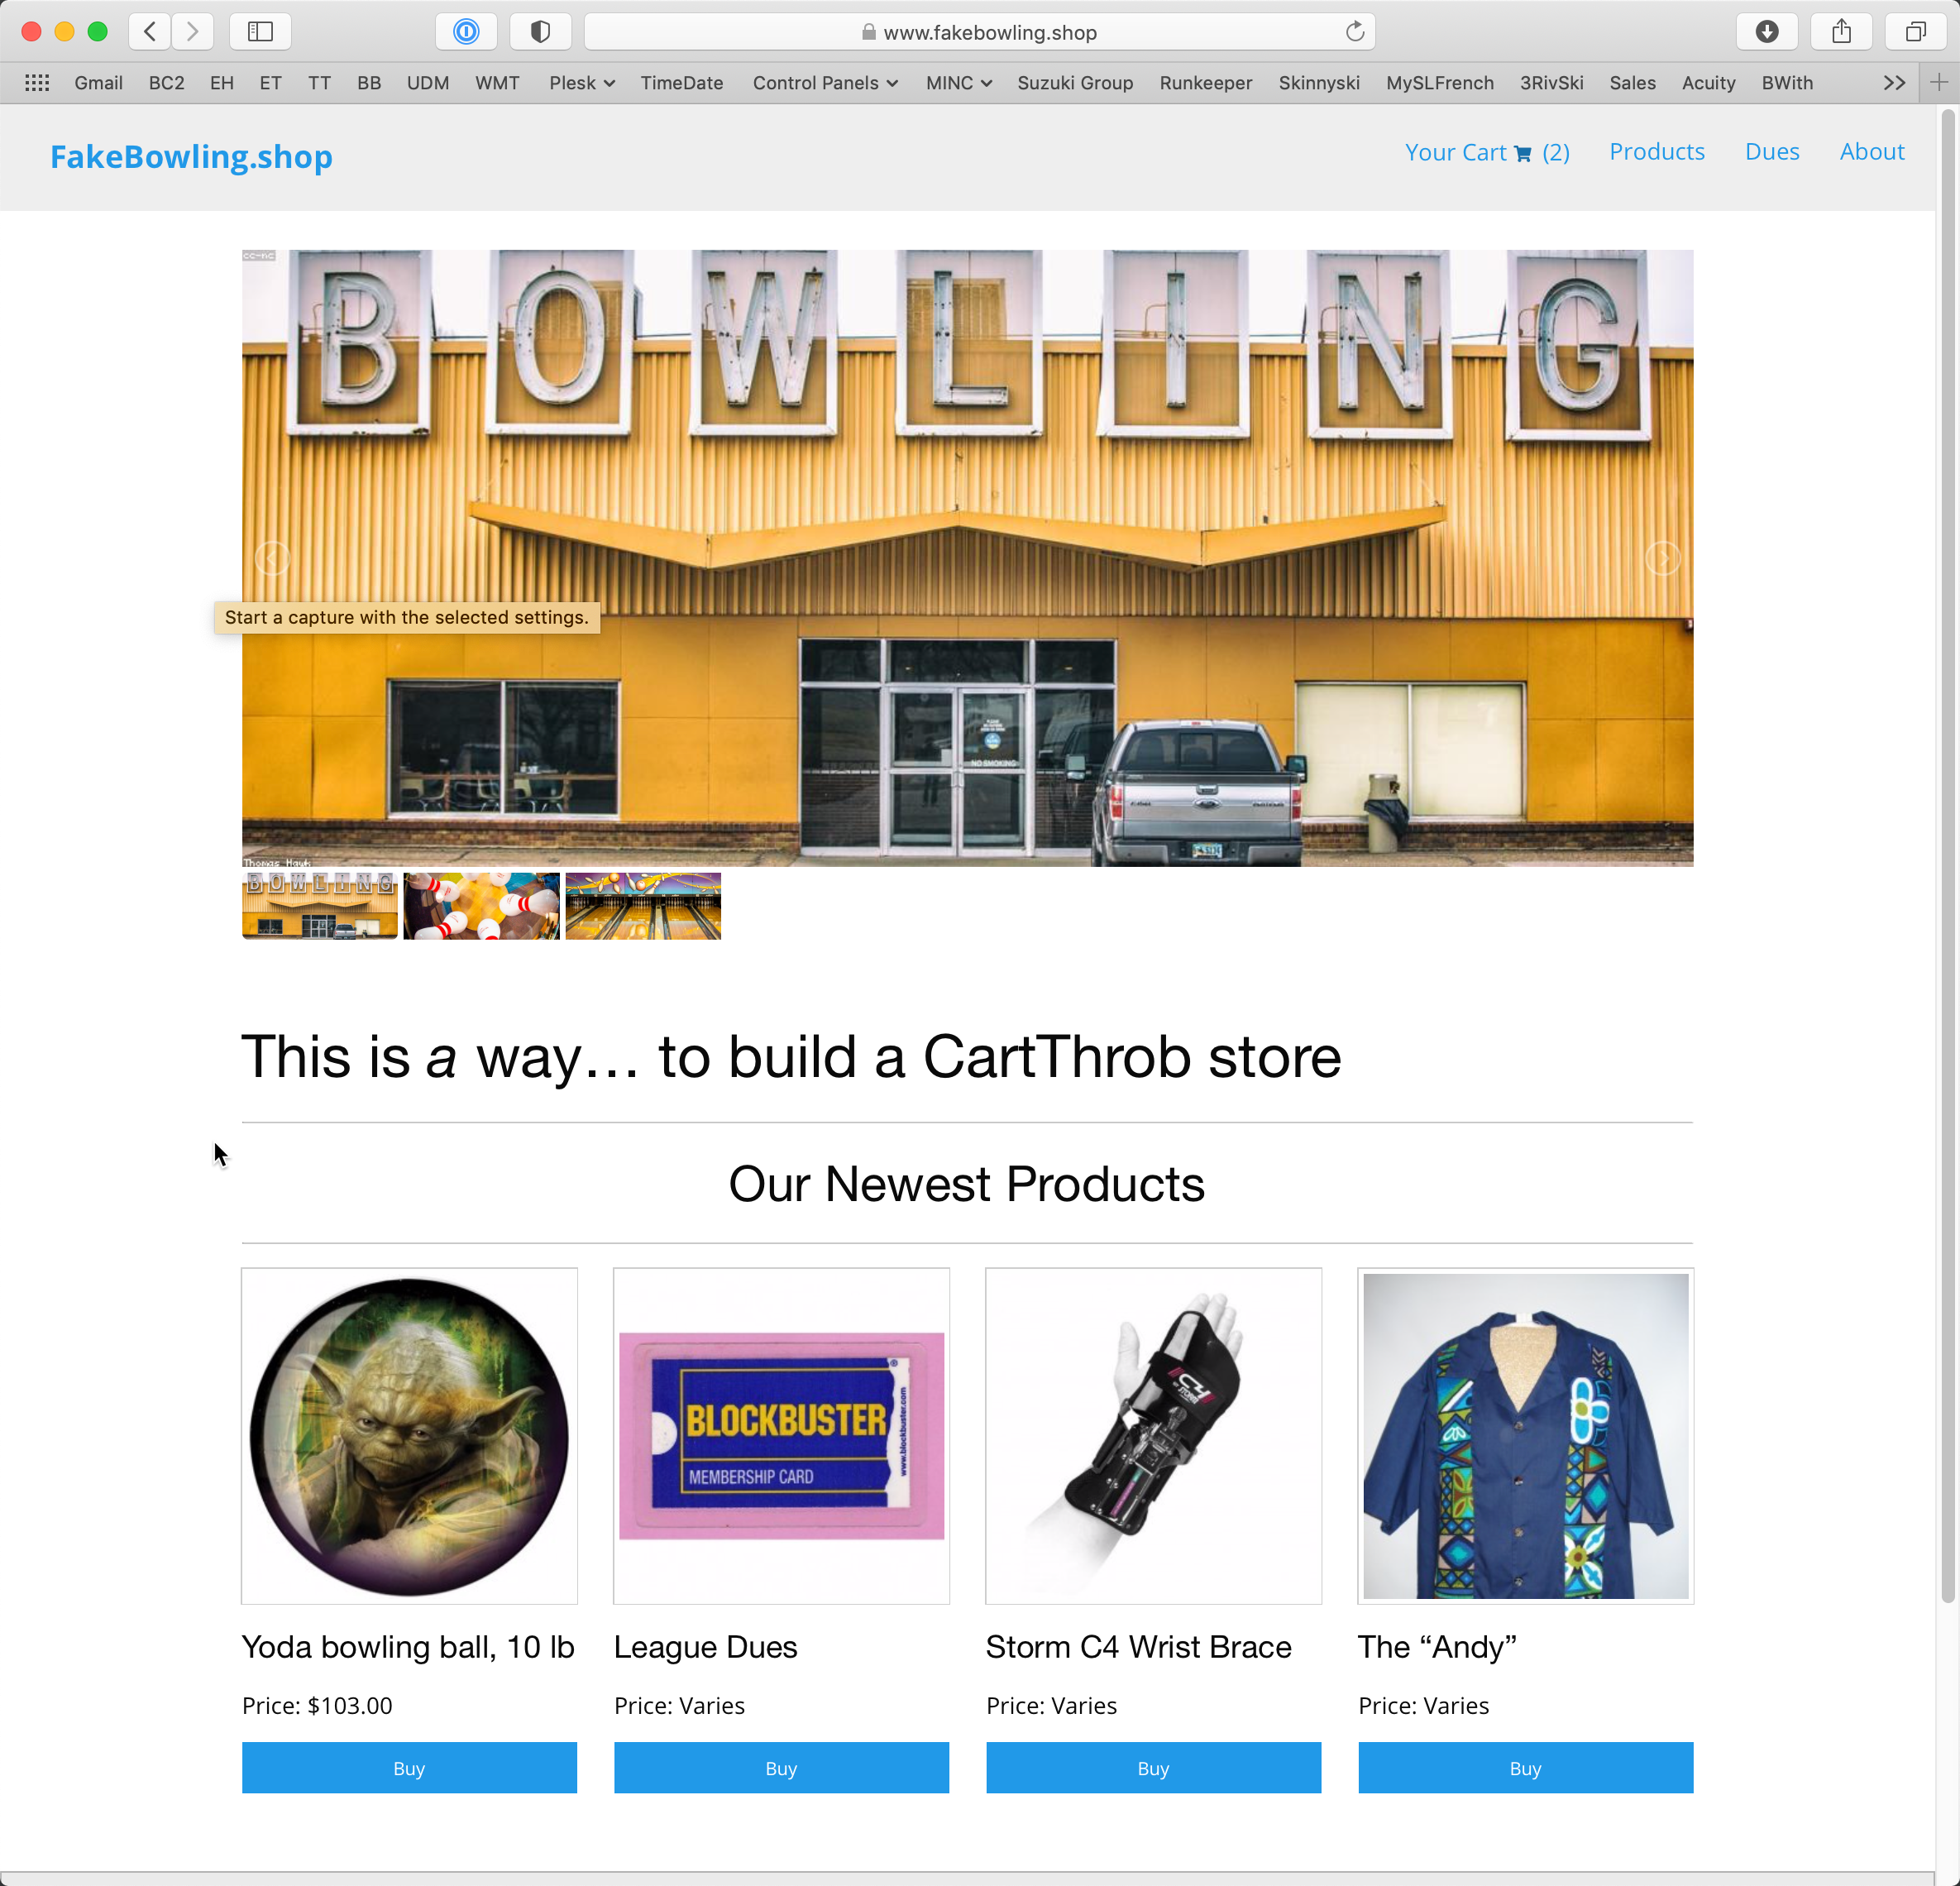
As you might have guessed, our chosen demonstration store is one that sells bowling accessories. Such a store would likely have Simple Products such as a bowling ball, or Optioned Products such as a shirt with size options, or Virtual Products such as League dues where shipping and weight don’t apply.
This is a speed run starting from an existing ExpressionEngine website; our journey begins just after the CartThrob add-on has been installed but none of the configuration has been completed.
At the end of this walkthrough, we’ll have covered:
- CartThrob field creation
- CartThrob channel assignment
- CartThrob payment, shipping, tax and notification configuration
- Template setup and tag overview
Let’s get started!
2) Simple Products: field creation and entry configuration
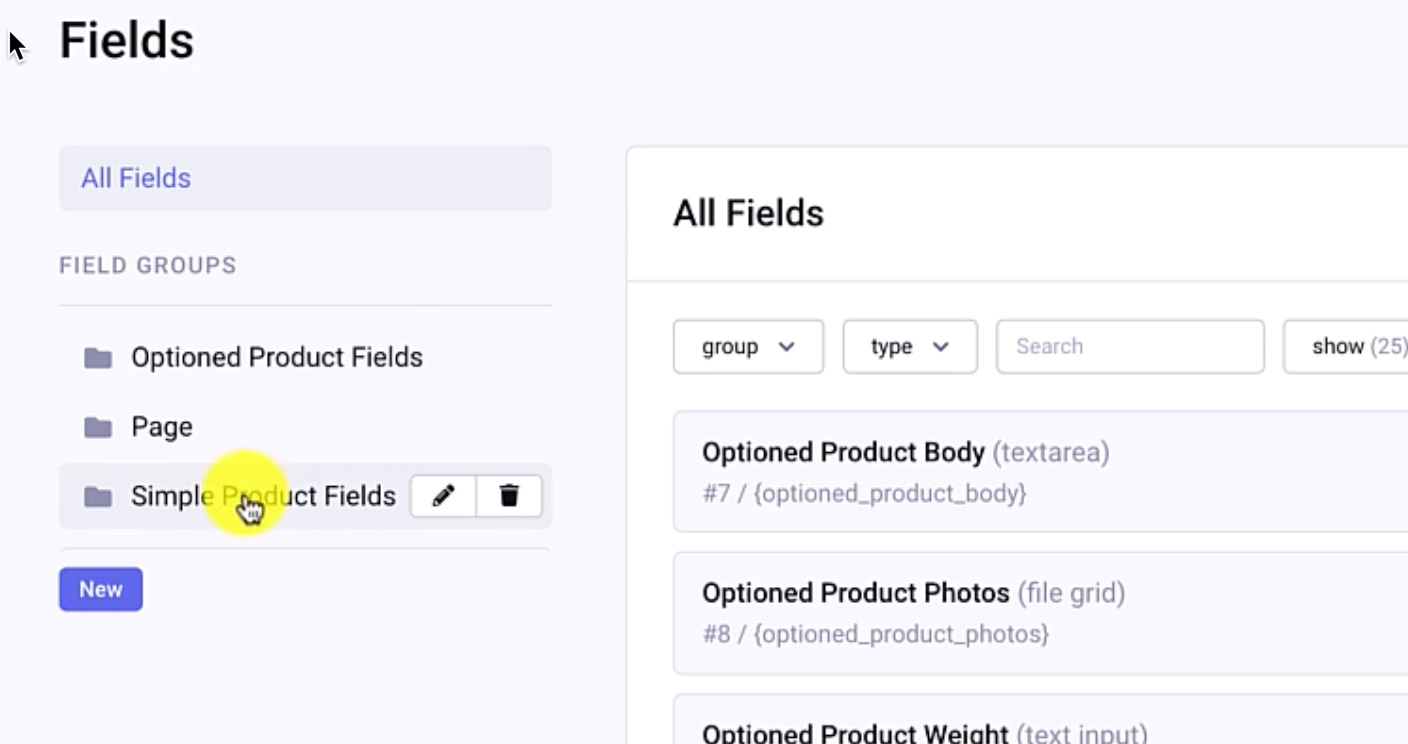
We’re going to create our simple product fields and then review how those appear on the front end, then configure CartThrob, so it knows about that simple product channel. Within Fields menu, you’ll see we already created field groups for our Simple and Optioned products, but for now we’re going to focus on the Simple Product Field group.
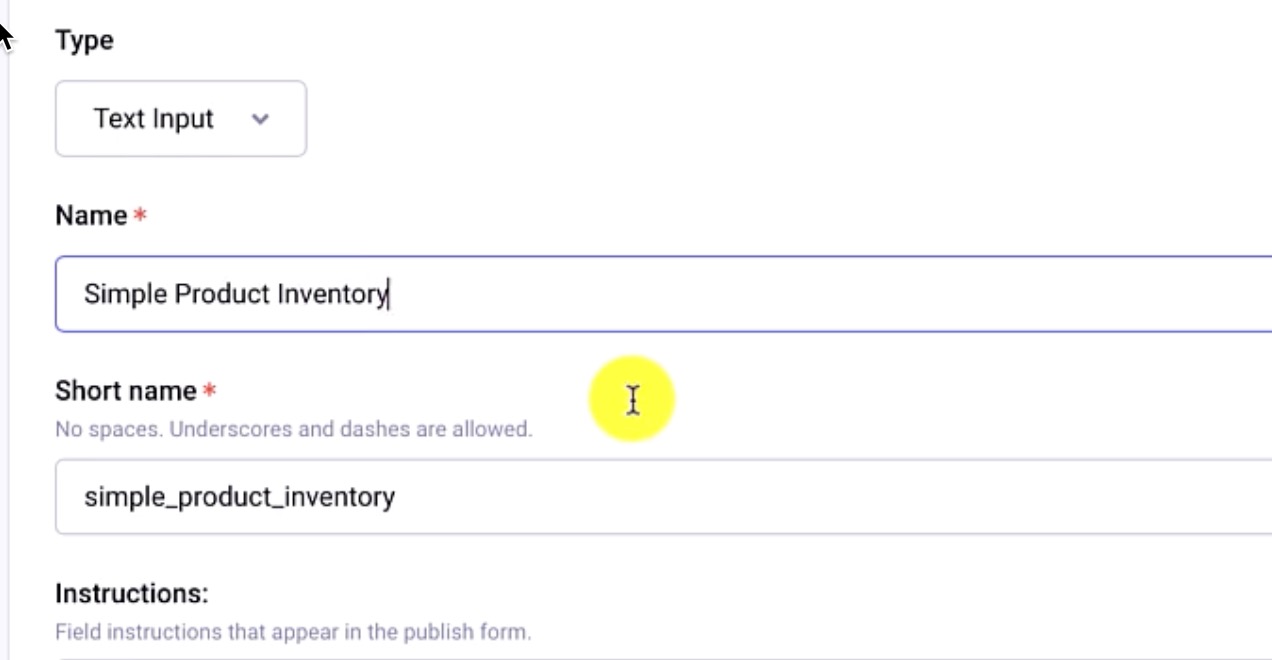
The first field we need to add is the price. Create a new field within this field group; use the field type “CartThrob - Simple”. I’ll call this Simple Product Price, making it required.

The next field is the Quantity, or the Inventory Tracking field, and this can just be text input with “Integer” as the Allowed Content setting.
We have three demo products in our store (two bowling balls and one accessory). Note that Products within CartThrob are simply ExpressionEngine channel entries: everything you’re accustomed to from a standard EE website applies; we are simply introducing CartThrob field types.
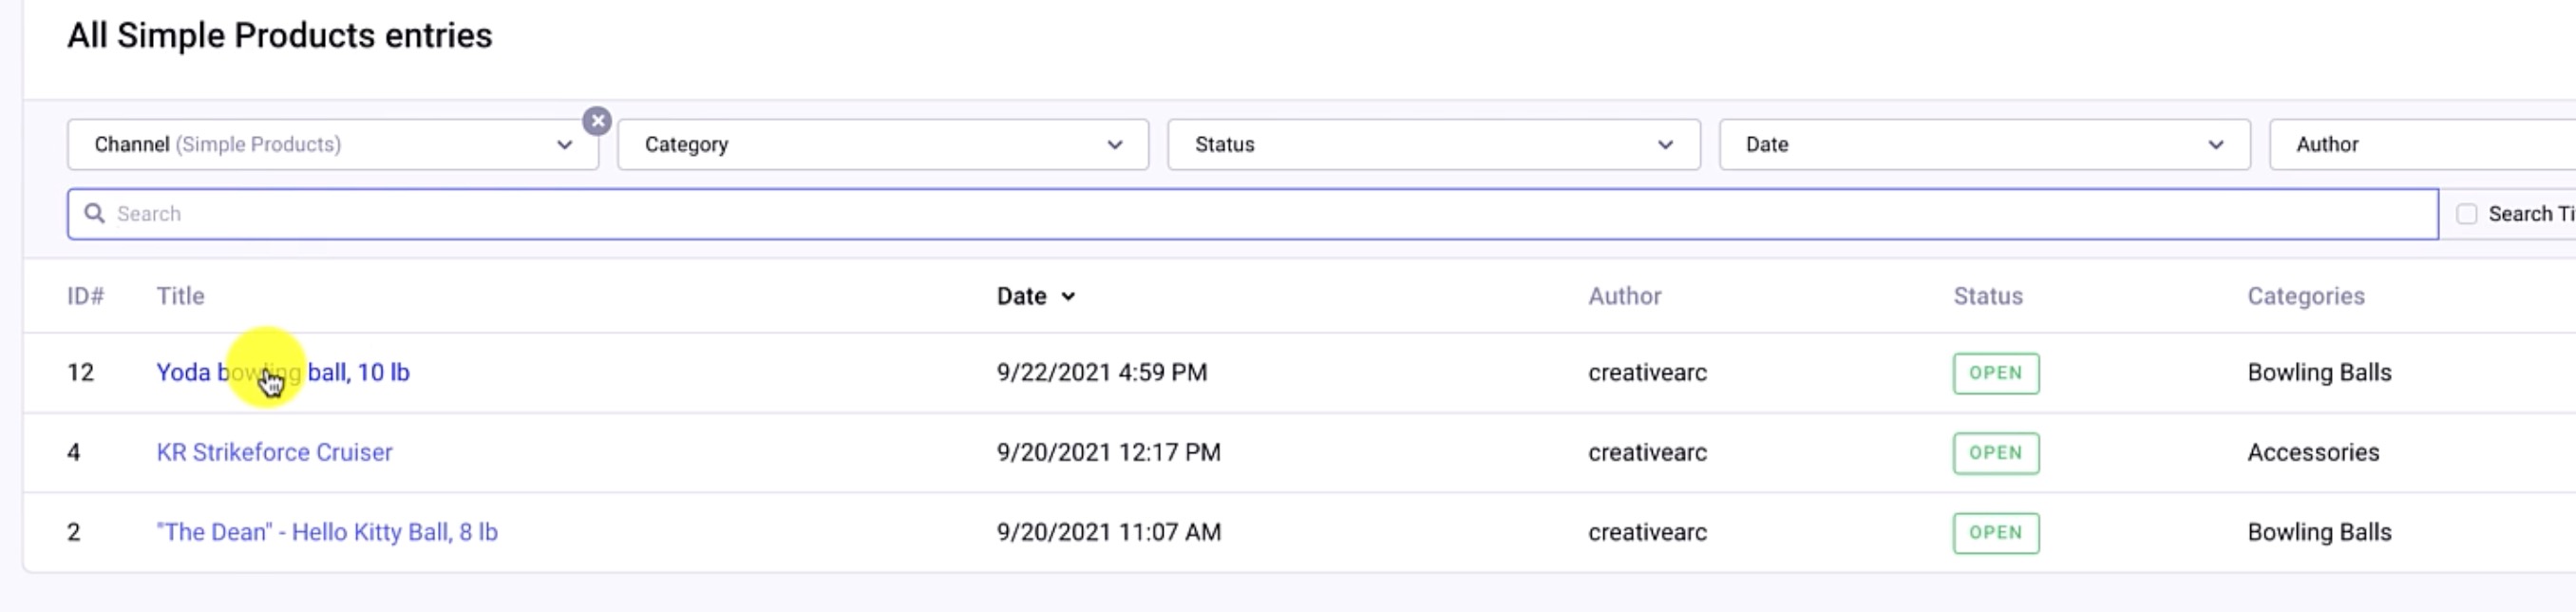
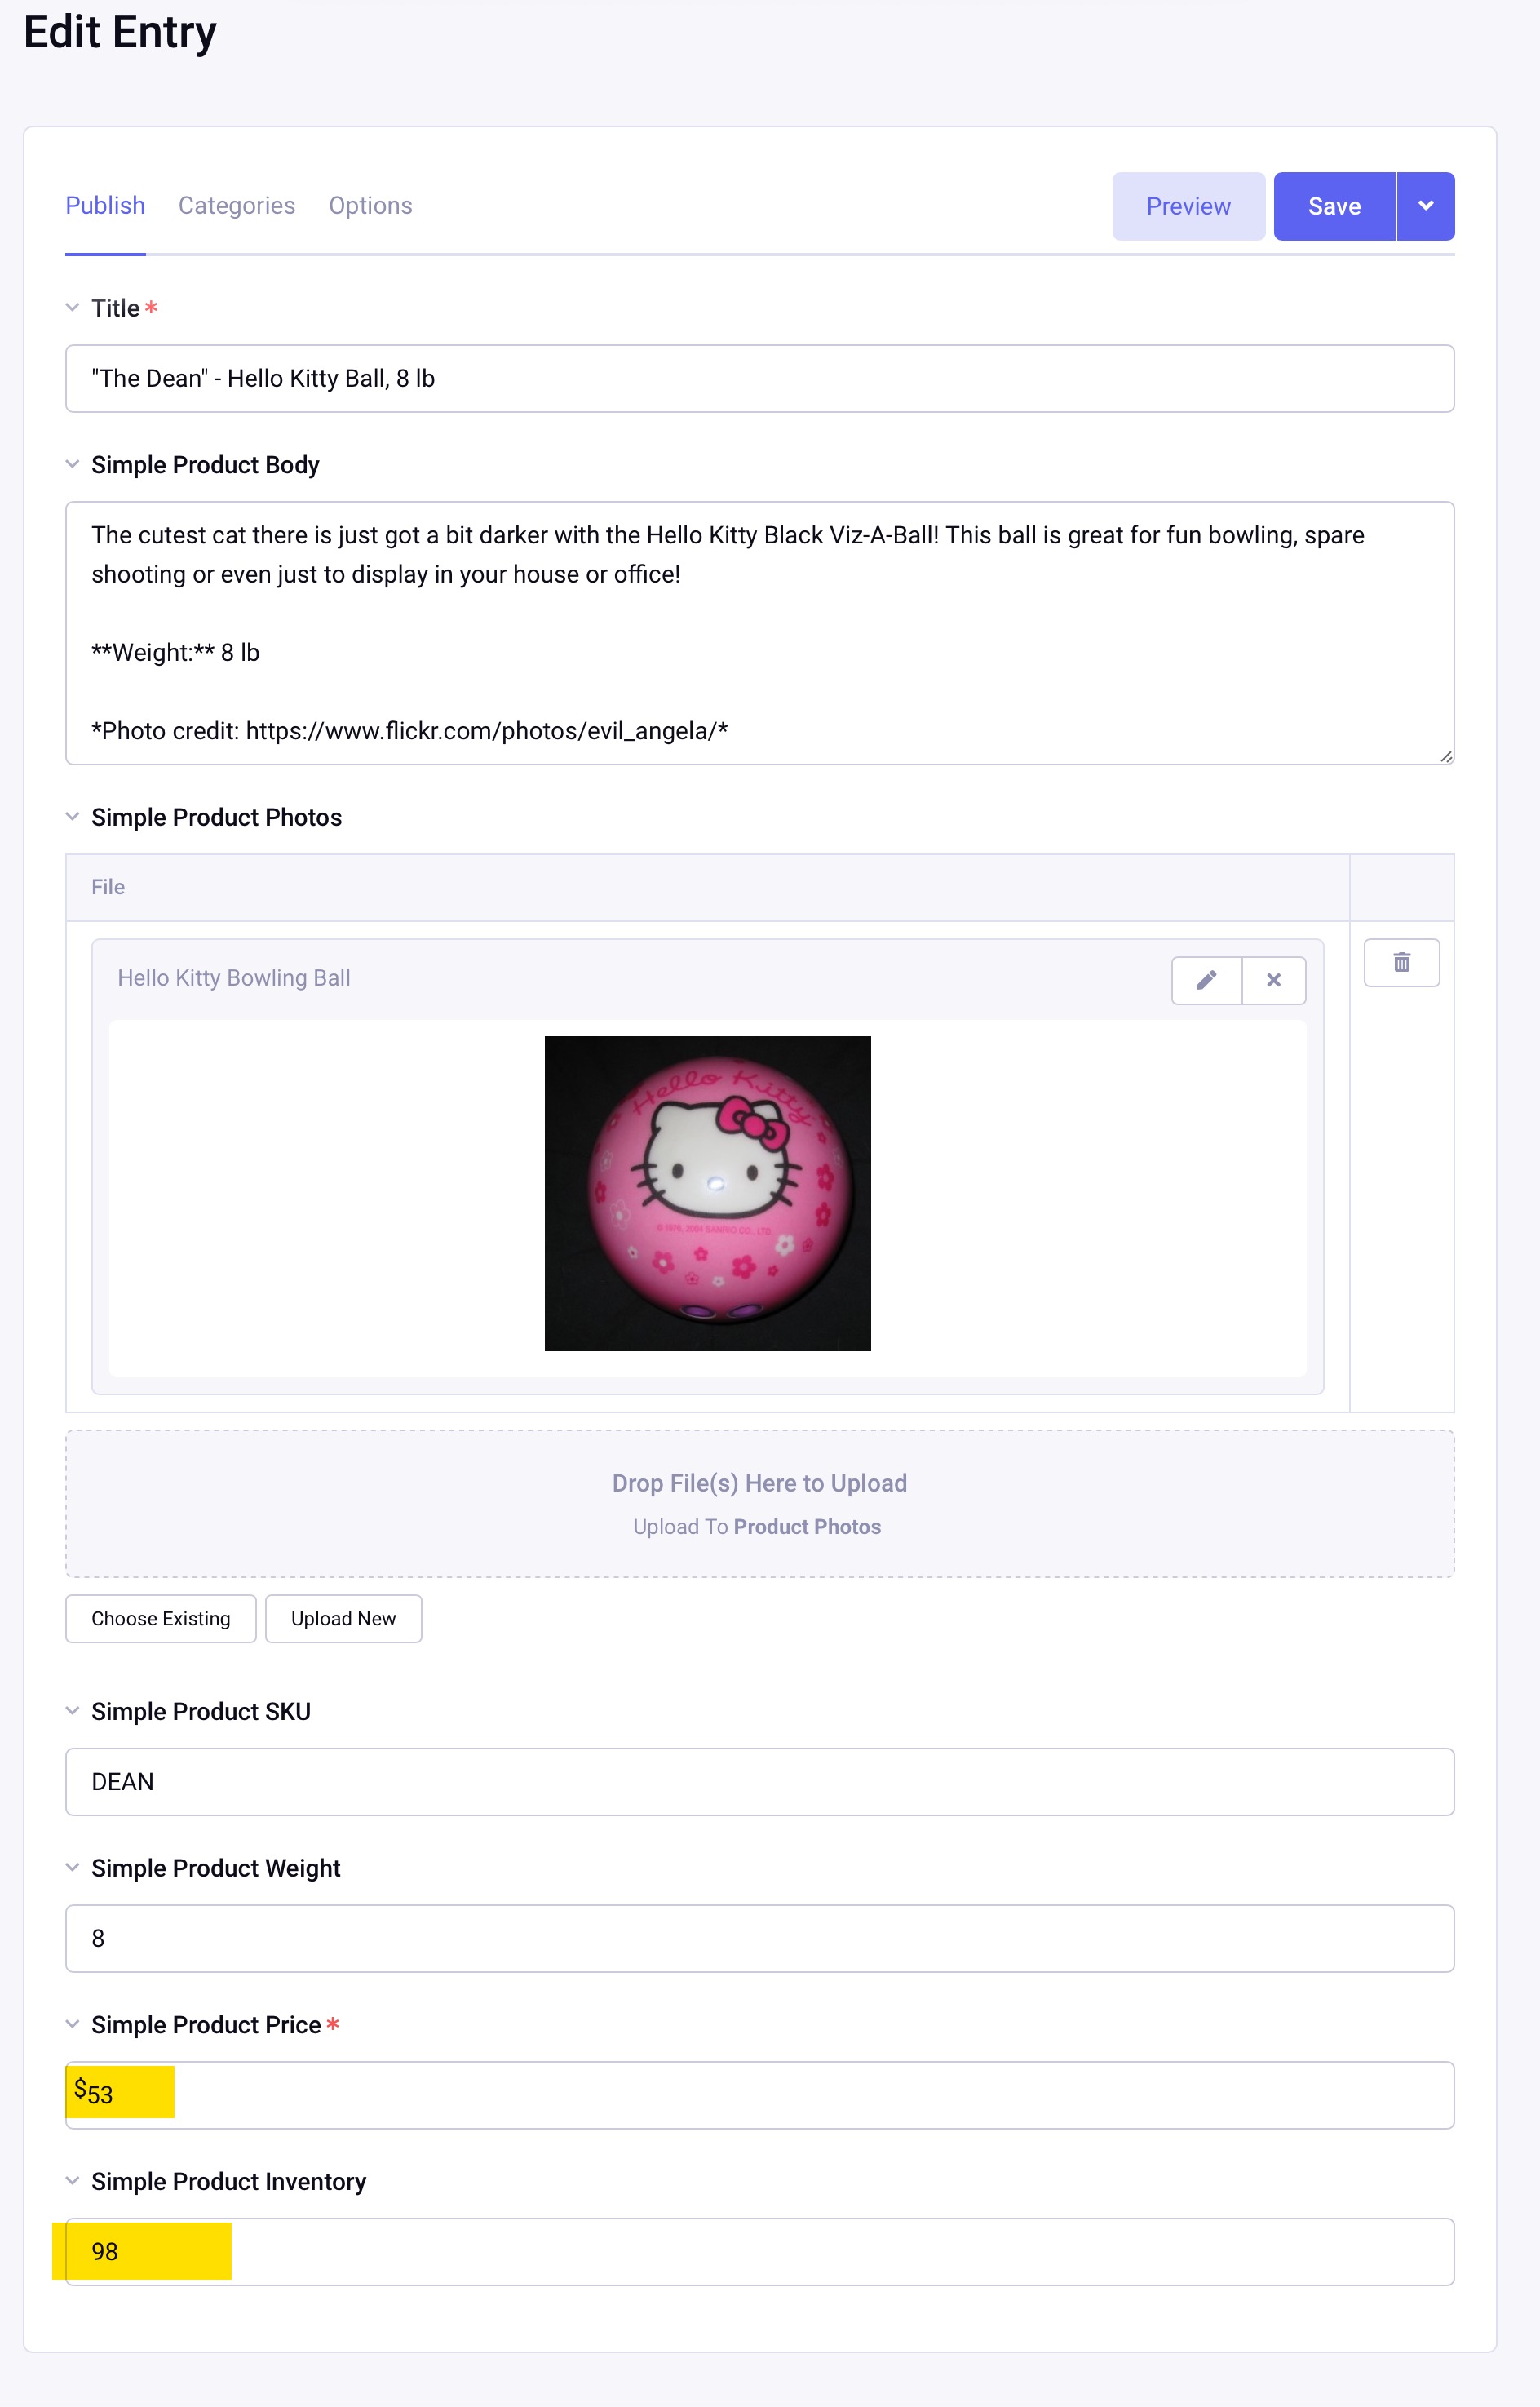
Let’s look at one test product entry as an example (8-pound Hello Kitty ball). We already have the photo and the body and the SKU in there, but I’ll just give this a price of $53 and a quantity of 98 in stock.
Following suit, the Yoda ball is $103 with a Inventory of 5, followed by the Bag Roller product, priced at $80 and a quantity of 60.
A quick peek at one of these items on the frontend:

Now, we can go to the CartThrob addon within the ExpressionEngine backend, which at the moment doesn’t know this channel exists. From the Products tab, we’ll assign the channel Simple Products. Our Price Field name is the Simple Product Price, the weight field name is, Simple Product Weight and the quantity field is Simple Product Inventory.
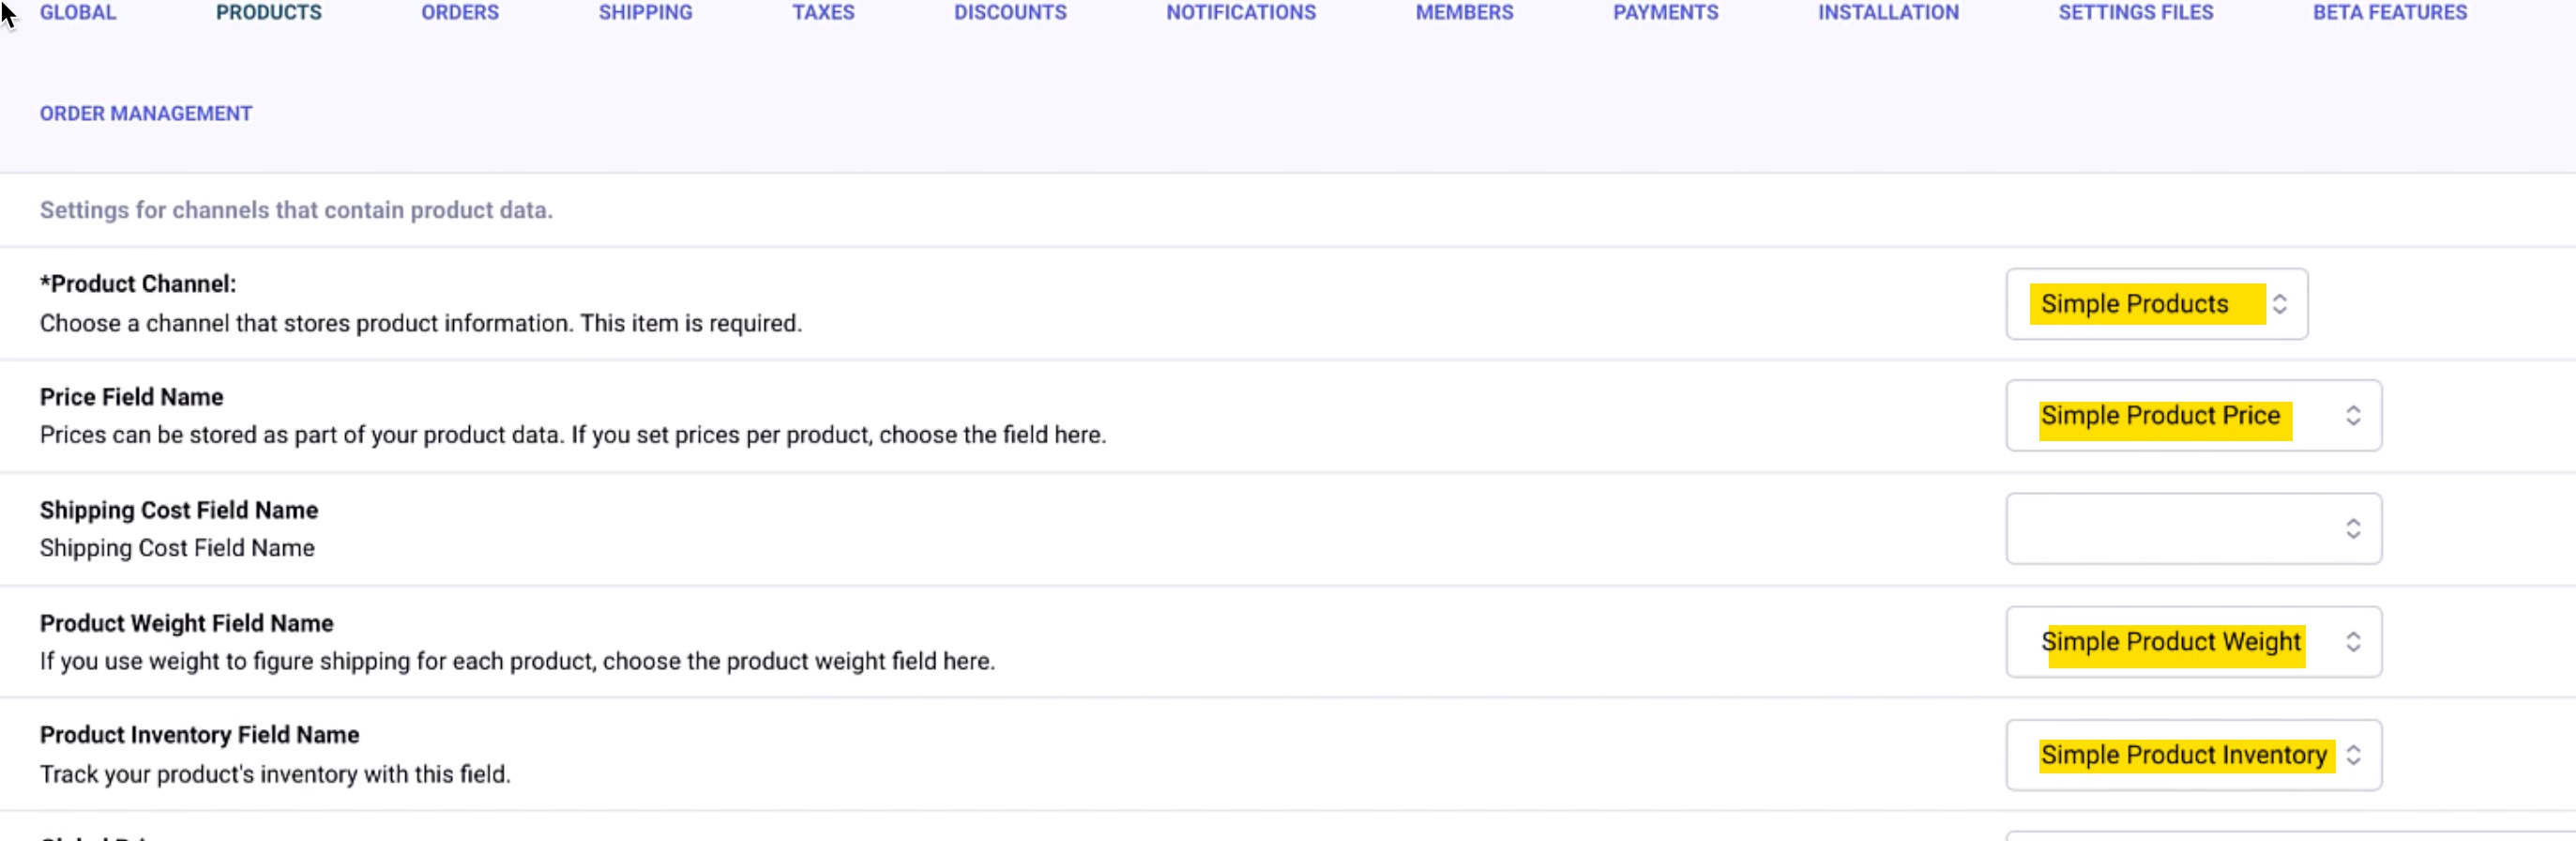
So now CartThrob knows that products are coming from that channel, and it knows which fields to use for the pricing and for the shipping/weight calculations.
3) Optioned Products
So we have the basics of the simple product configured and populated. Now we have our more complicated Optioned products that are in a different channel, and just as we did for the Simple products, we have to make some fields, populate the products, and then configure CartThrob to use the appropriate channel and fields. As a reminder, Optioned products refer to T-shirt with sizes of small, medium, and large, for example.
The CartThrob price modifier field
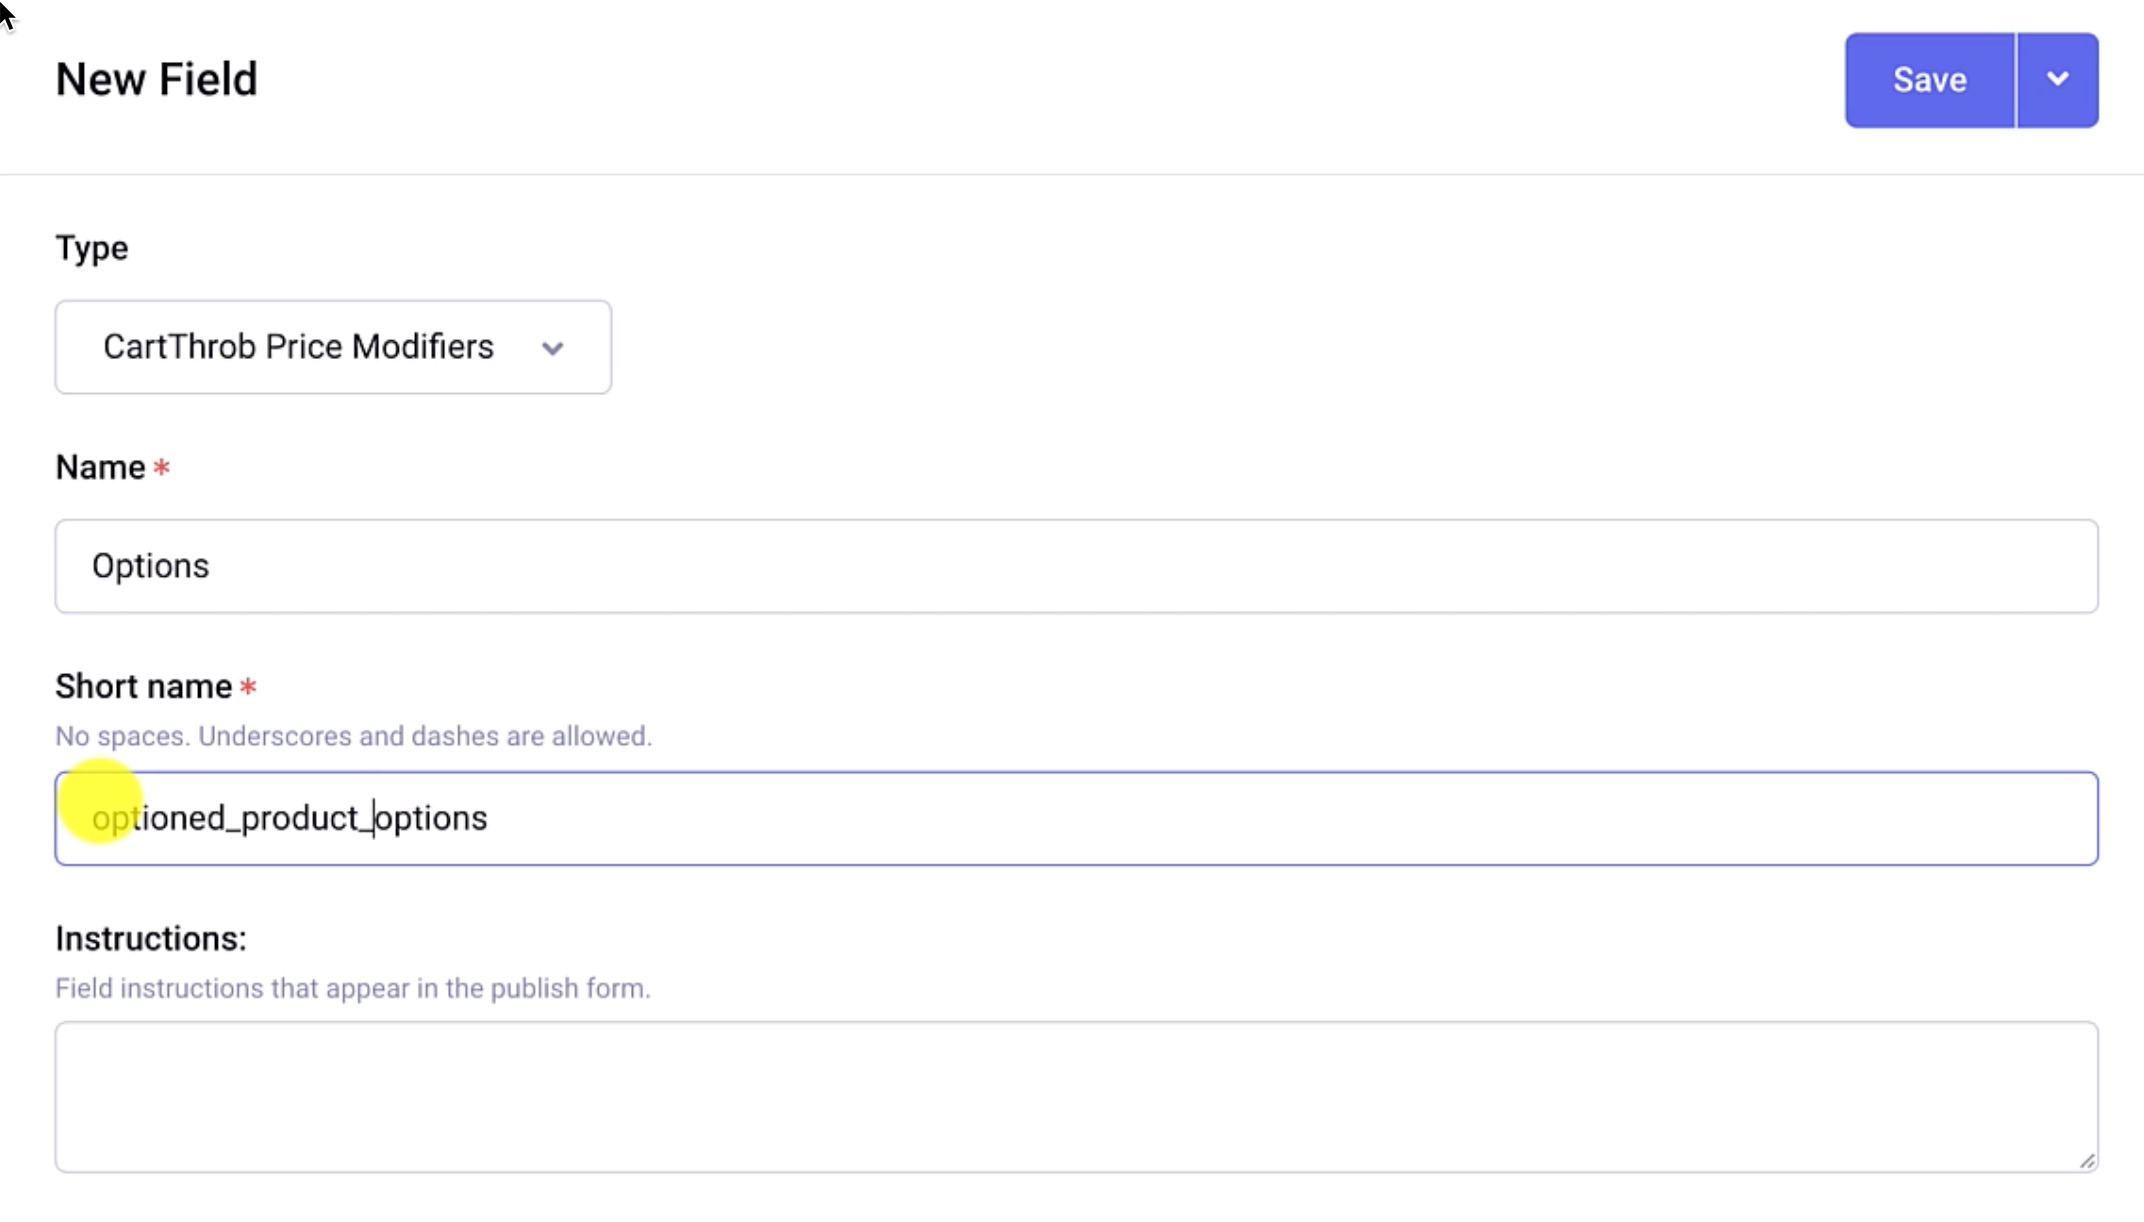
Returning to the Fields menu, navigate to the Optioned Product Field Group. Create a new field of type CartThrob price modifier. The name of my field is simply “Options,” with a Short name of optioned_product_options. Note: On the frontend, the name of the field (Options) is what’s going to show next to the dropdown with the options; shirt sizes and colors, for example.
Add Product Options to Entry
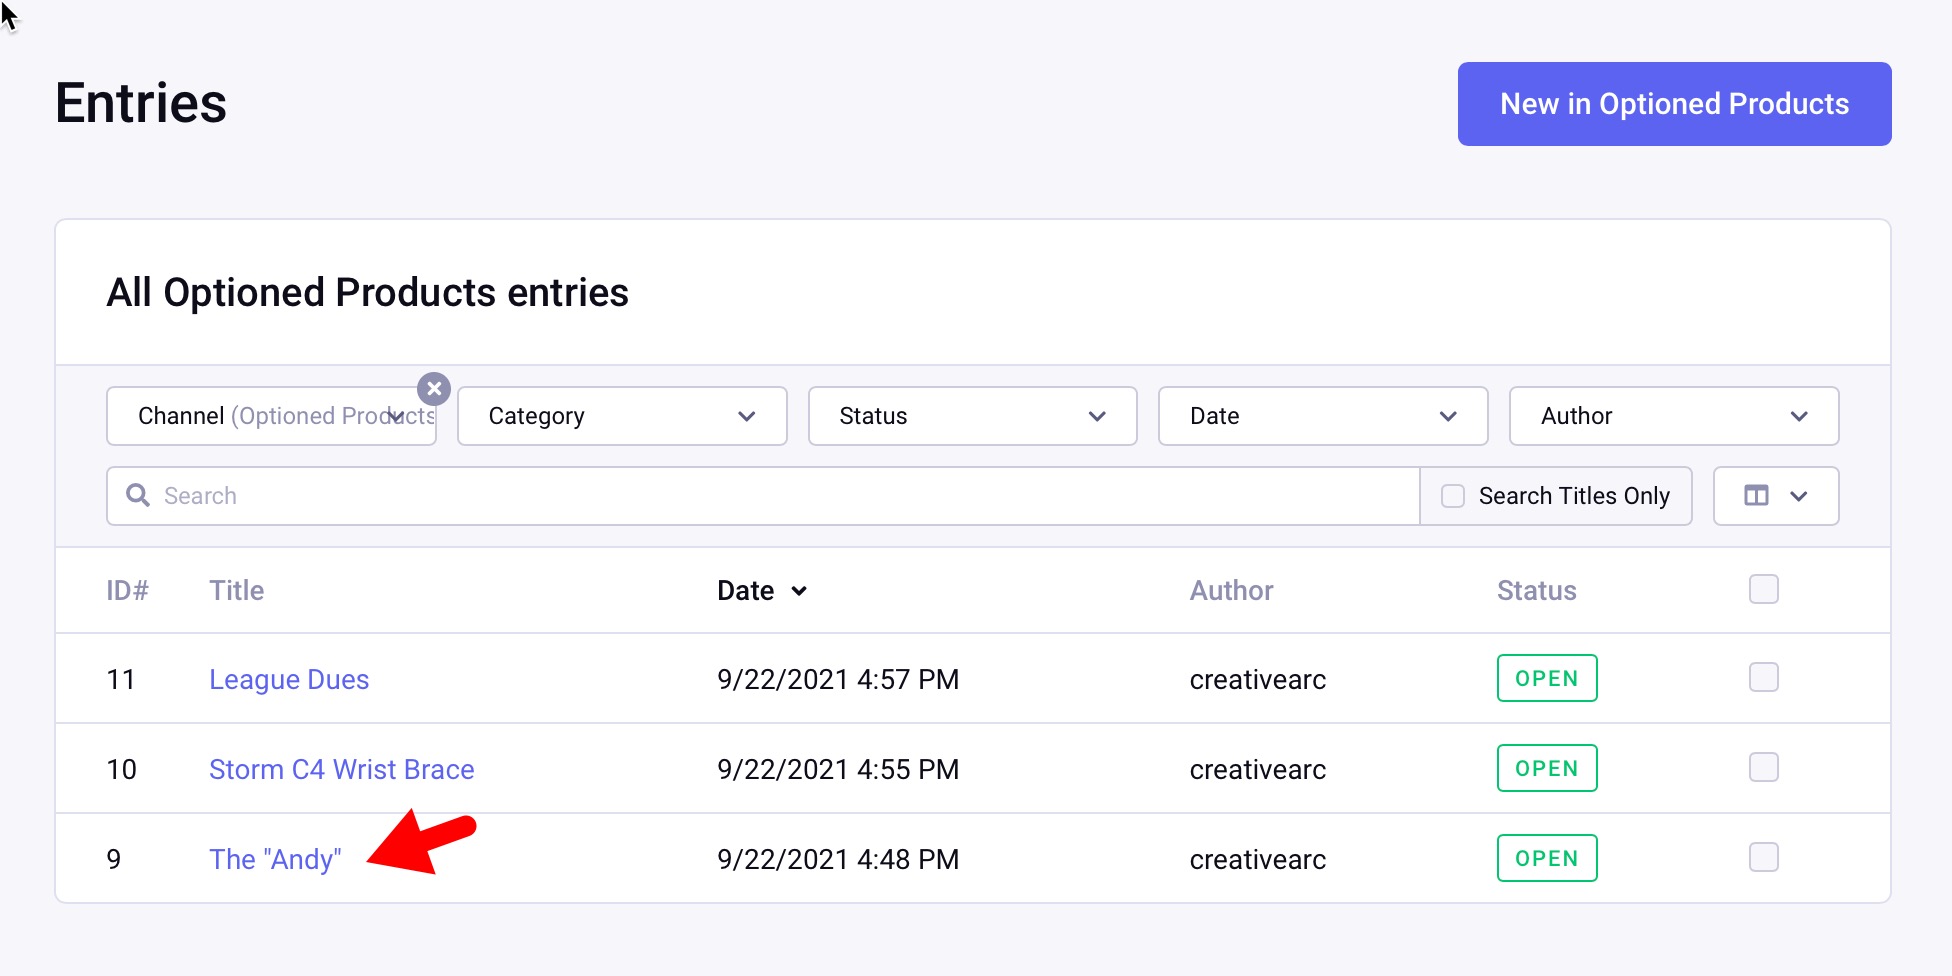
Next, go to “Edit” menu and bring up our Optioned Product channel. We’ll use our Shirt product (The Andy) as an example.
As we scroll down that product entry page, we’ll see our blank CartThrob Price Modifier field with default columns of Option Short Name, Option Label, and Price.
Next, a detail that is easy to miss the first time you do it: we can add additional columns; in our case, Inventory and SKU. (We’re making the assumption that the option prices here are what the customer will see on the frontend. Another option is to have a separate base price for which the price modifiers would add or subtract the prices from that base price). For this example, though, there is no base price, and the Option price is what the customer will see in their cart.
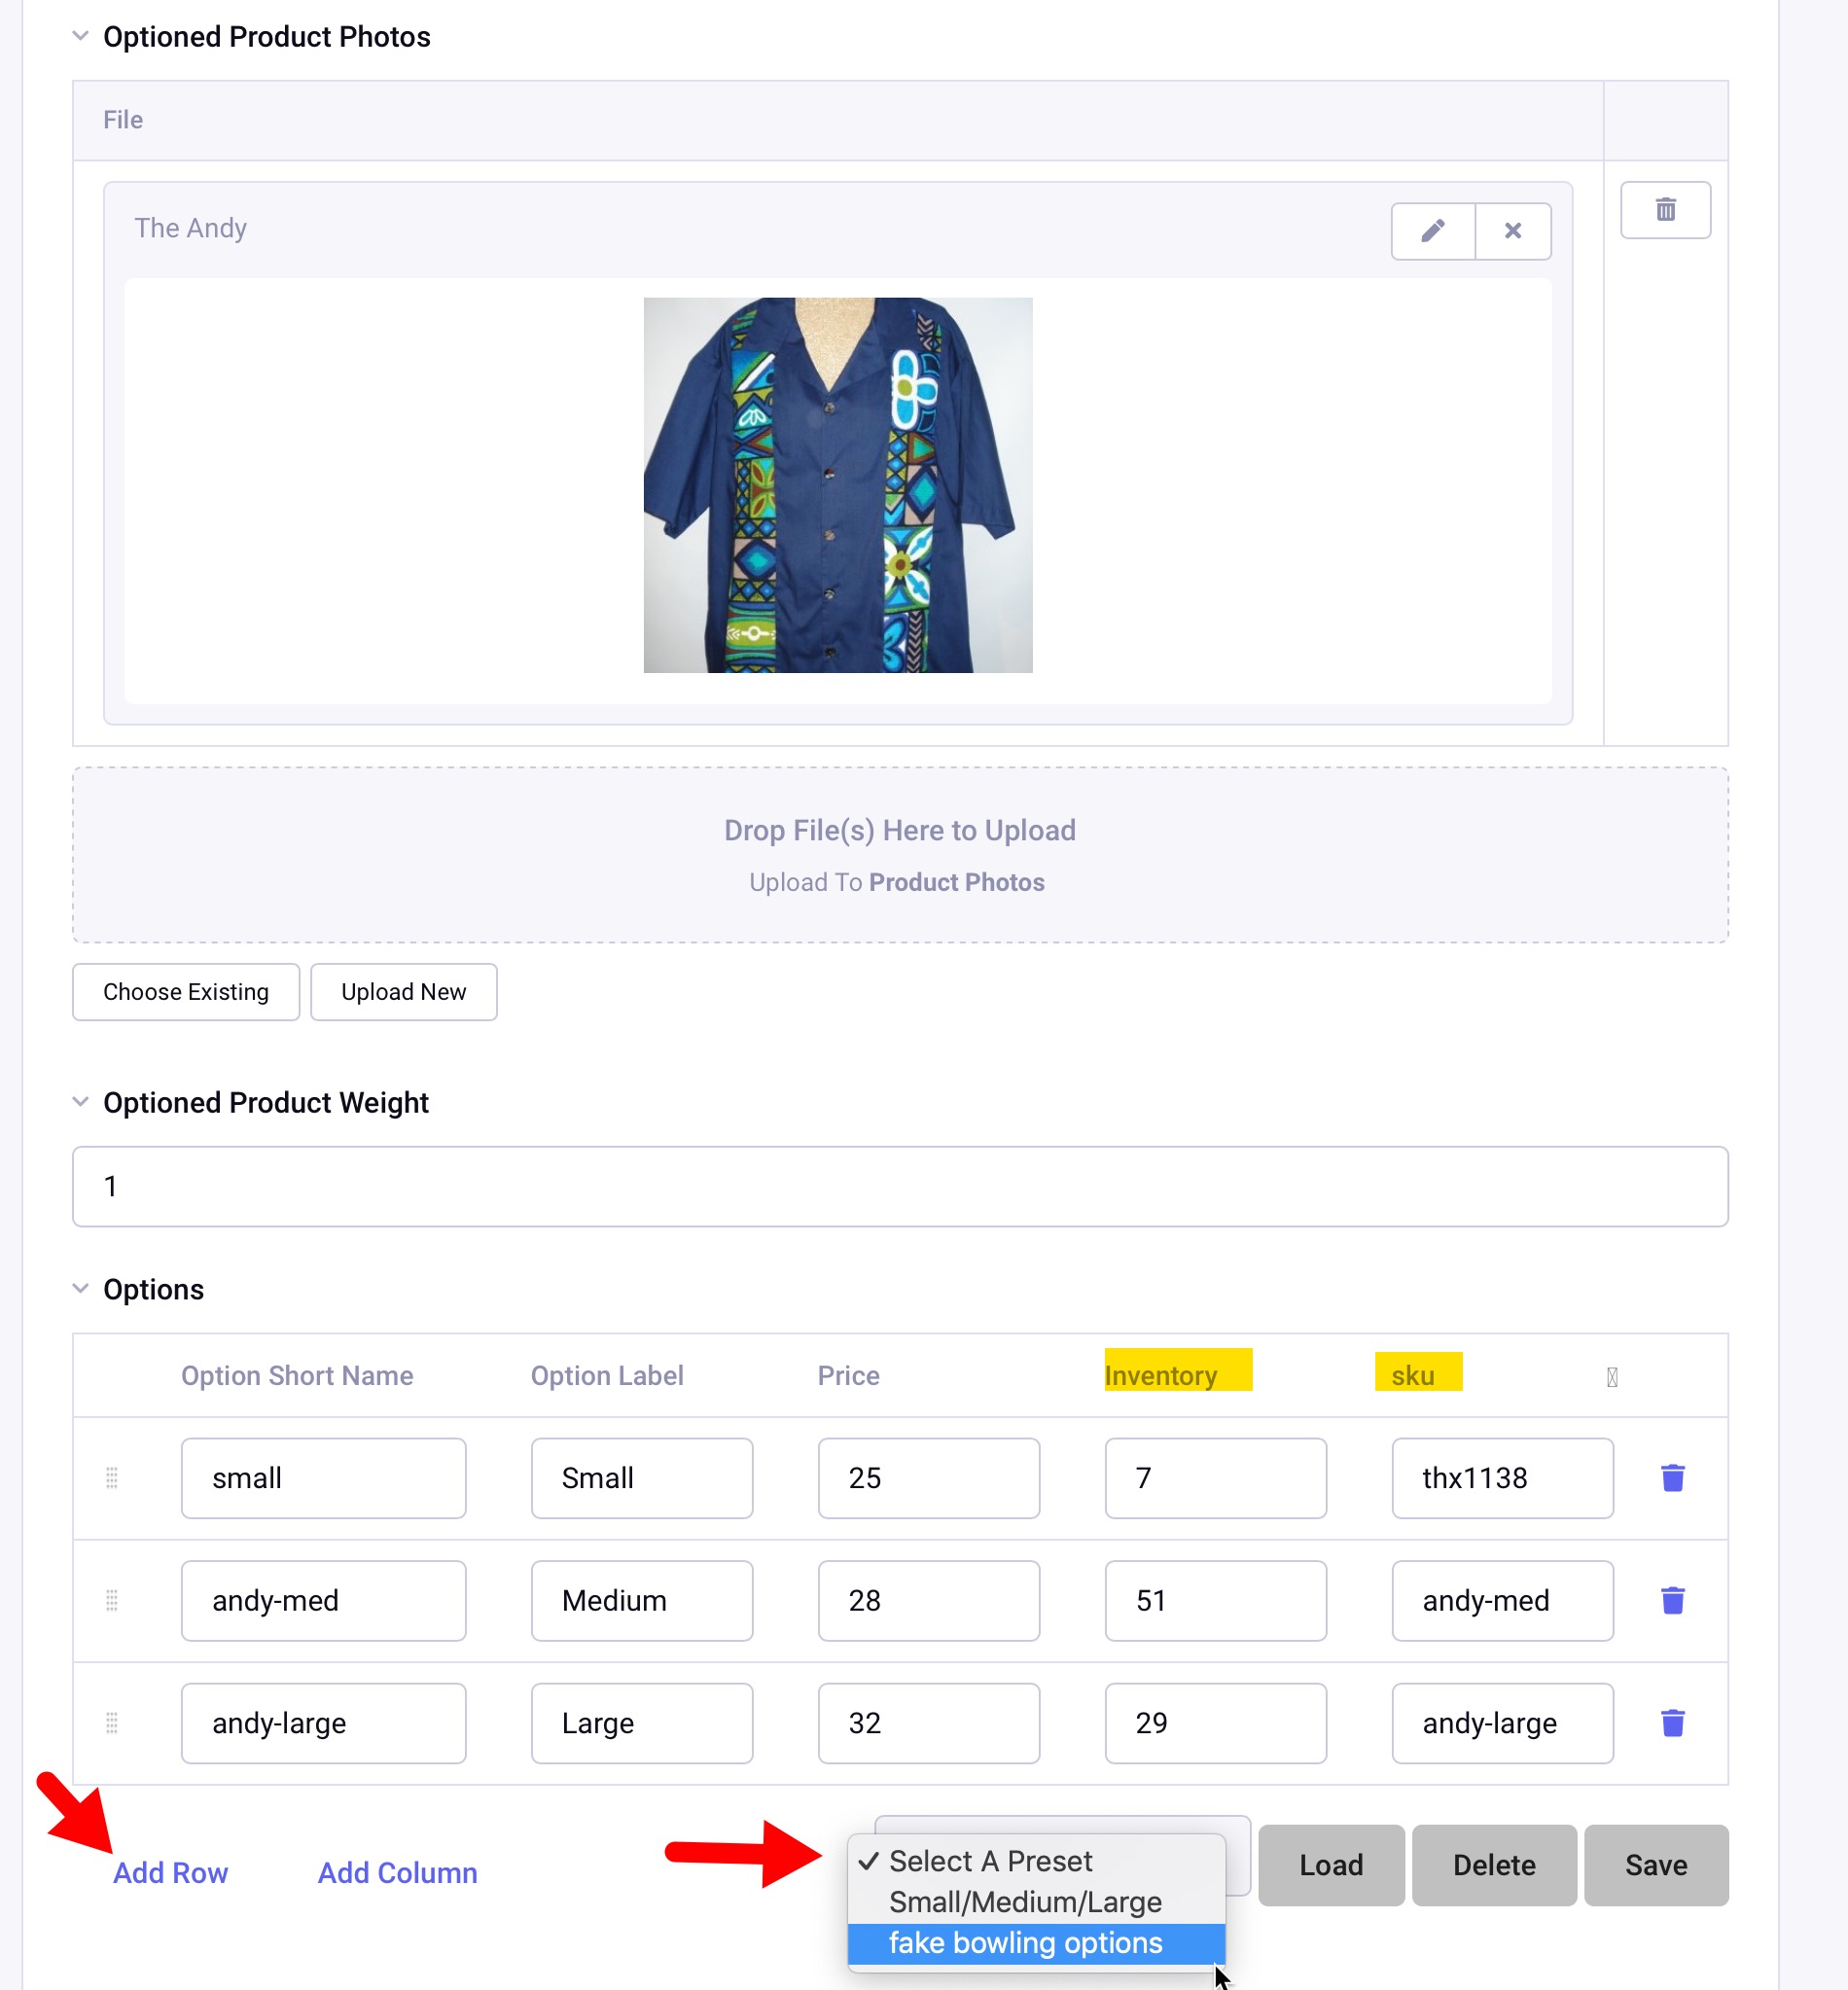
Sizes (Options) have been added: Small, Medium, and Large with their associated price, inventory, and SKU.
Note: Within the Options (CartThrob Price Modifier field), the “Save” action is for the Preset, you’ll need to save the Entry afterwards. The preset makes data entry easier as you add more products.
Setup Optioned Product Channel within CartThrob
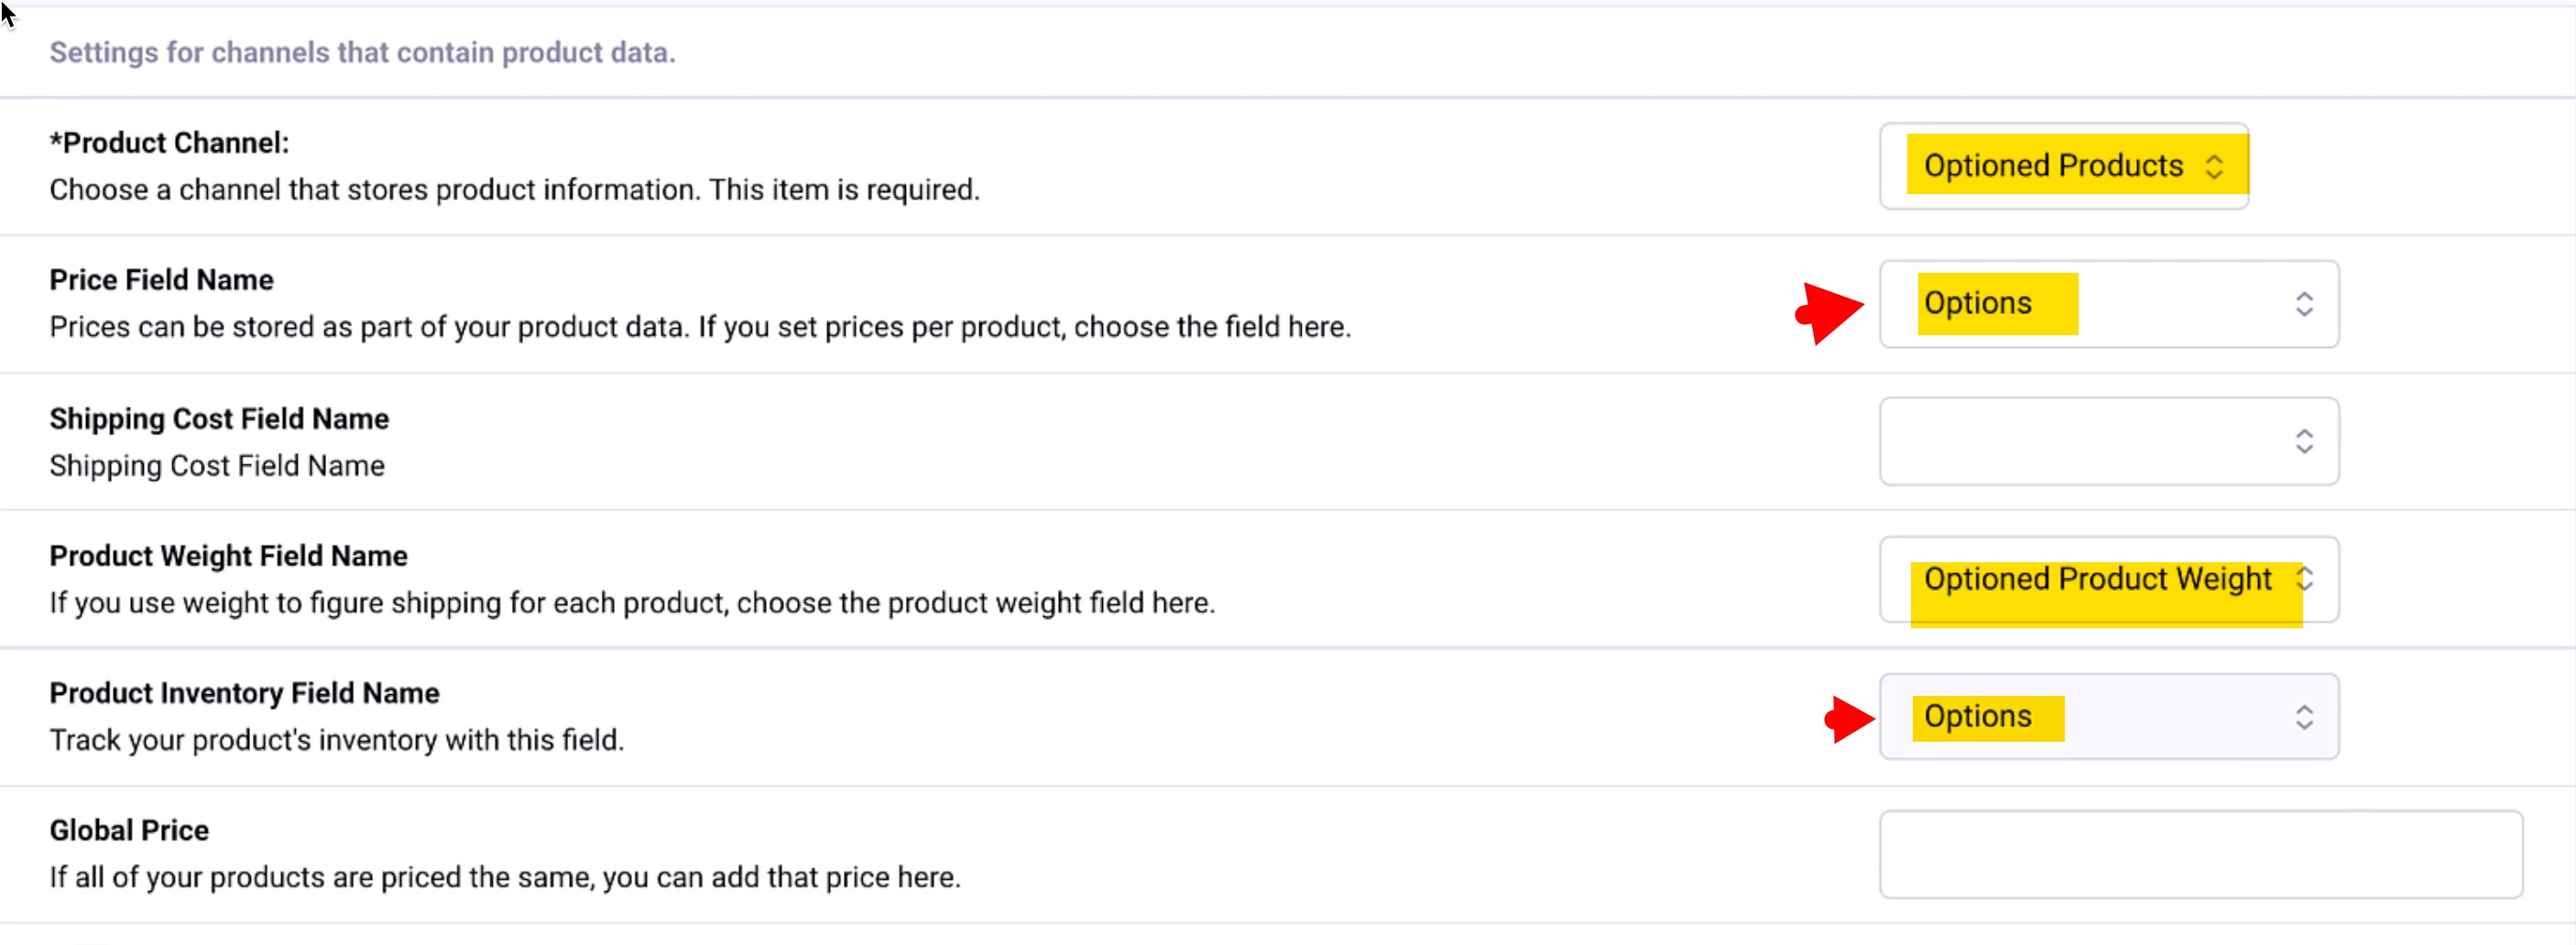
CartThrob doesn’t know this “Optioned Products” channel exists yet, so we’ll head back to the CartThrob addon, “Products” tab. You’ll see our simple products are still there but we’re going to add another channel (click “Add Another Channel”). We’ll choose Optioned Products with the settings below:
So far so good! Now we have to save by clicking Submit at the bottom of the page. We should be ready to move on.
4) Frontend Add to Cart Demo, CartThrob Orders/Discount Channel Installation
We now have our products created, both the simple and the optioned products. Upon adding the Yoda bowling ball to the cart, it’s good to see it has the proper line-item cost and then a subtotal cost. Updating the cart to a quanity of 2, for example, properly adjusts the subtotal and listed quantity.

Next, we add the Andy product, size Medium, to the cart.
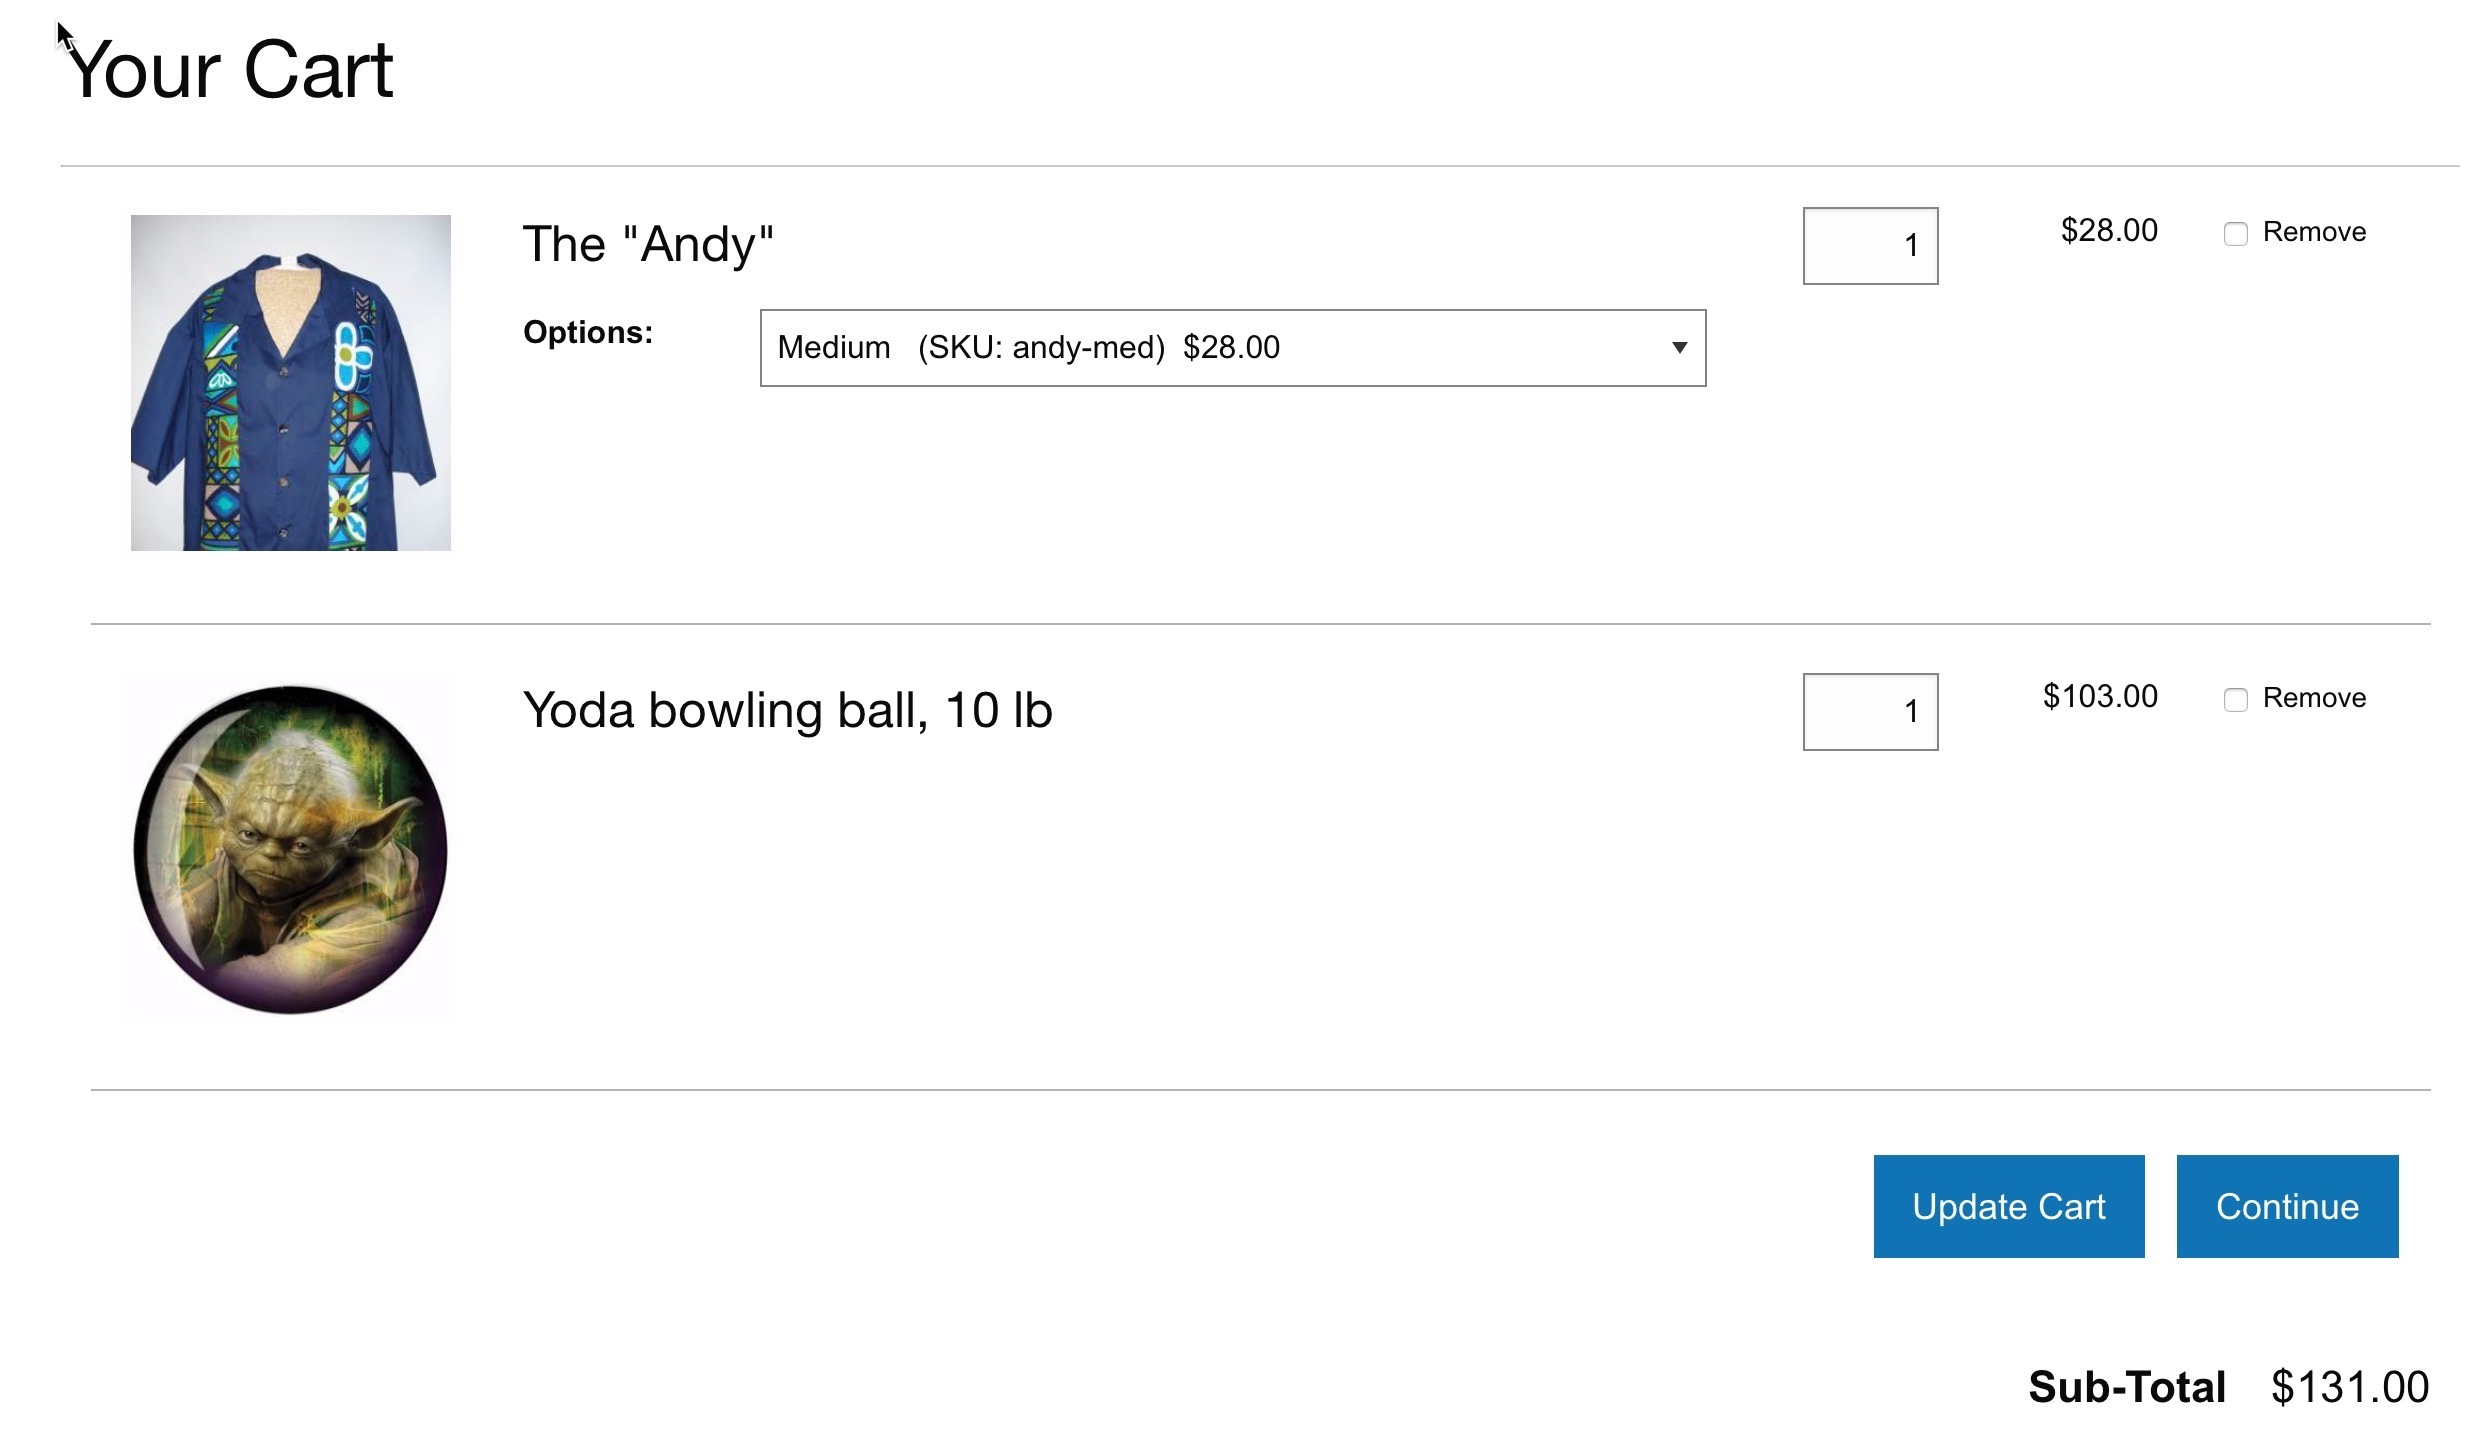
Both simple and optioned products are together in the same cart with a proper subtotal, and respond to quantity changes by clicking “Update Cart.”
We have the basics of the cart working in terms of the product information and calculations. It’s now we have to tell CartThrob what to do the orders.
Back in the ExpressionEngine backend, go to the CartThrob add-on, and then the “Installation” tab. (We’re not going to Orders Tab which would be the logical next step; We’re going to installation.)
Of these available installation options, we actually skip most of them because we’re starting with pretty basic templates that we’ve created. Our store is not really complicated enough for Packages or Discounts channels. Instead, we will only choose Store - Orders and then Store - Coupon Codes channels. (Remember, our FakeBowling.shop EE site already had a Products channel) If you’re curious, Store - Purchased items would be used to if you want to show “Customers Also Bought..” on a product page, which is a cool feature.
We are not installing any templates, as we already have those completed.
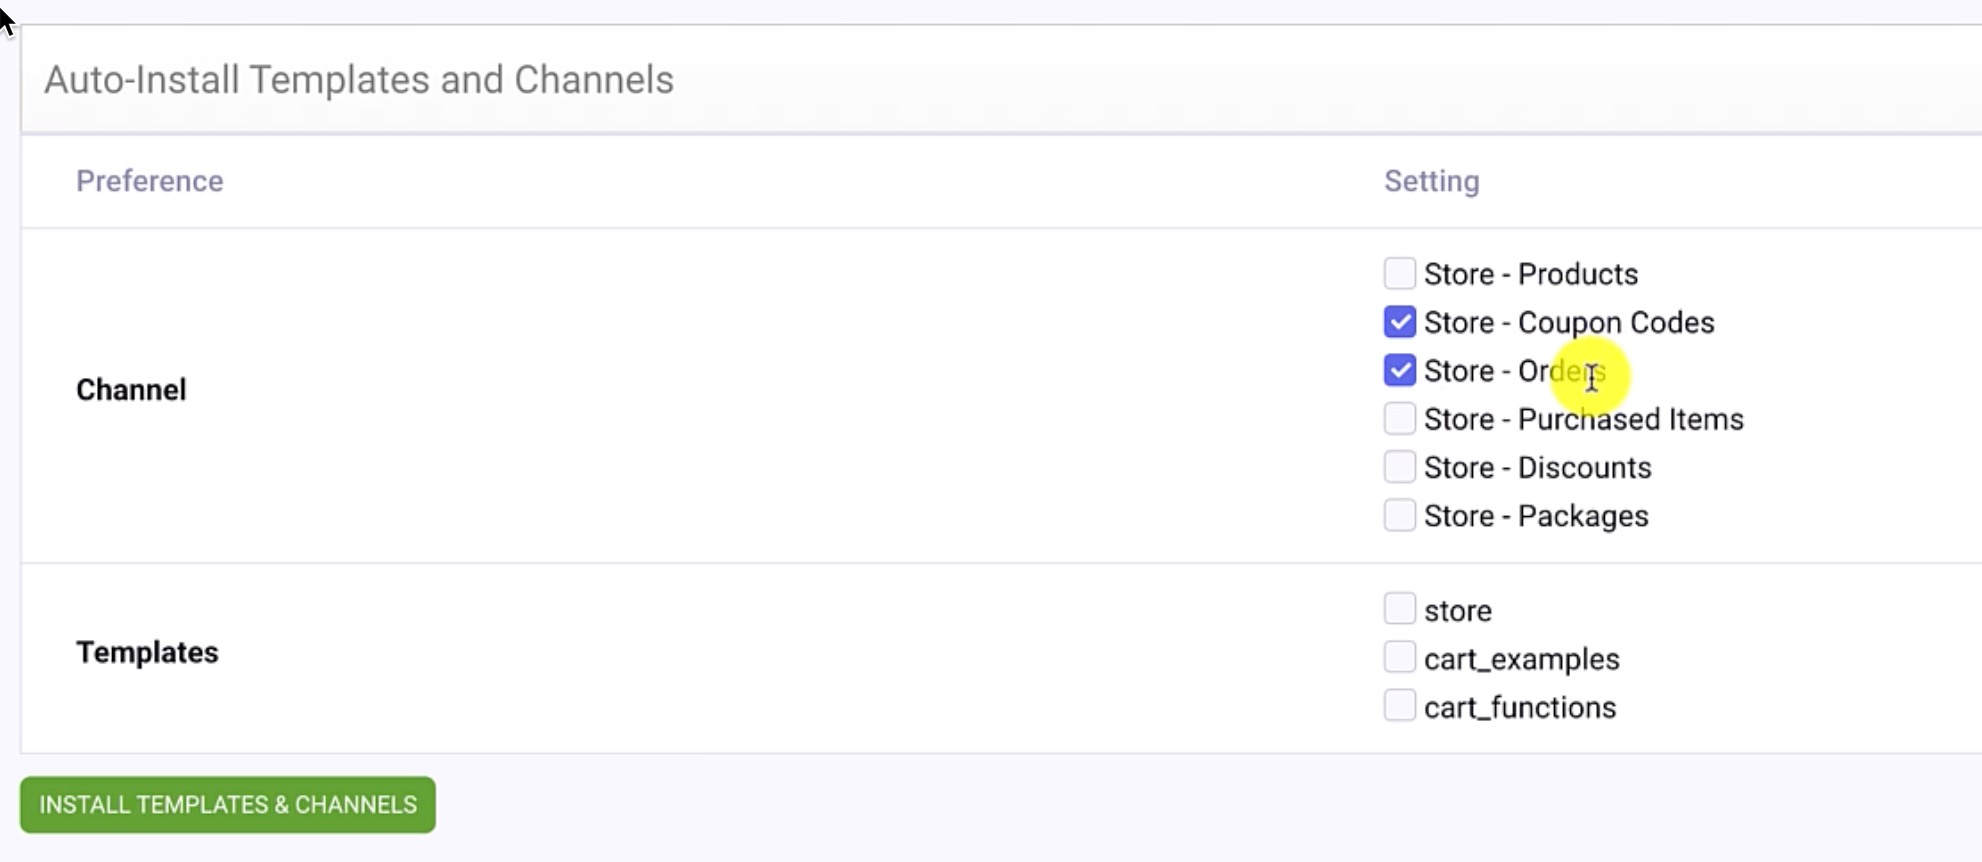
Click Install Templates & Channels.
Navigate to the Channels menu, and you’ll hopefully see that the two new channels were created.
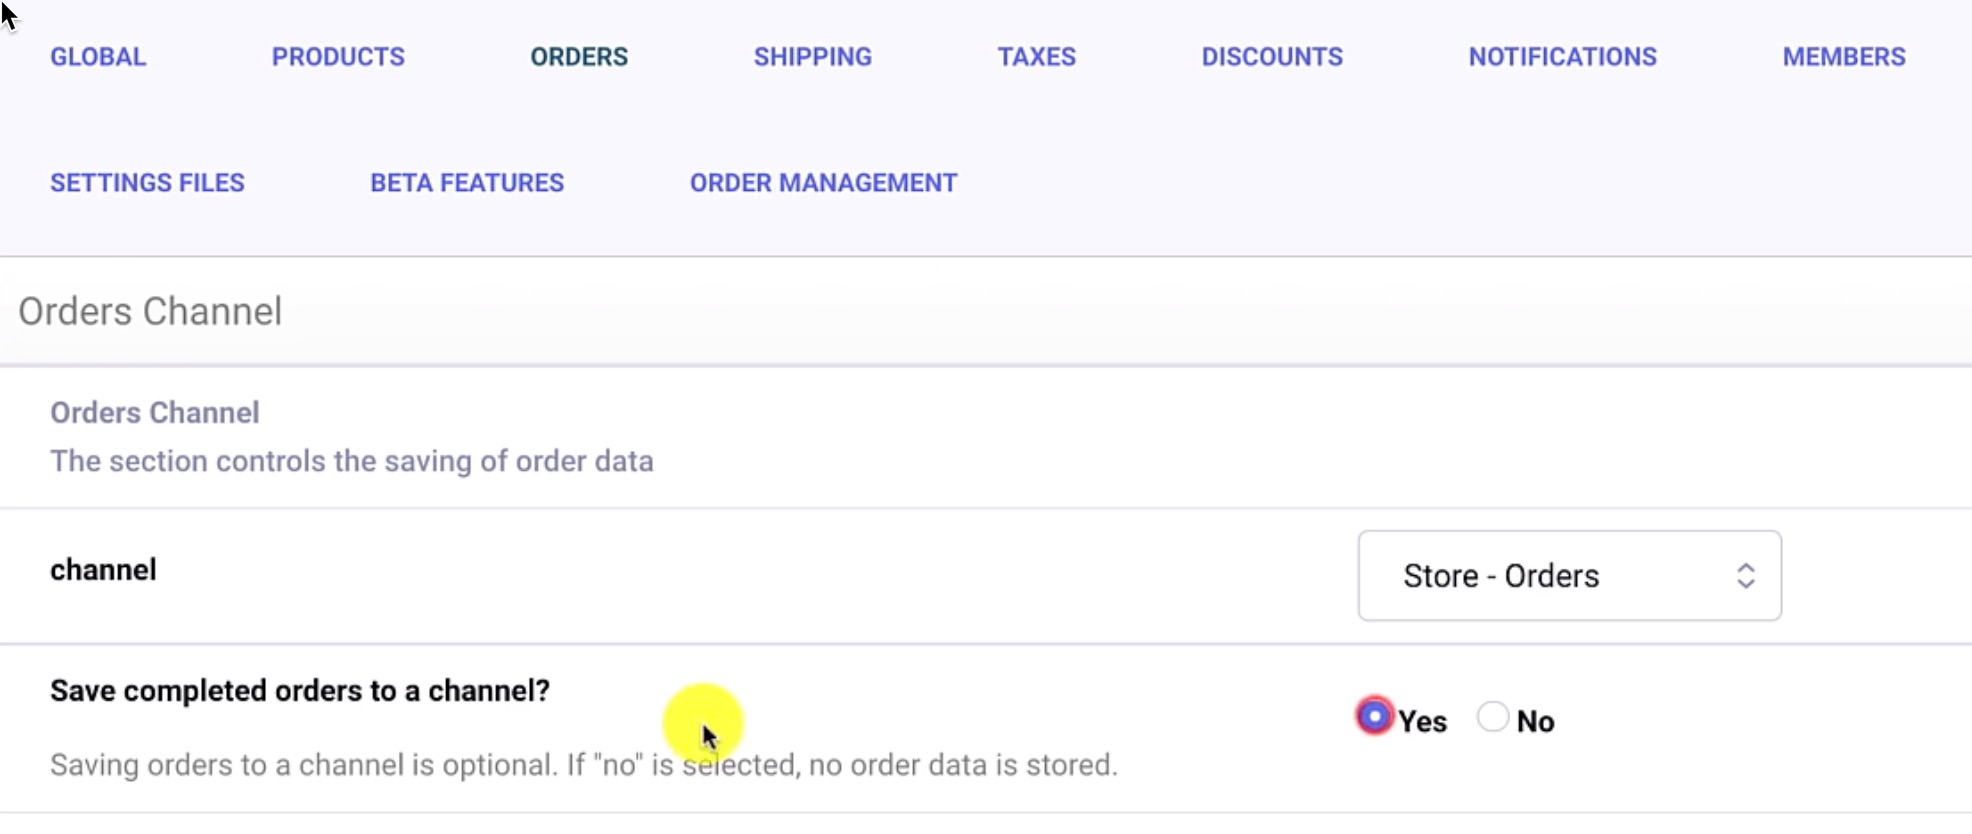
Now, head back to CartThrob, navigate to the Orders tab, and this one’s sort of settle. You have to first click your order channel, Store - Orders, and then be sure to select “Yes” for “Save completed orders to a channel?”
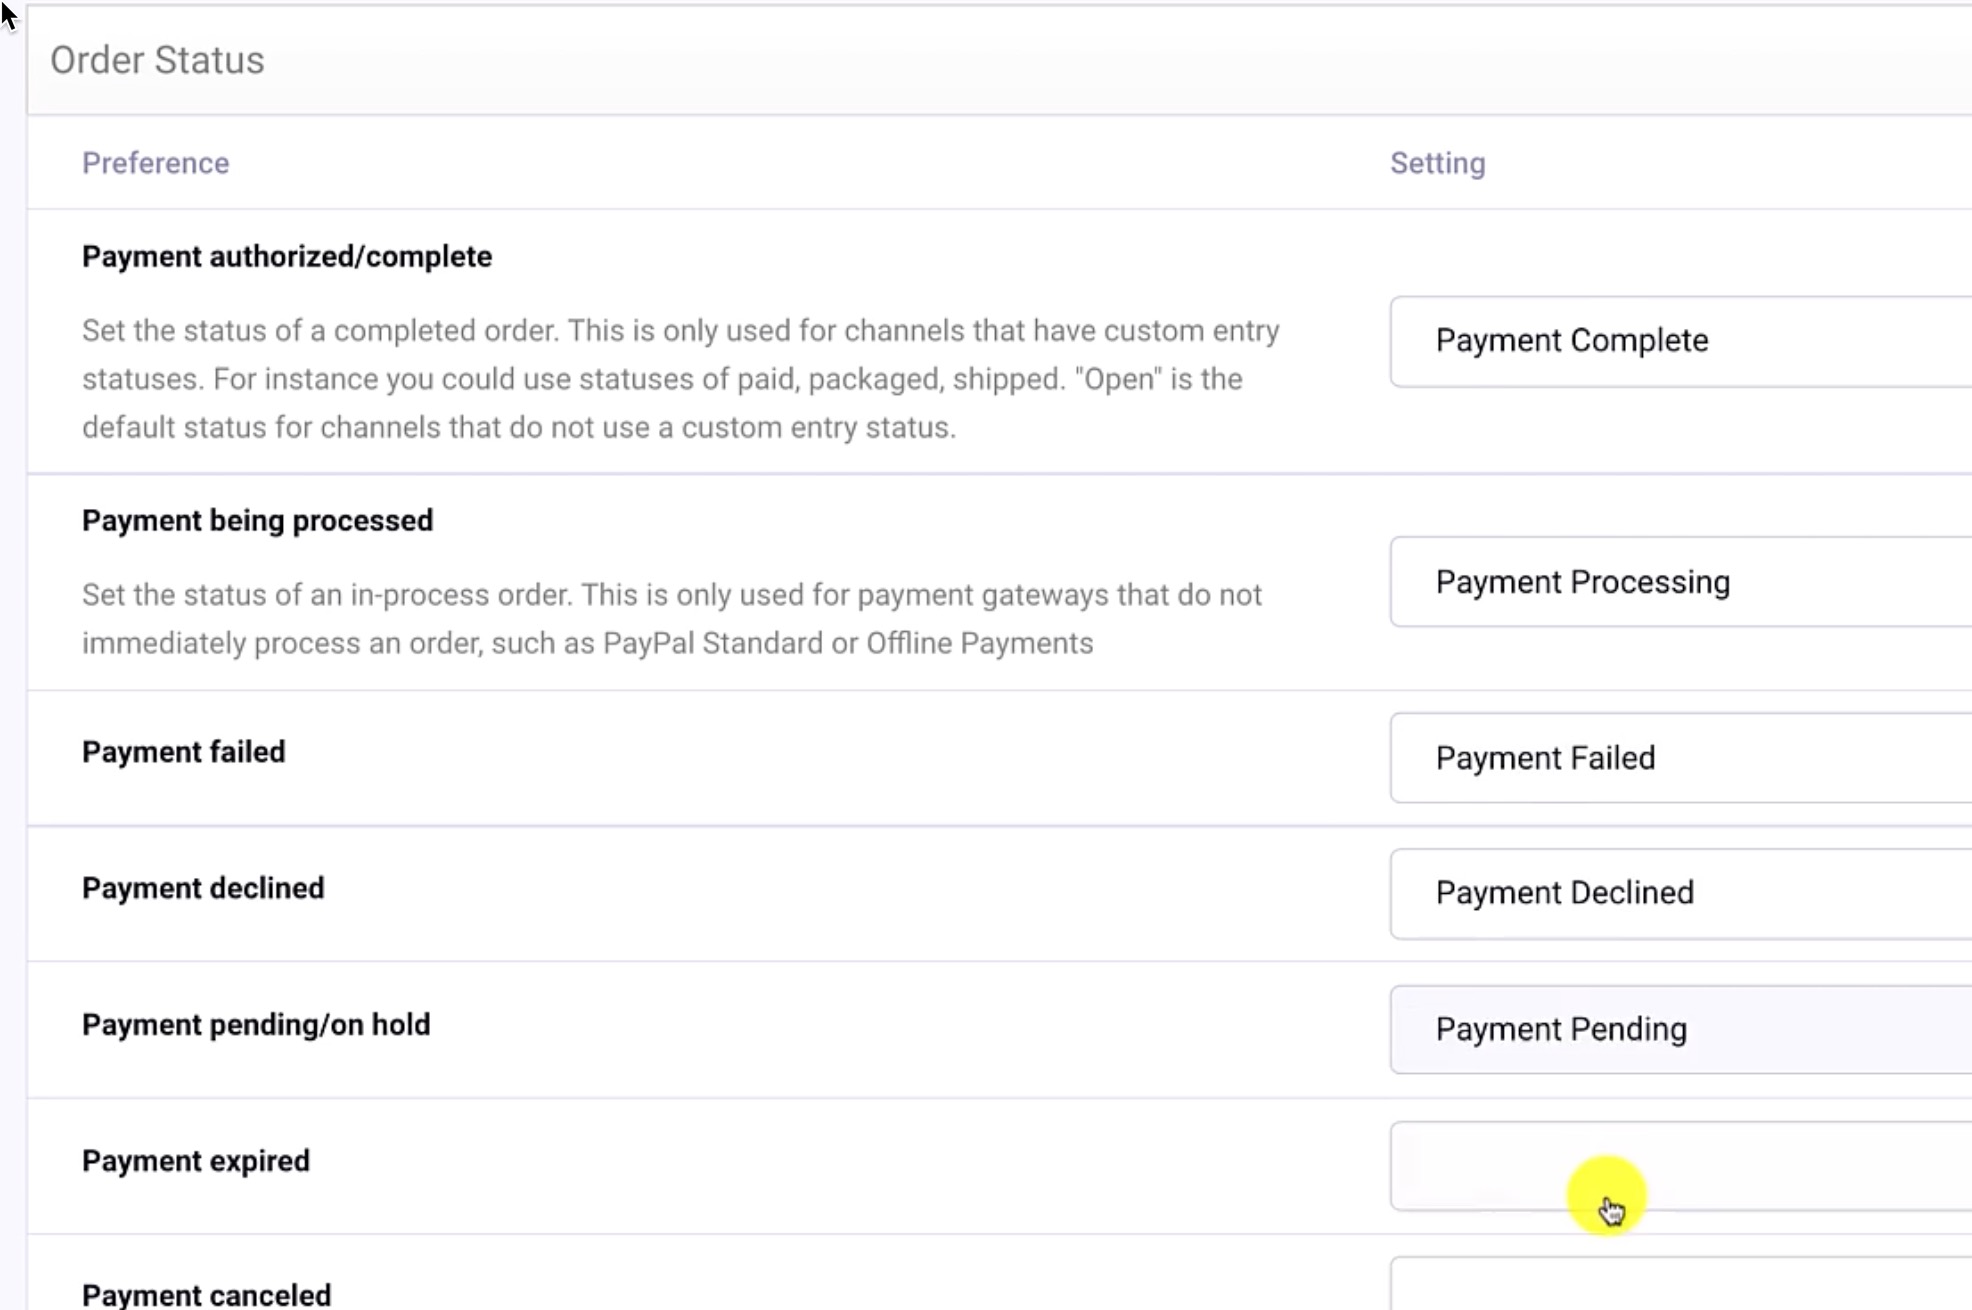
Upon submitting these changes, we should see statuses that need to be assigned. Scroll down to the Order Status section and map each status accordingly.
We’ll follow suit with **Order Data Fields*. (this one takes a while!)
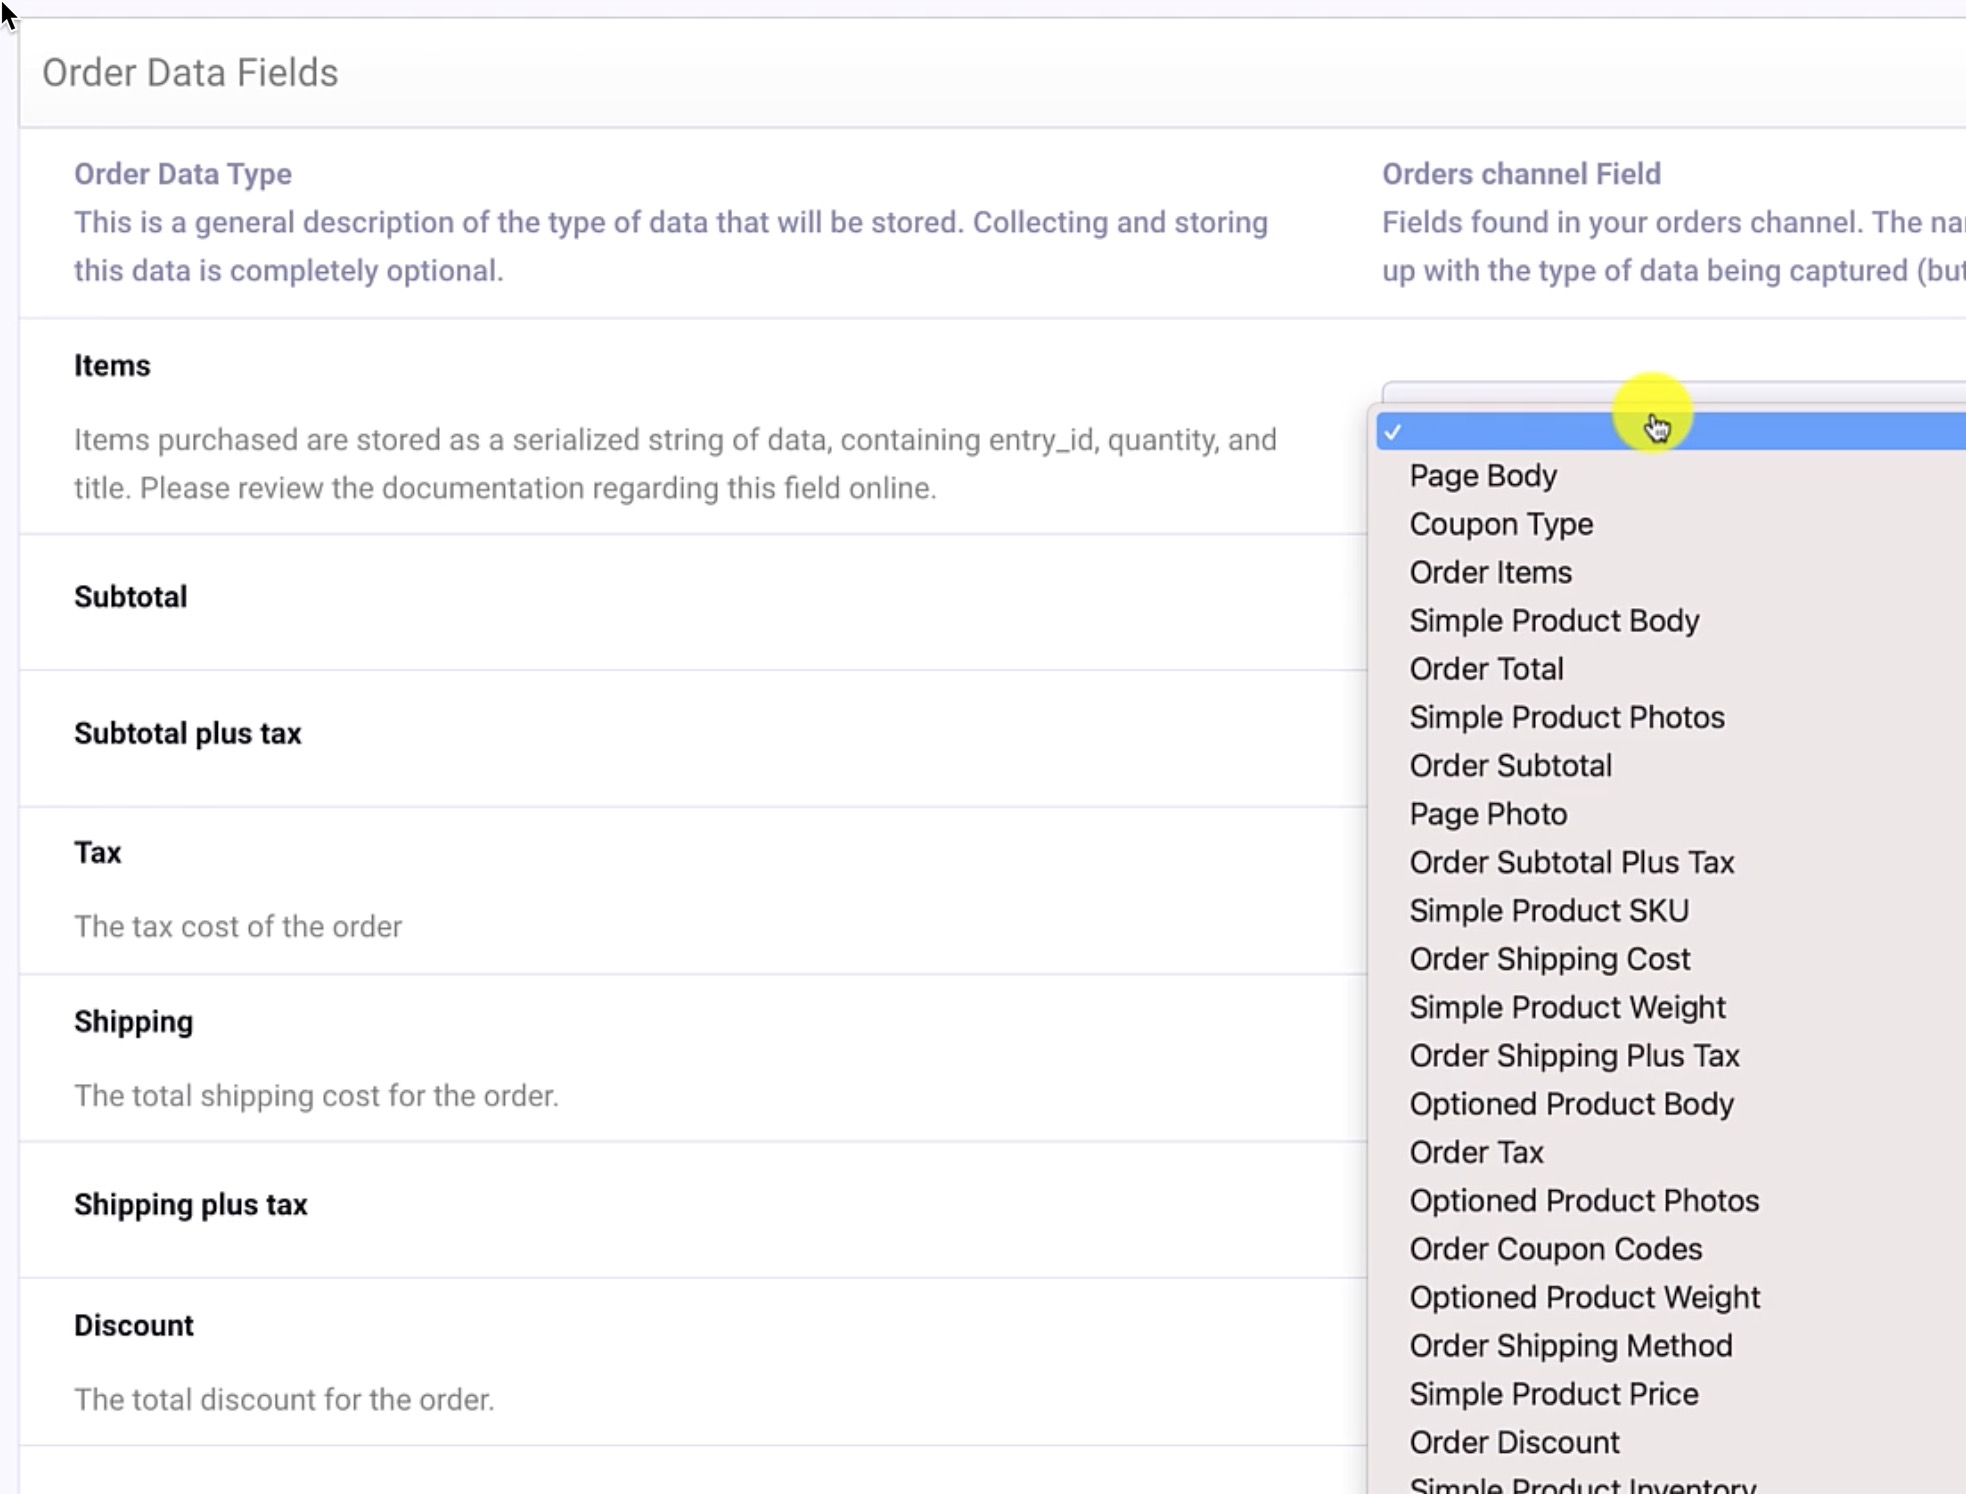
Now CartThrob knows about our Orders channel and its Status and Data fields.
Coupon Code (Discounts)
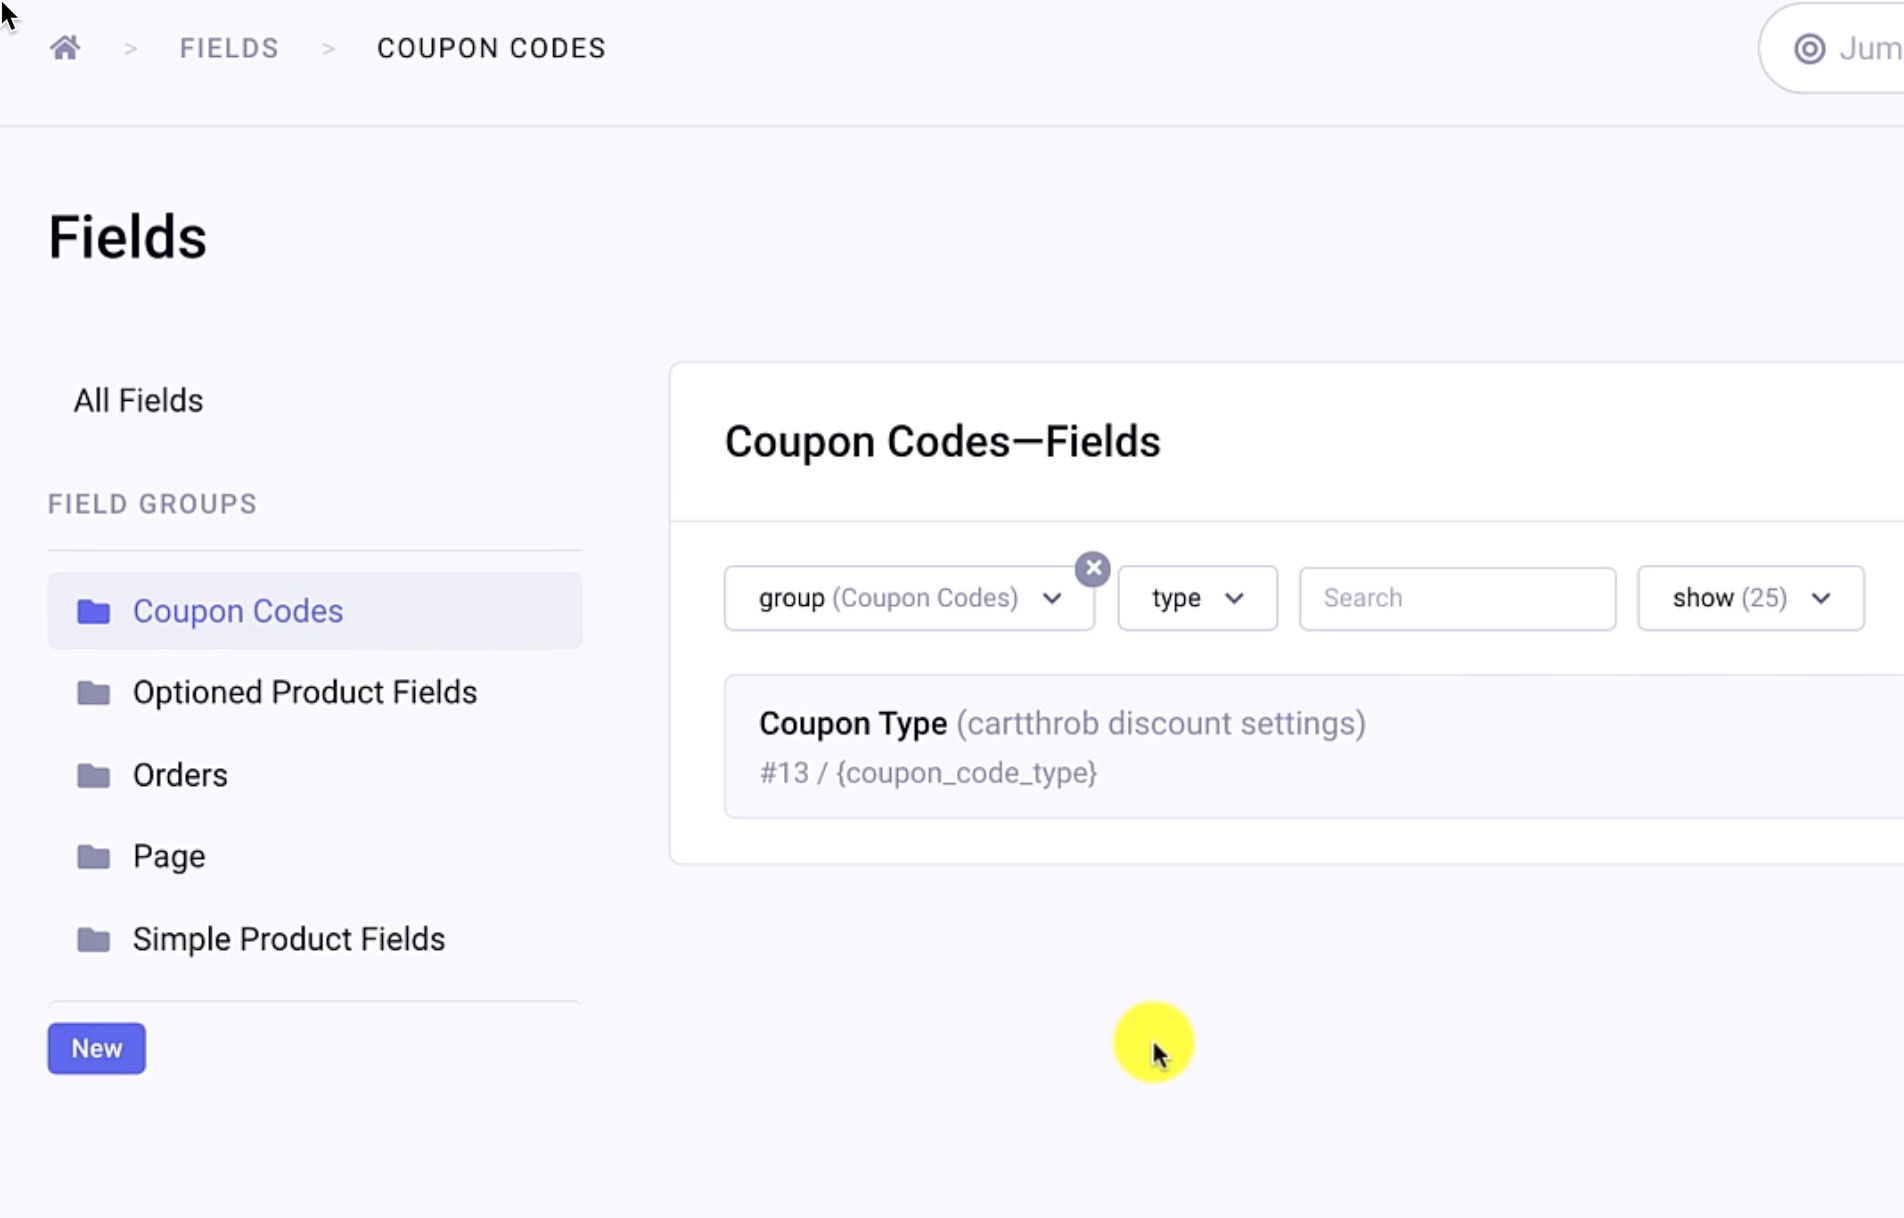
Next, we’re going to make some fields to store coupon codes. In the Fields menu, there’s now a field group called Coupon Codes with a default field {coupon_code_type}. We’re going to supplement this with two more fields of our own.
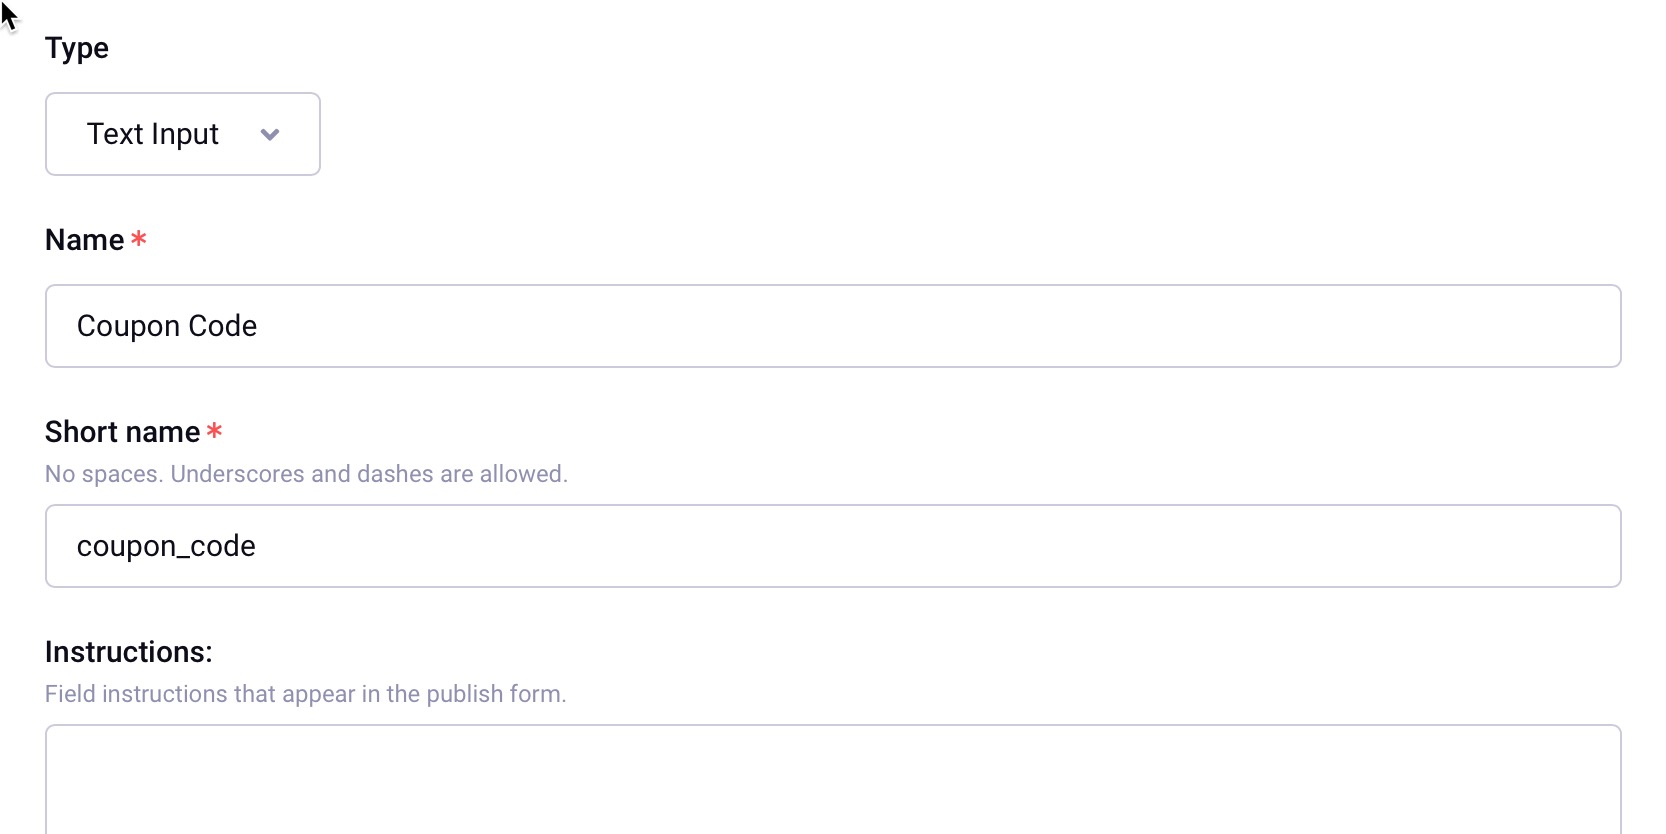
Add a text input field we’ll call it just “Coupon Code”, shortname {coupon_code}. This will be the field that we put the actual code the customer would type in on the cart page, e.g. “Black Friday” coupon.
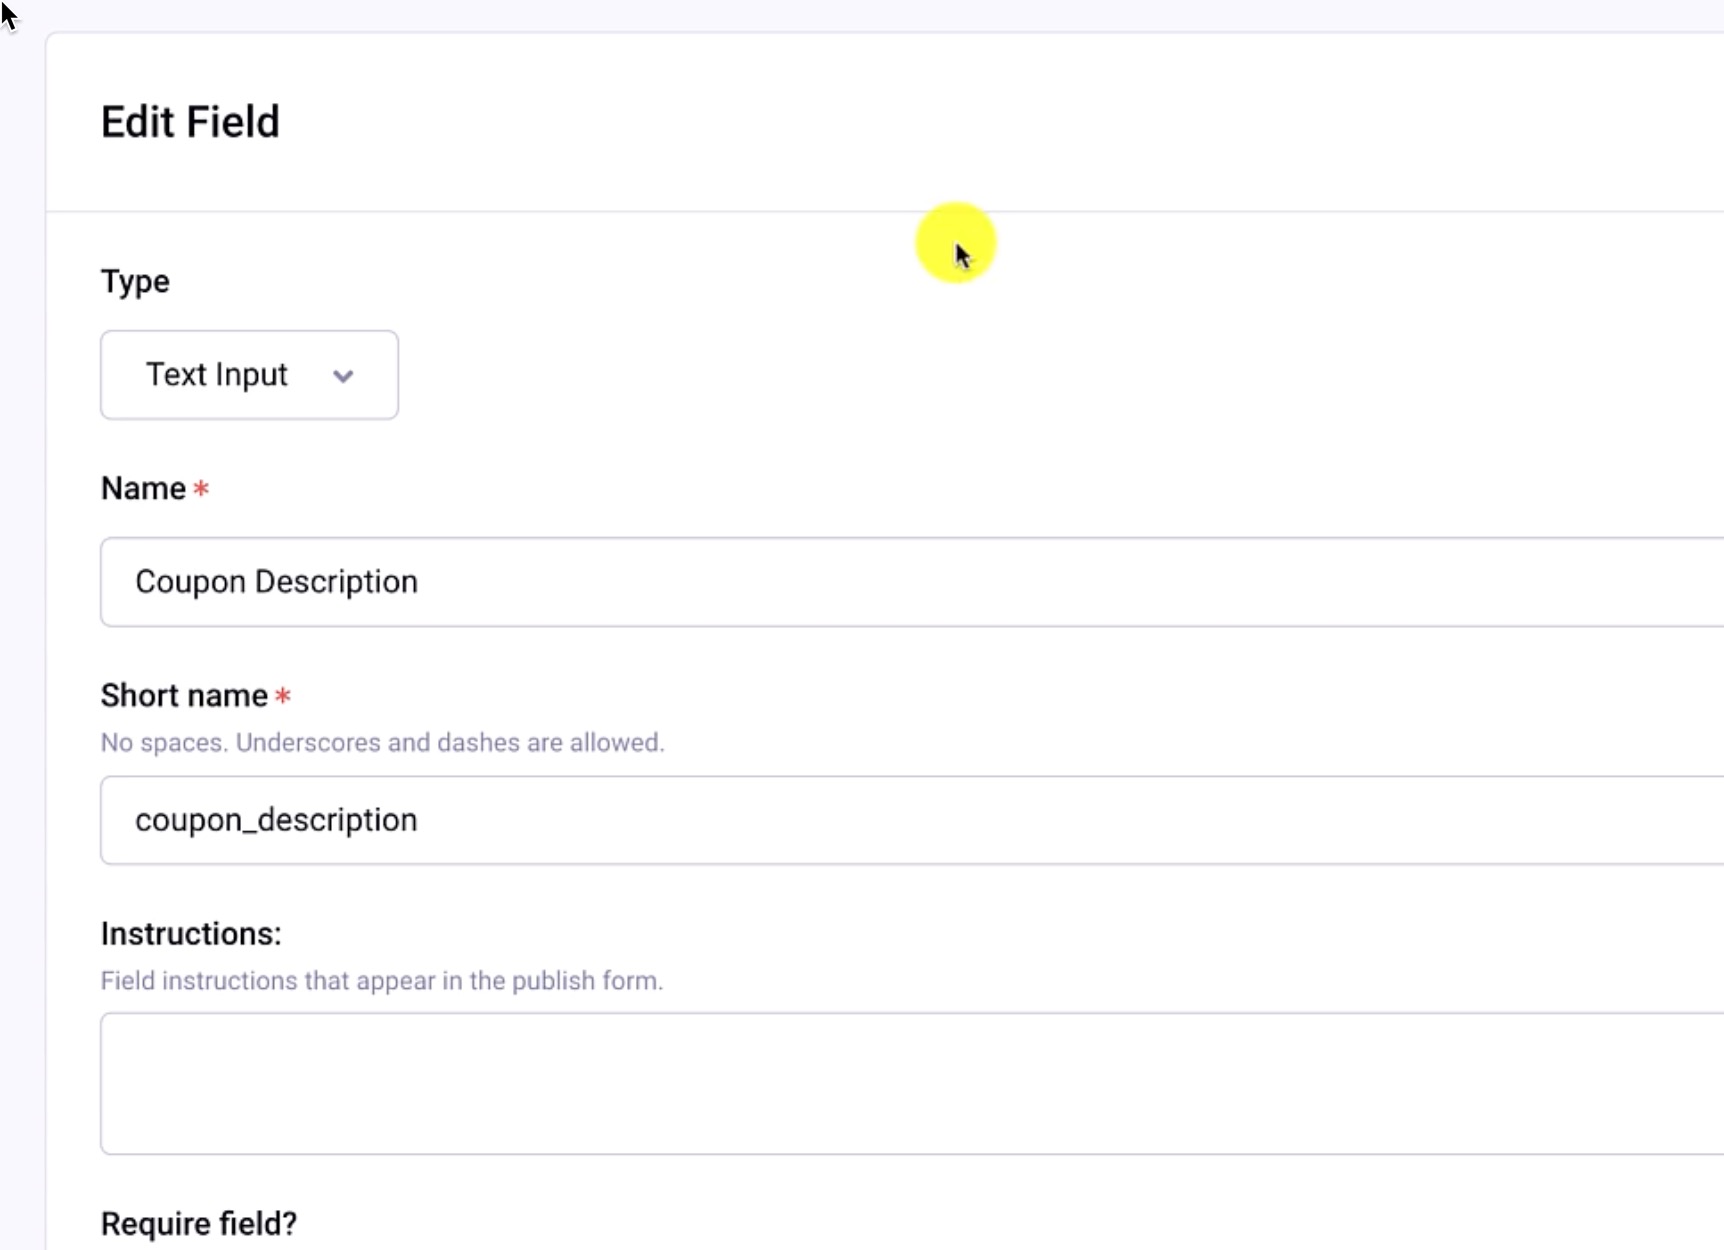
Follow up with another text field is the coupon description. This field would be for a frontend description, such as, “You now have a 10% off your order” to display in the cart.
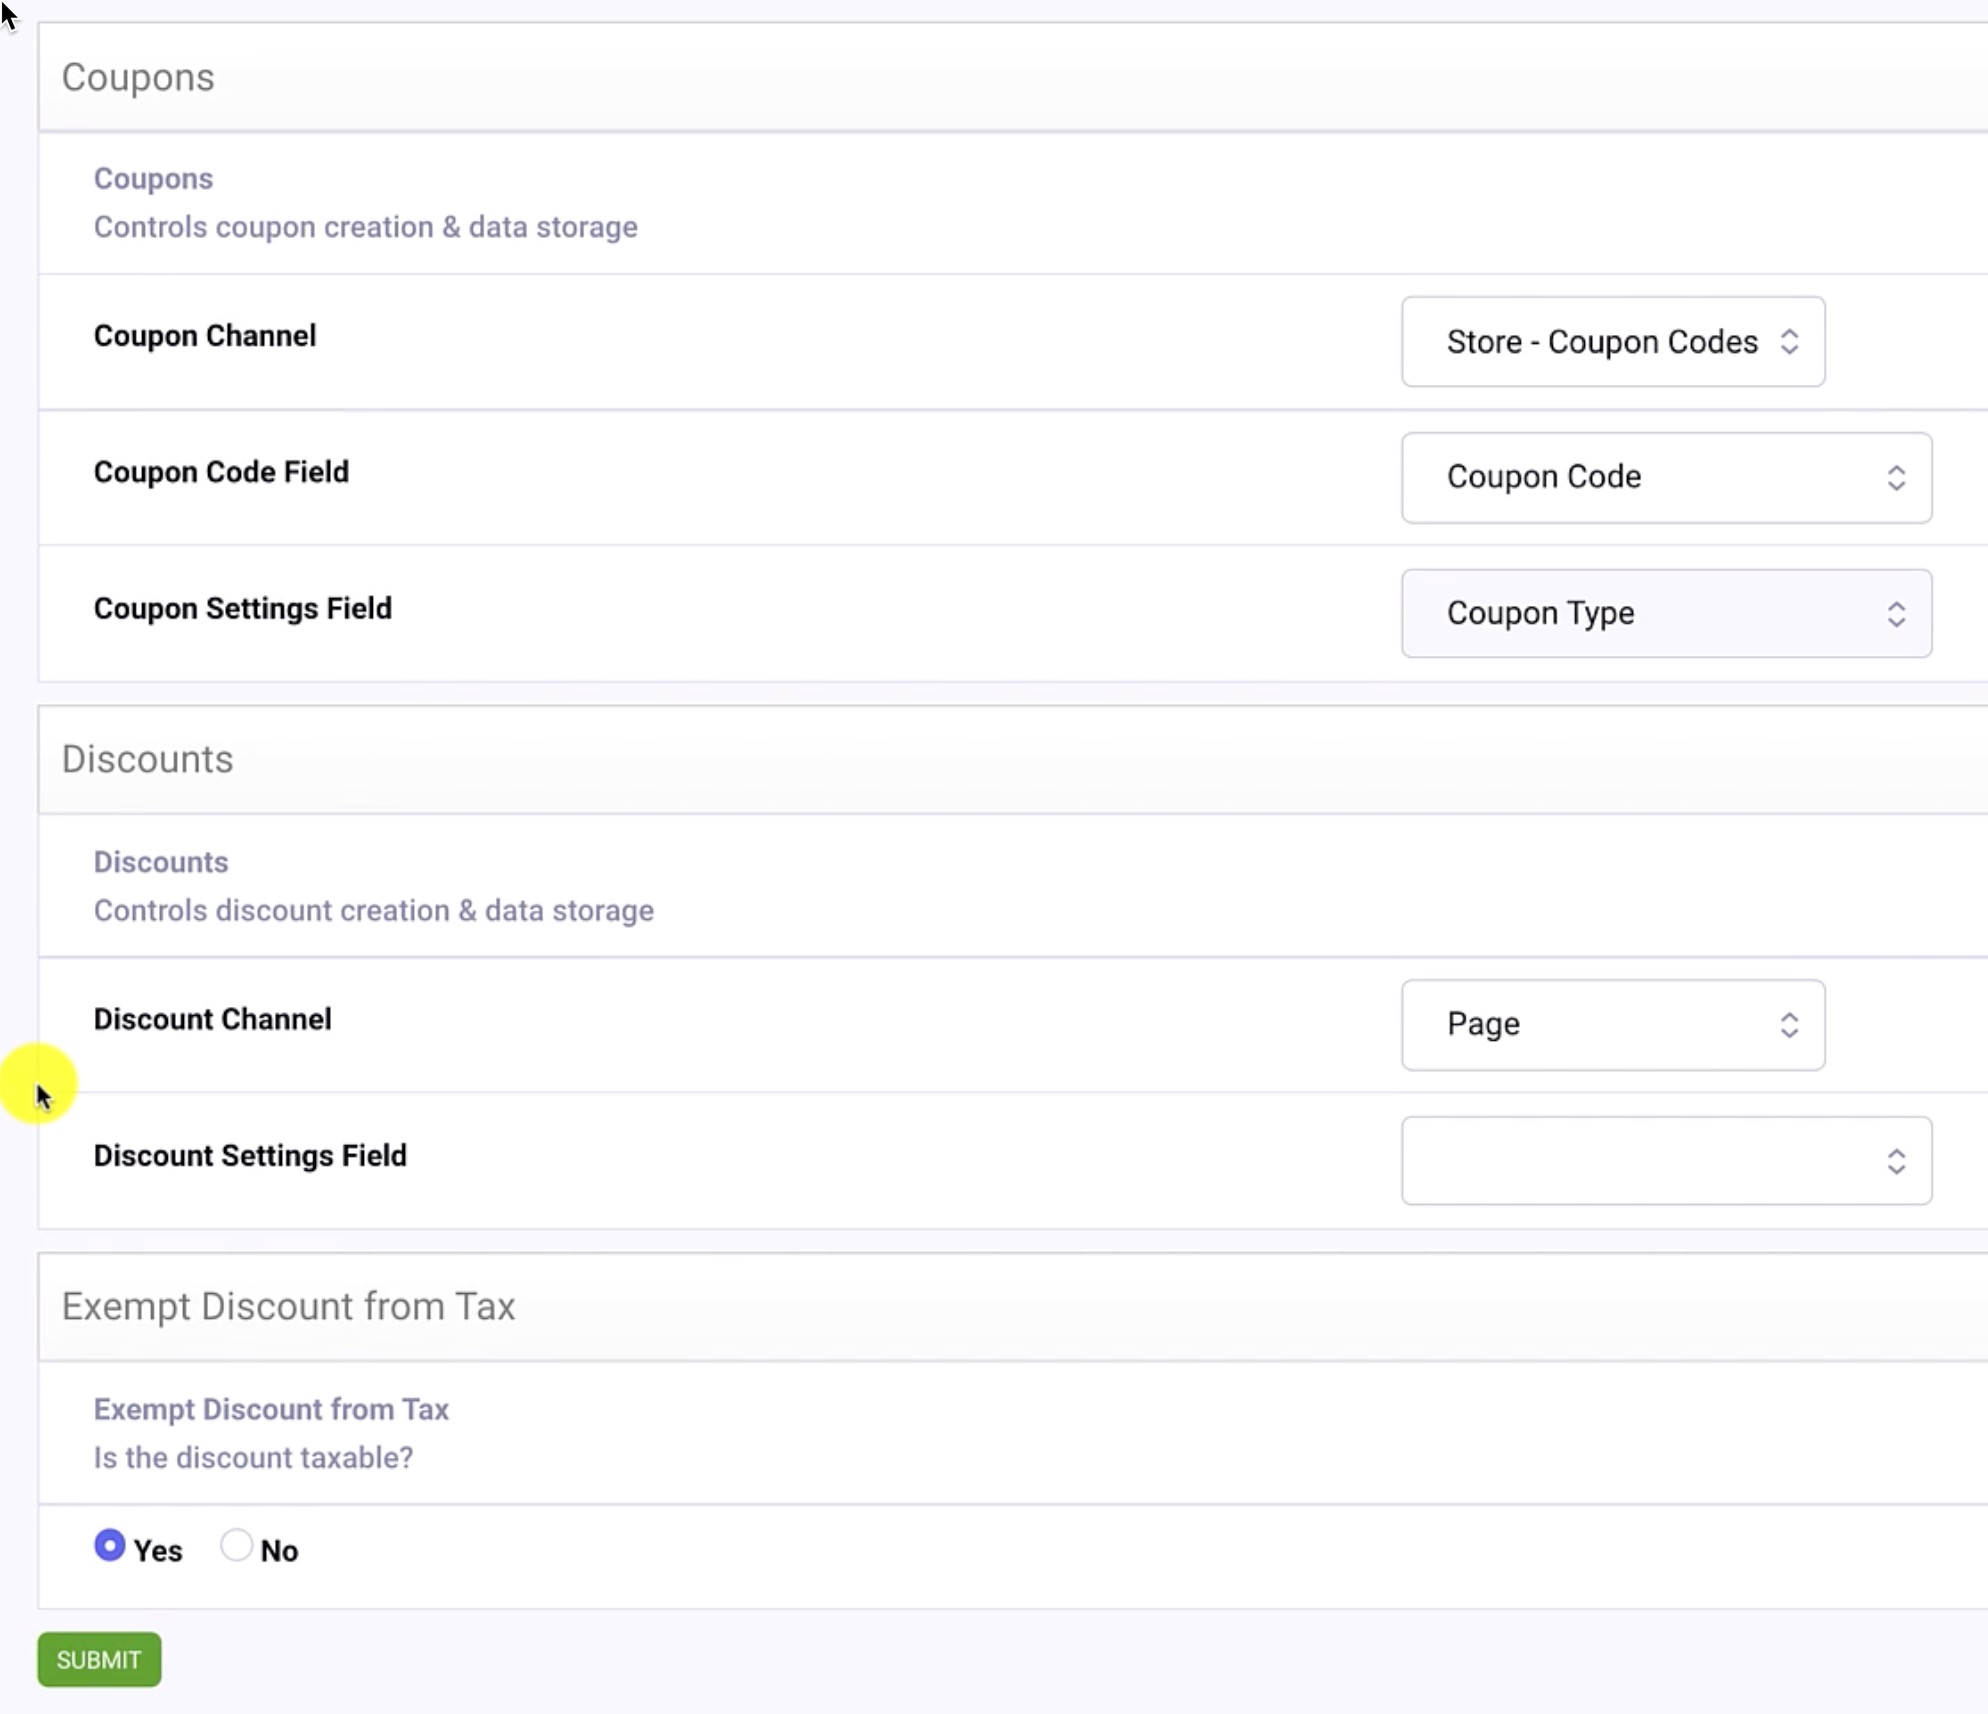
With the discount fields created, it’s back CartThrob settings and then the Discounts tab. Our fields haven’t yet been assigned to the new channel, so we’ll add that setting and click Submit.
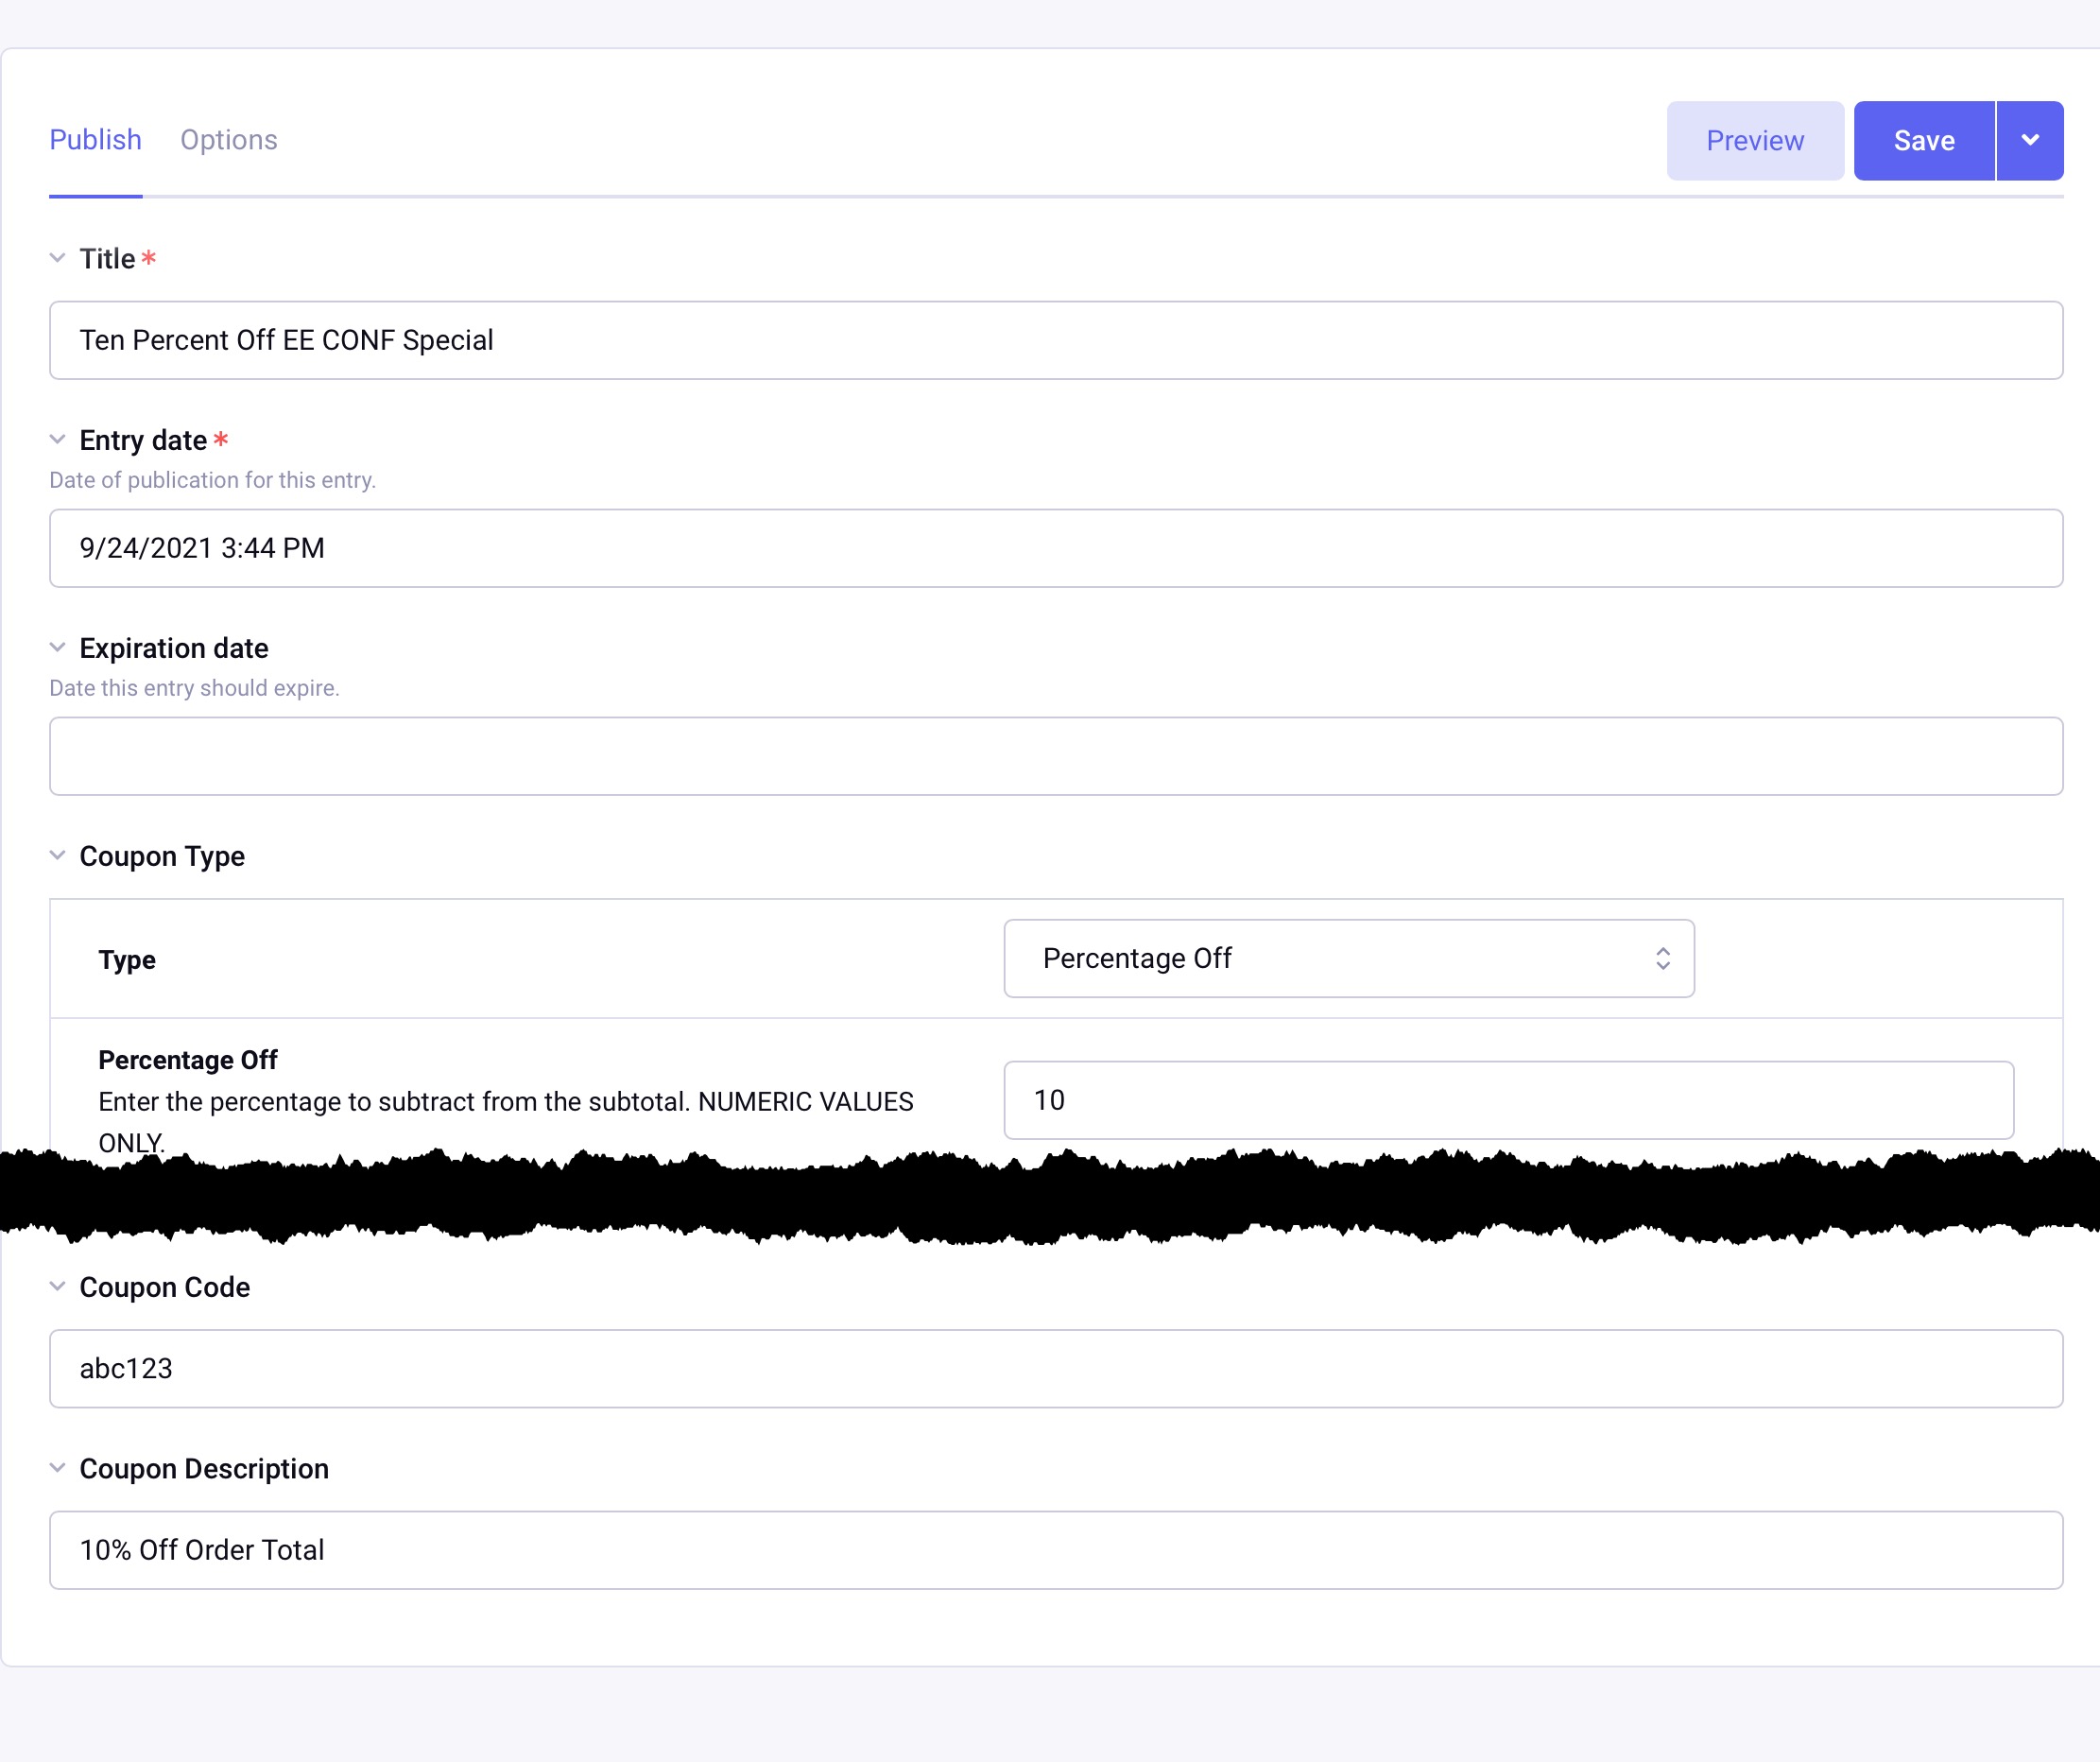
Now we are ready to make a coupon code entry within the Store - Coupon Codes channel. Our title is “Ten Percent Off EE CONF Special,” a Type of “Percentage Off,” and Percentage Off value of 10. And finally, a Coupon Code of “abc123” and a Coupon Description.
We’re done!
6) Shipping / Tax / Payment
6a) Shipping
Within CartThrob, navigate to Shipping. There’s several plugins to choose from; for this example I’m using By weight - Threshold. The settings are self-explanatory. The shipping plugin uses a tiered system so any order weight total of up to 5 lbs will match the first row, resulting in a shipping charge of $8, and so on.
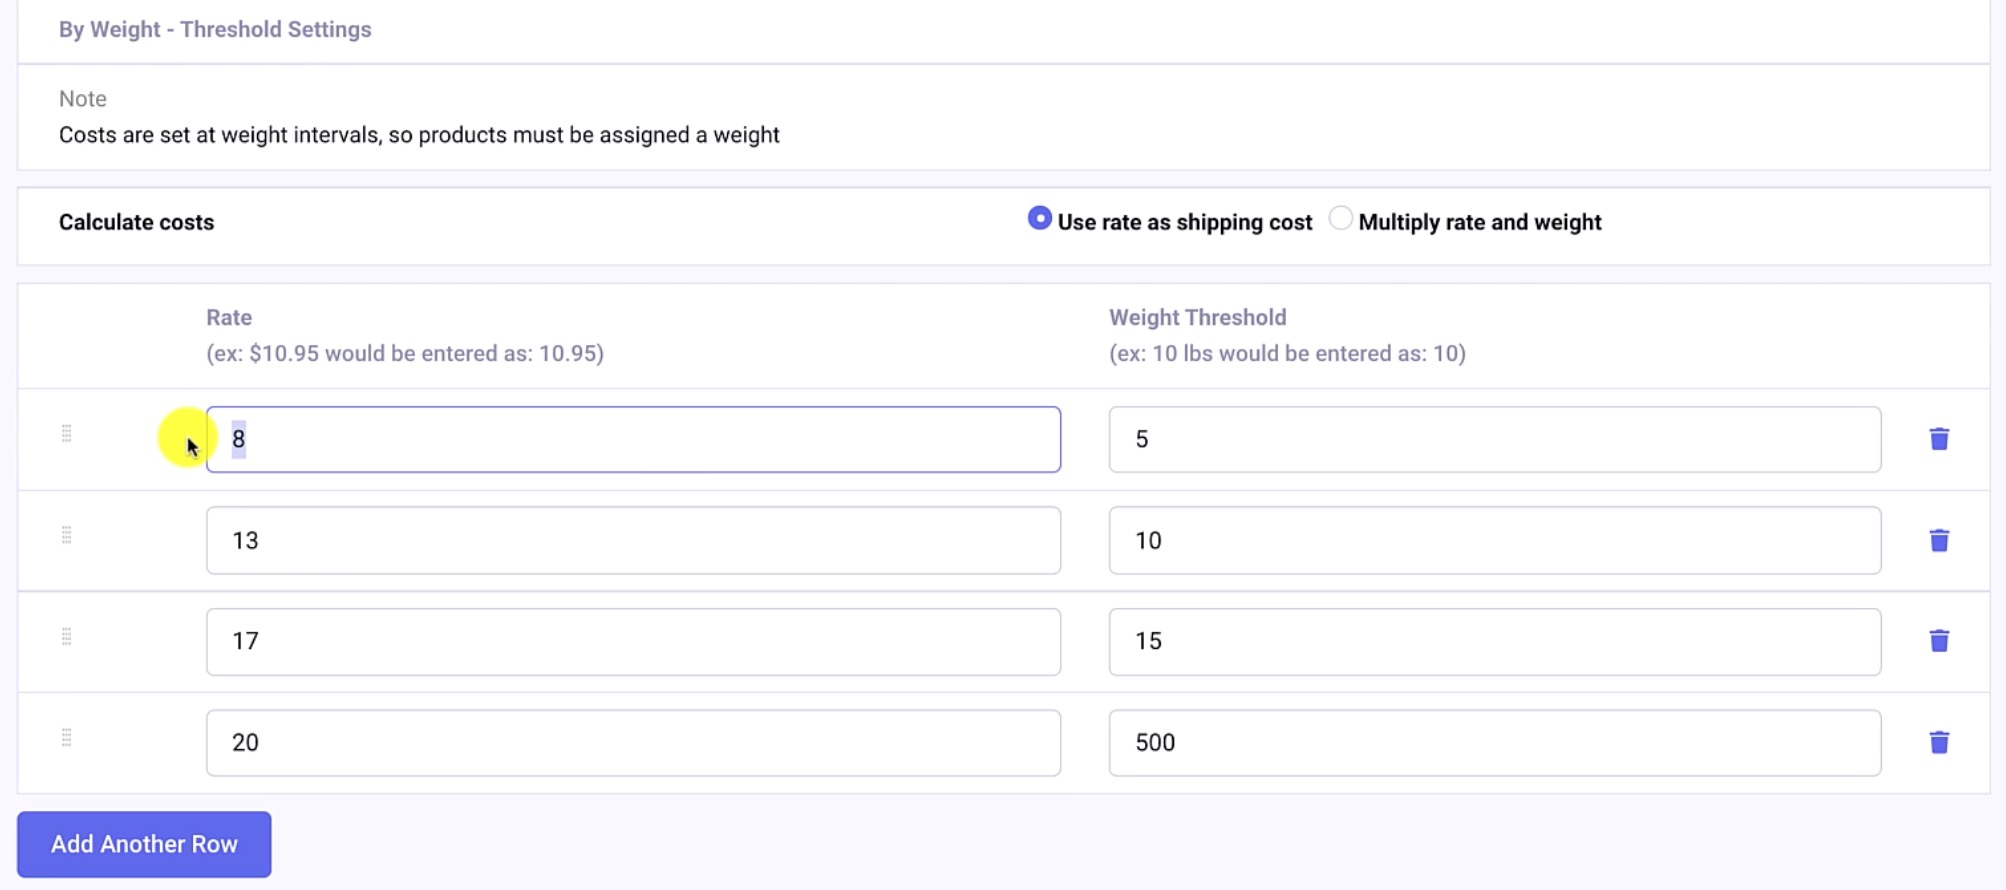
For the last row I have a really high threshold of 500, so anything after 15 lbs will just cost $500.
Click Submit to save the plugin selection and its values.
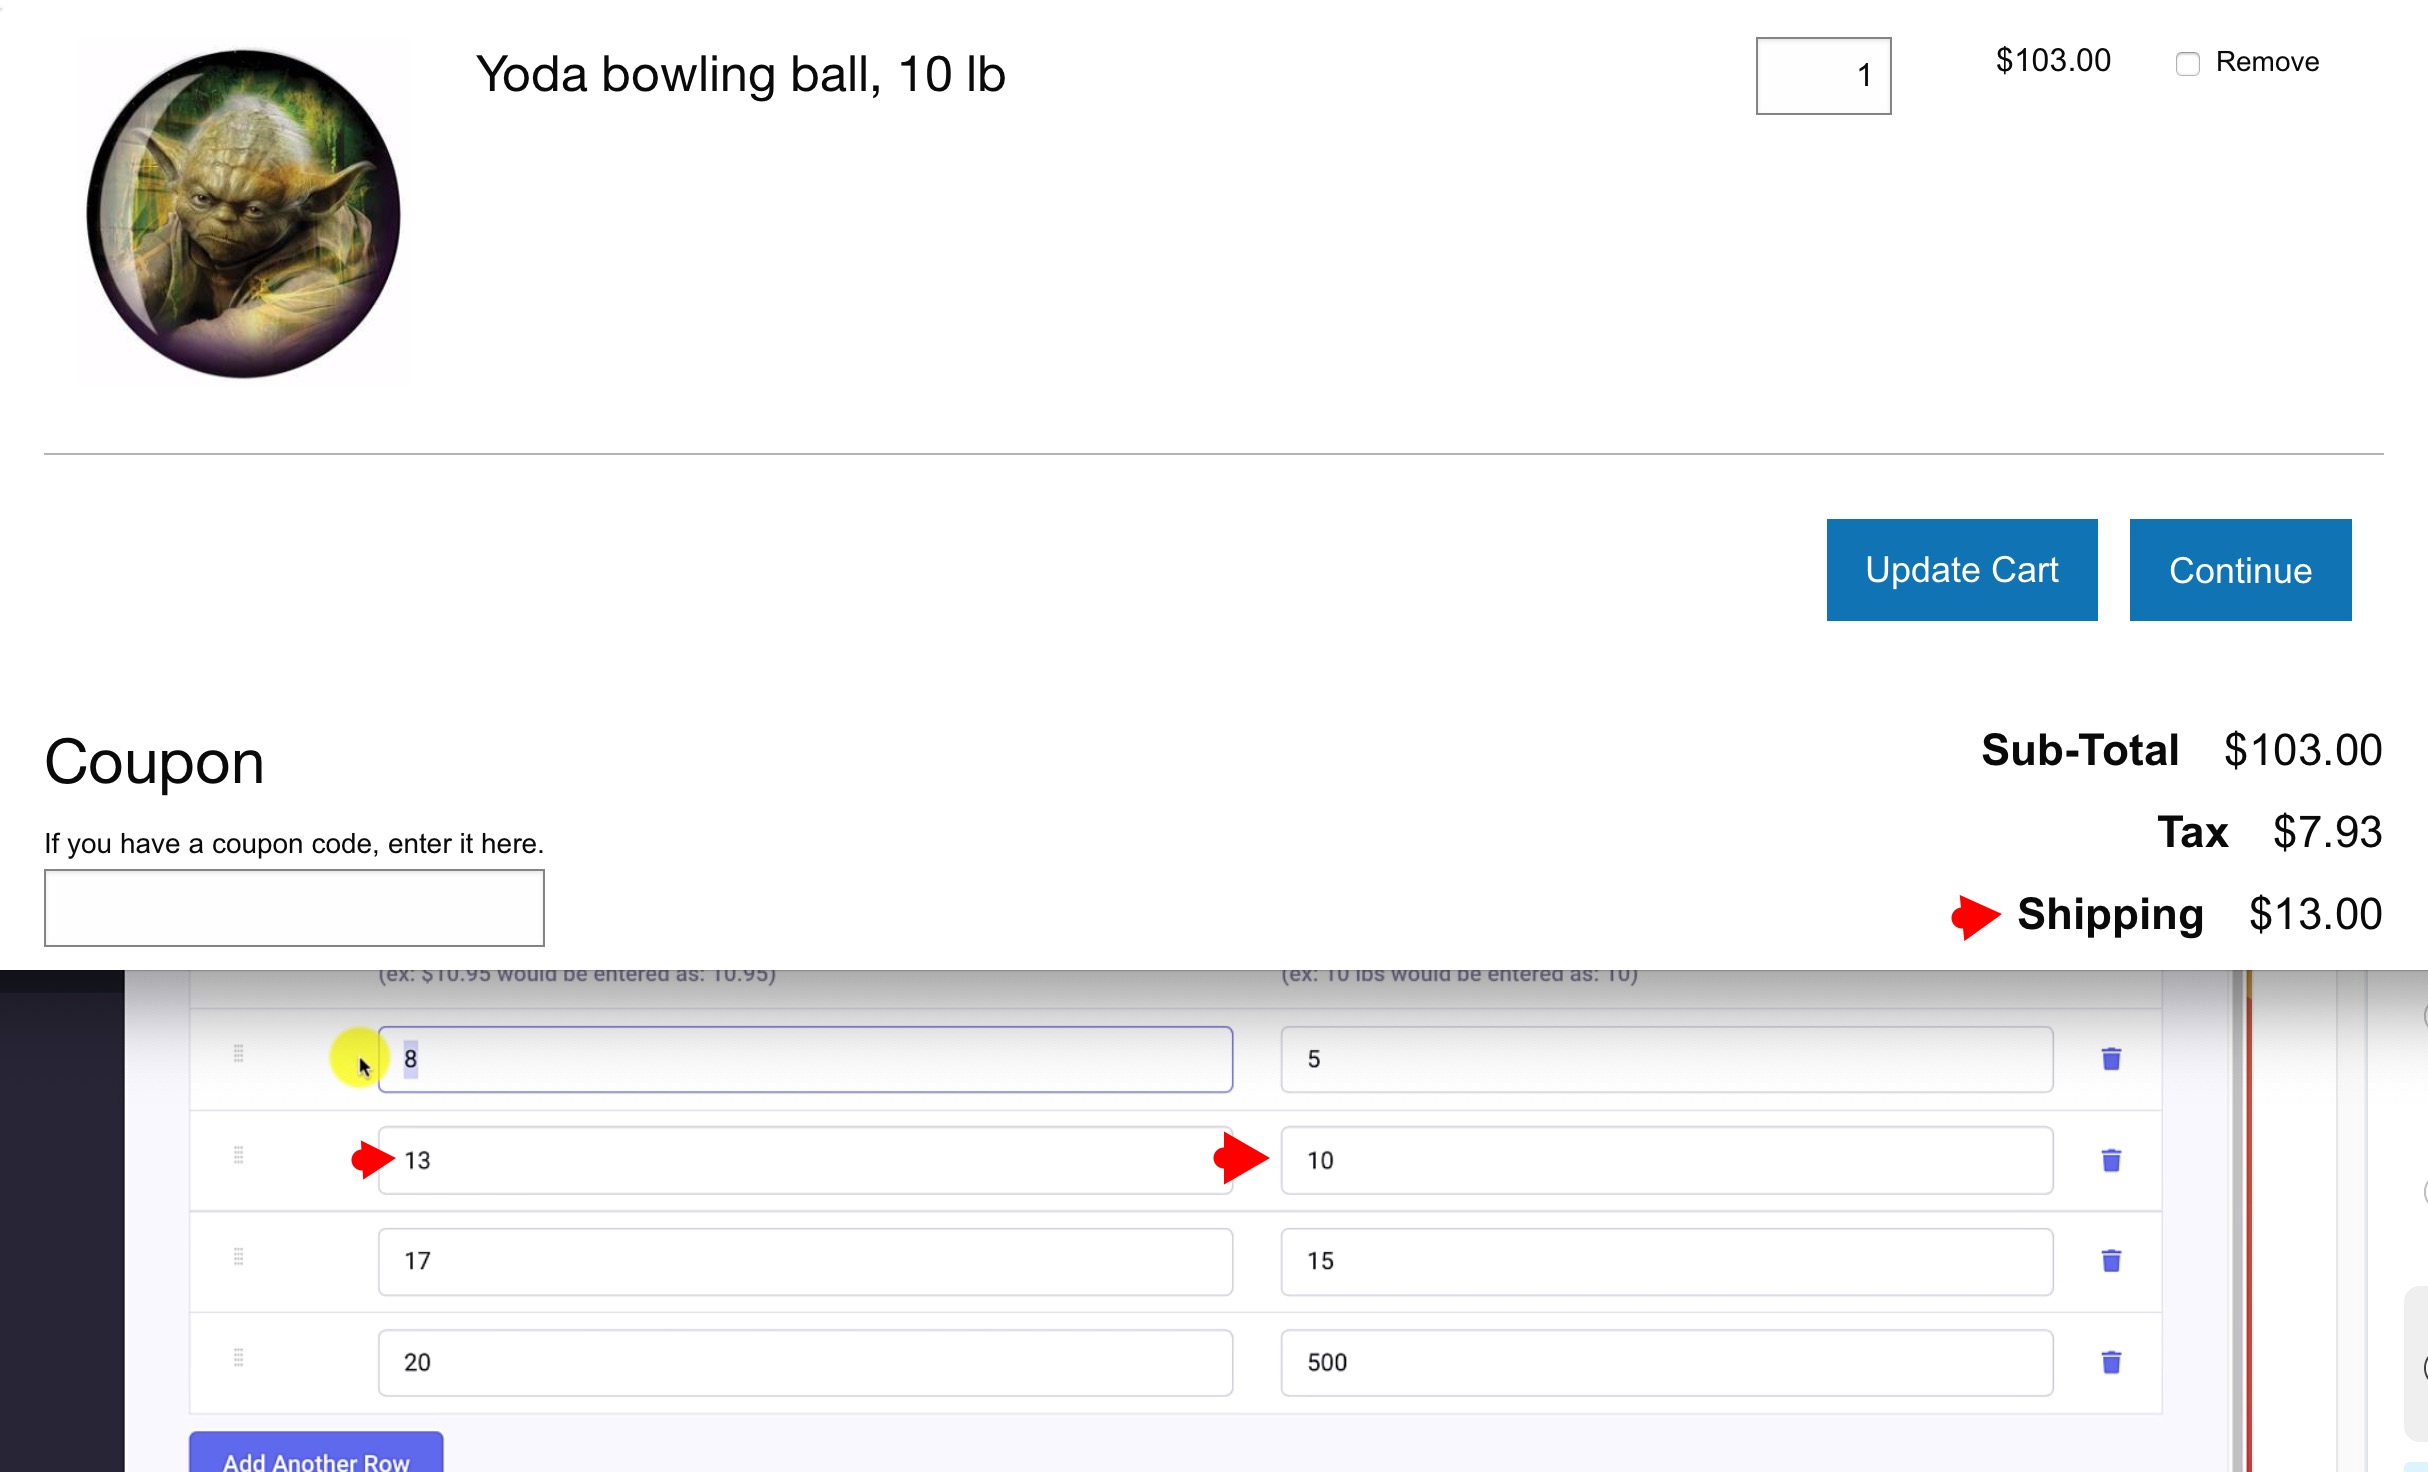
On the frontend we’ll test the Yoda Bowling Ball. The cart tallies shipping as $13, because the By Weight - Threshold plugin matches the order total of 10 lbs. (Totals up to and matching 10 lbs will match the $13 calculation.)
6b) Taxes
Within CartThrob, navigate to Taxes. I’ll leave “Calculate taxes using shipping address” as No, since I want to calculate by billing address.
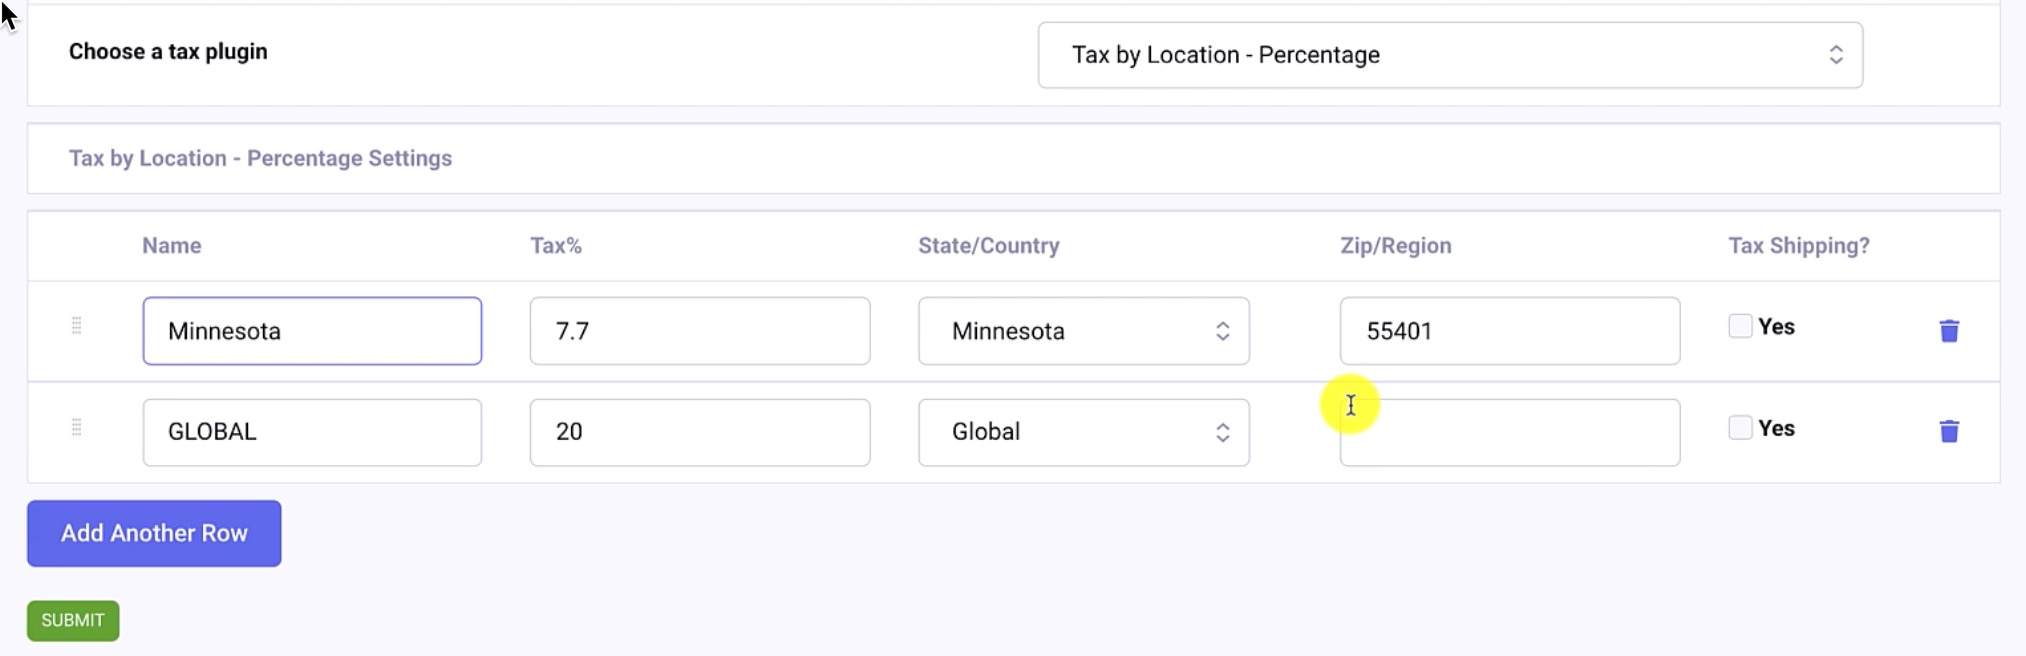
For the Tax Plugin, we’ll use “Tax by Location - Percentage”. Each row represents a tax rate, region, and zip. CartThrob will use these values to match to the customer’s billing address to tally the proper tax rate. For this example, I’ll use 7.7%.
Like shipping, I added a second row with a high value to catch all other situations. Anything that doesn’t match the first row would be match by this global rule which is 20%. We could put in more rows and more zip codes and regions, but we’ll leave this simple for now!
Click Submit. Taxes are done! Add an item to your cart on the frontend and give it a try!
6c) Payments
Now that our shipping and tax are behaving, I’ll look at the payment gateways. Within CartThrob, navigate to Payments, and focus on the first menu, Choose your primary payment gateway. I’m using the Stripe plugin developer mode. (Stripe and Authorize are the gateways I use the most. I prefer Stripe because it’s just easier to test compared to Authorize or Paypal)
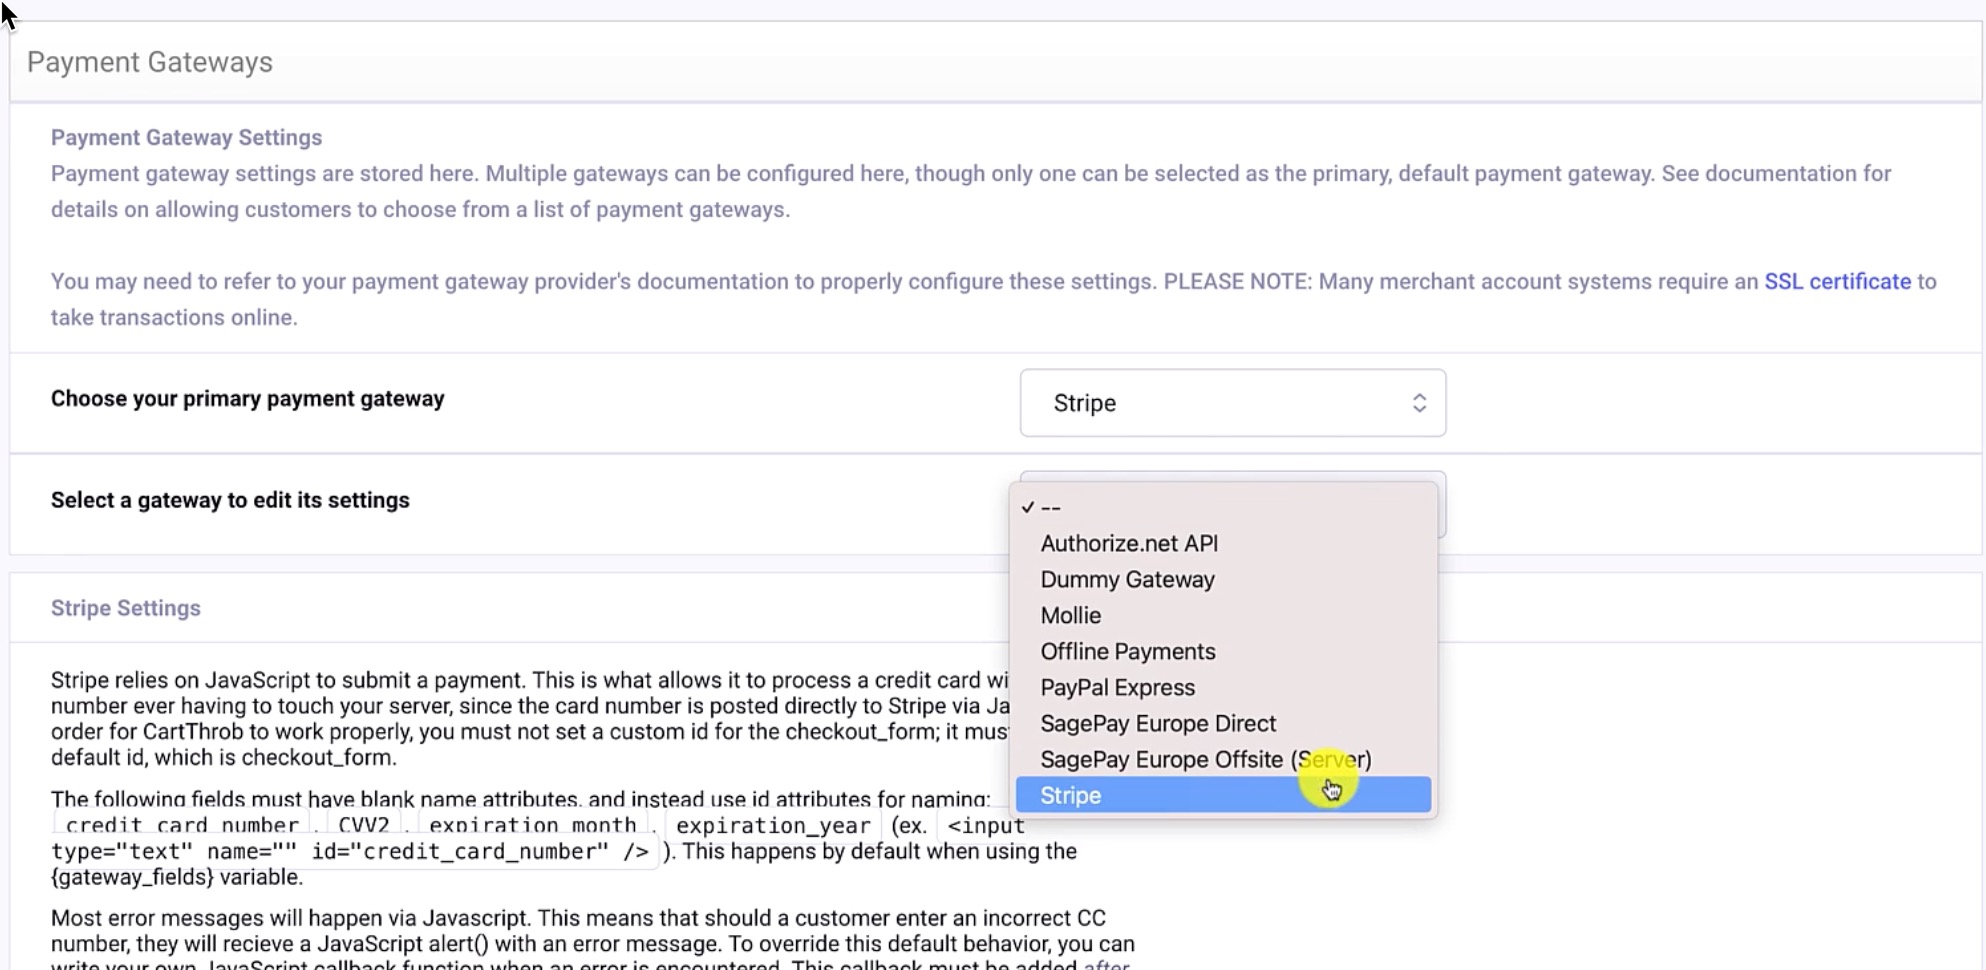
You can choose the various gateways that CartThrob has available. The first select menu is showing you what gateway is chosen, the second is giving you the chance to edit that gateway’s settings. (the settings will appear below, without a page reload, upon making this selection)
Below is where I have my test modes selected, and I have my Test Mode API key (secret), and Test Mode API key (publishable) that I configured within my Stripe account.

Everything else I can leave as-is. Click Submit to save the changes.
Submit an order on the frontend
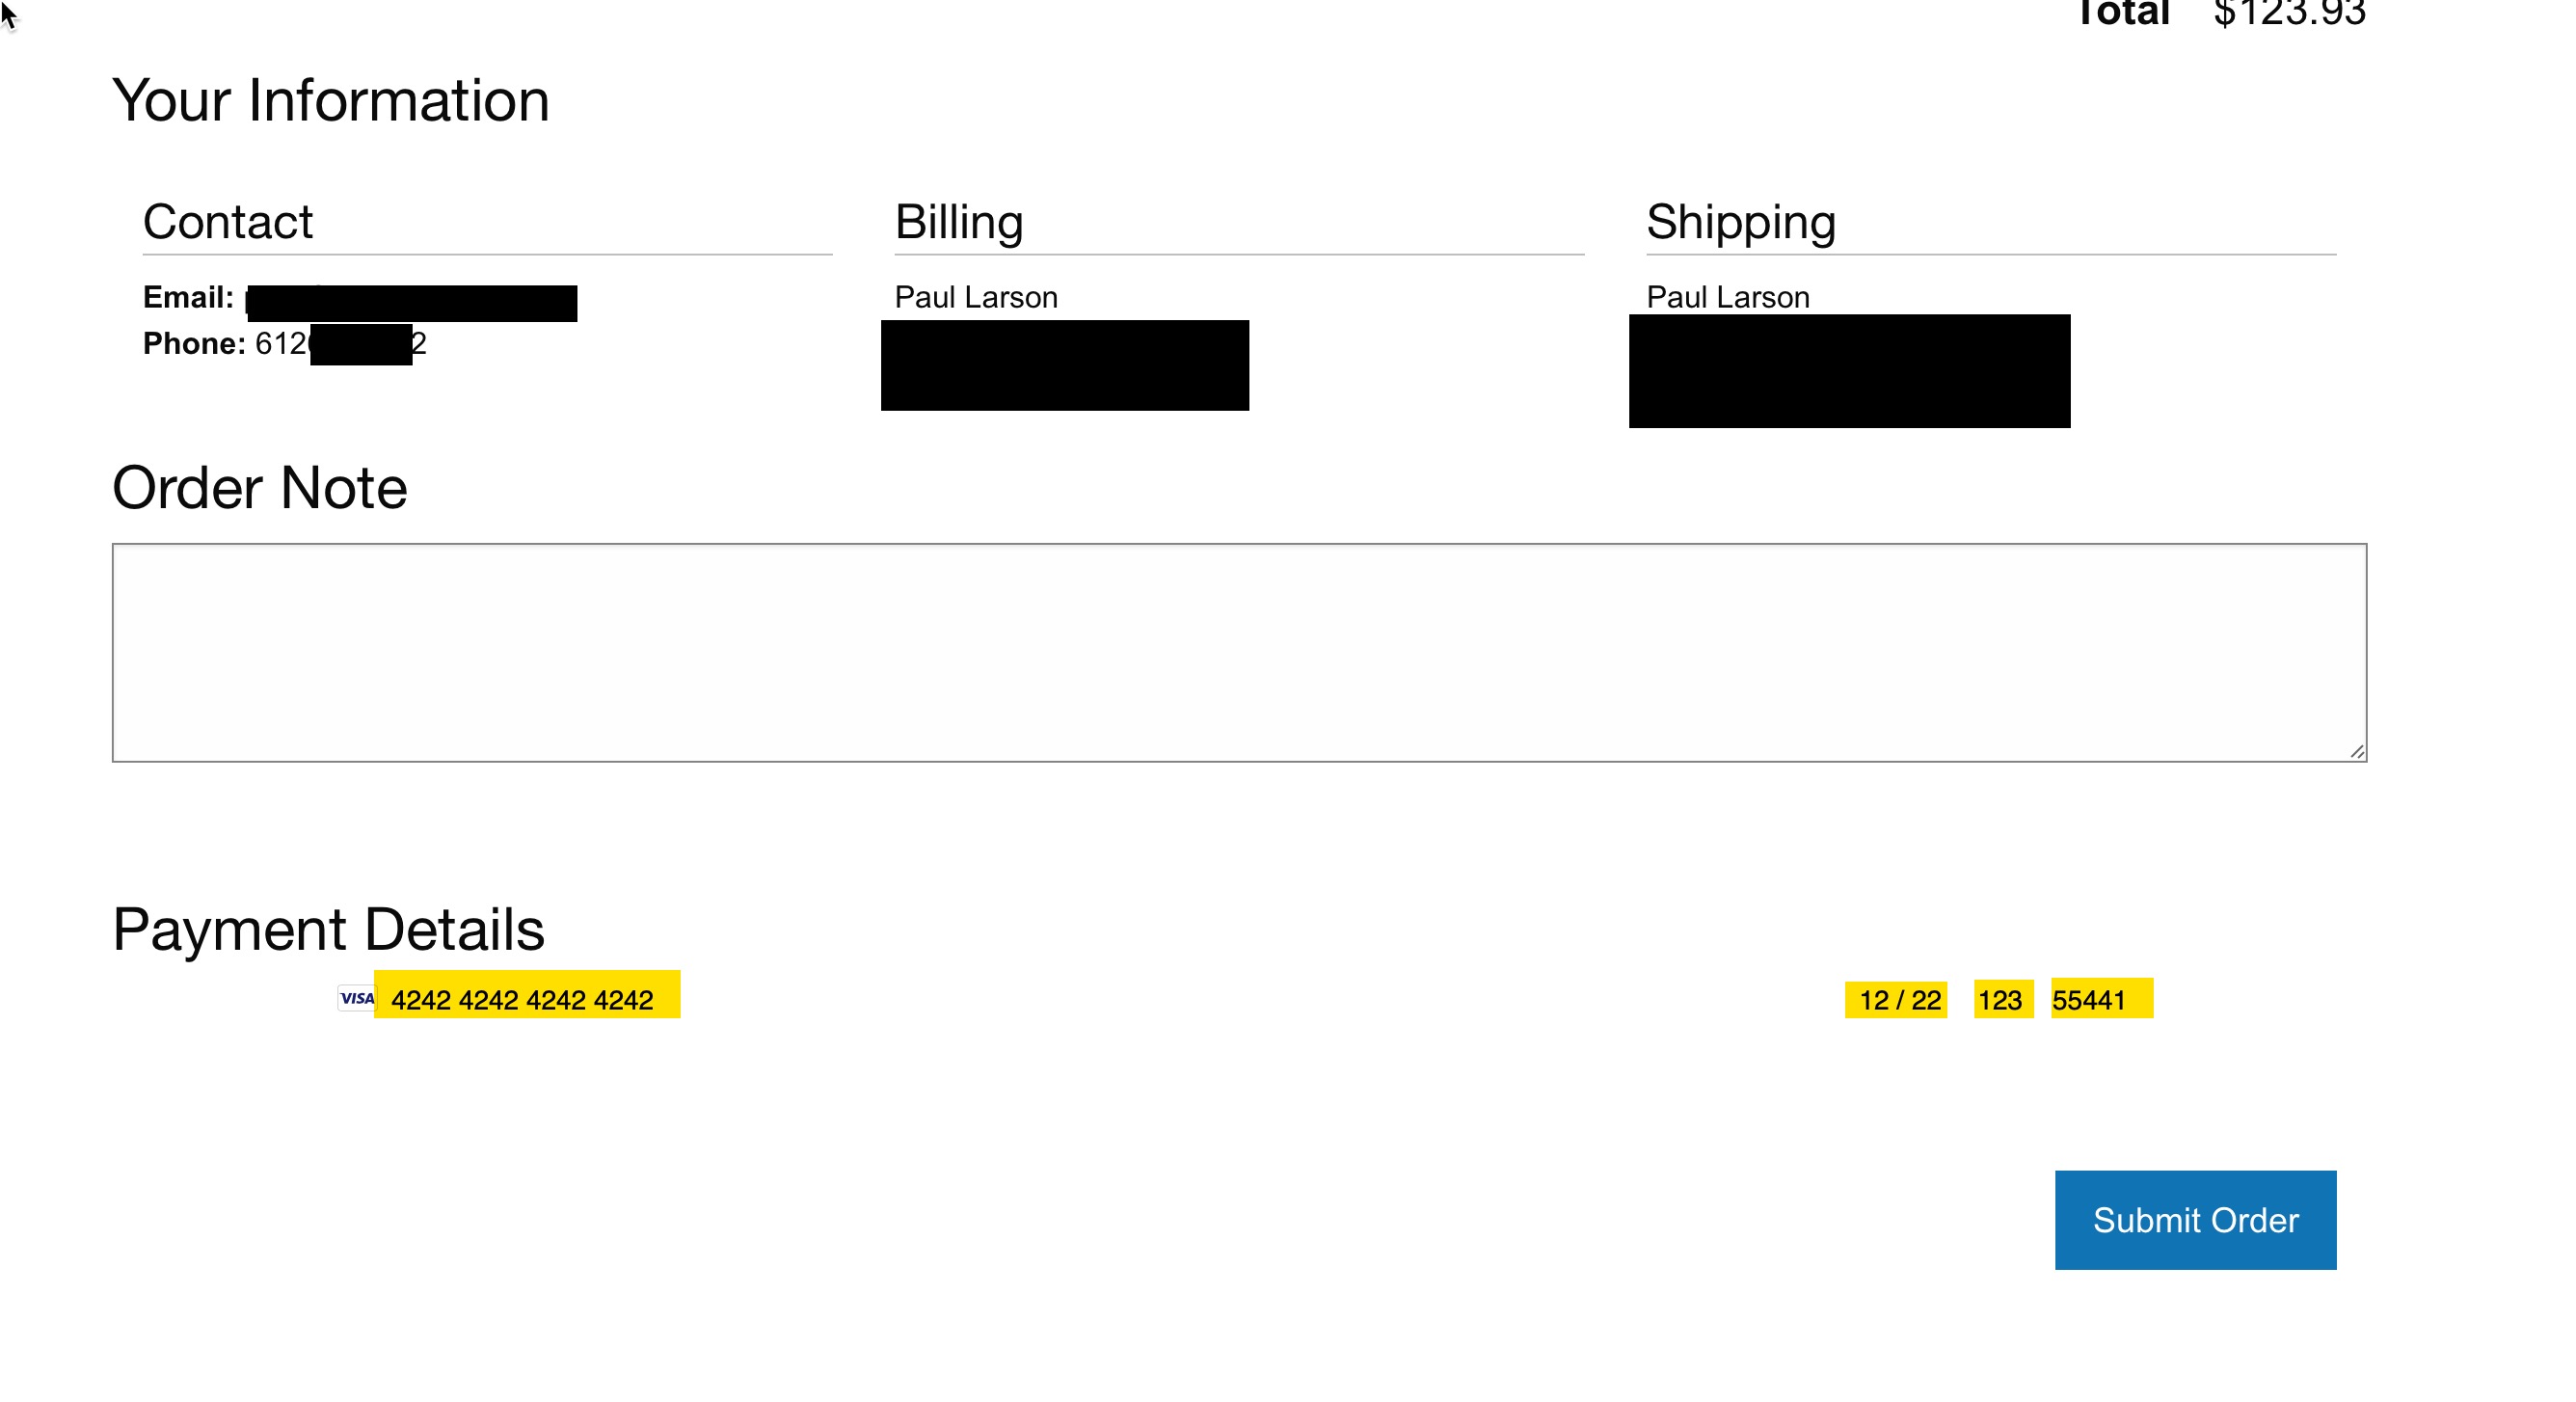
Now we can actually complete an order! At the bottom of my checkout page, I’m using the default Stripe test number, 4242 4242 4242 4242, providing any CVV code and a valid expiration date.
Our test order was hopefully successful! Head over to Stripe (or your gateway), and view the appropriate Dashboard for test orders to confirm.
7) Notifications and Order management
7a) Notifications
We have most of the puzzle pieces of a working store in place. Next we’ll quickly review Notification setup and Order Management within CartThrob. Navigate to the Notifications tab.
Starting at the top of the page with the Log email? setting; I typically don’t log email unless it’s a troubleshooting situation. When enabled, it writes debug info to a CartThrob database table.
We are going to setup two email notifications. The first notification is intended for the customer, while the second is intended for the store owner.
In the CartThrob settings, the first block is what we’ll use for the Customer notification. CartThrob likely created a few of these email configuration blocks by default.
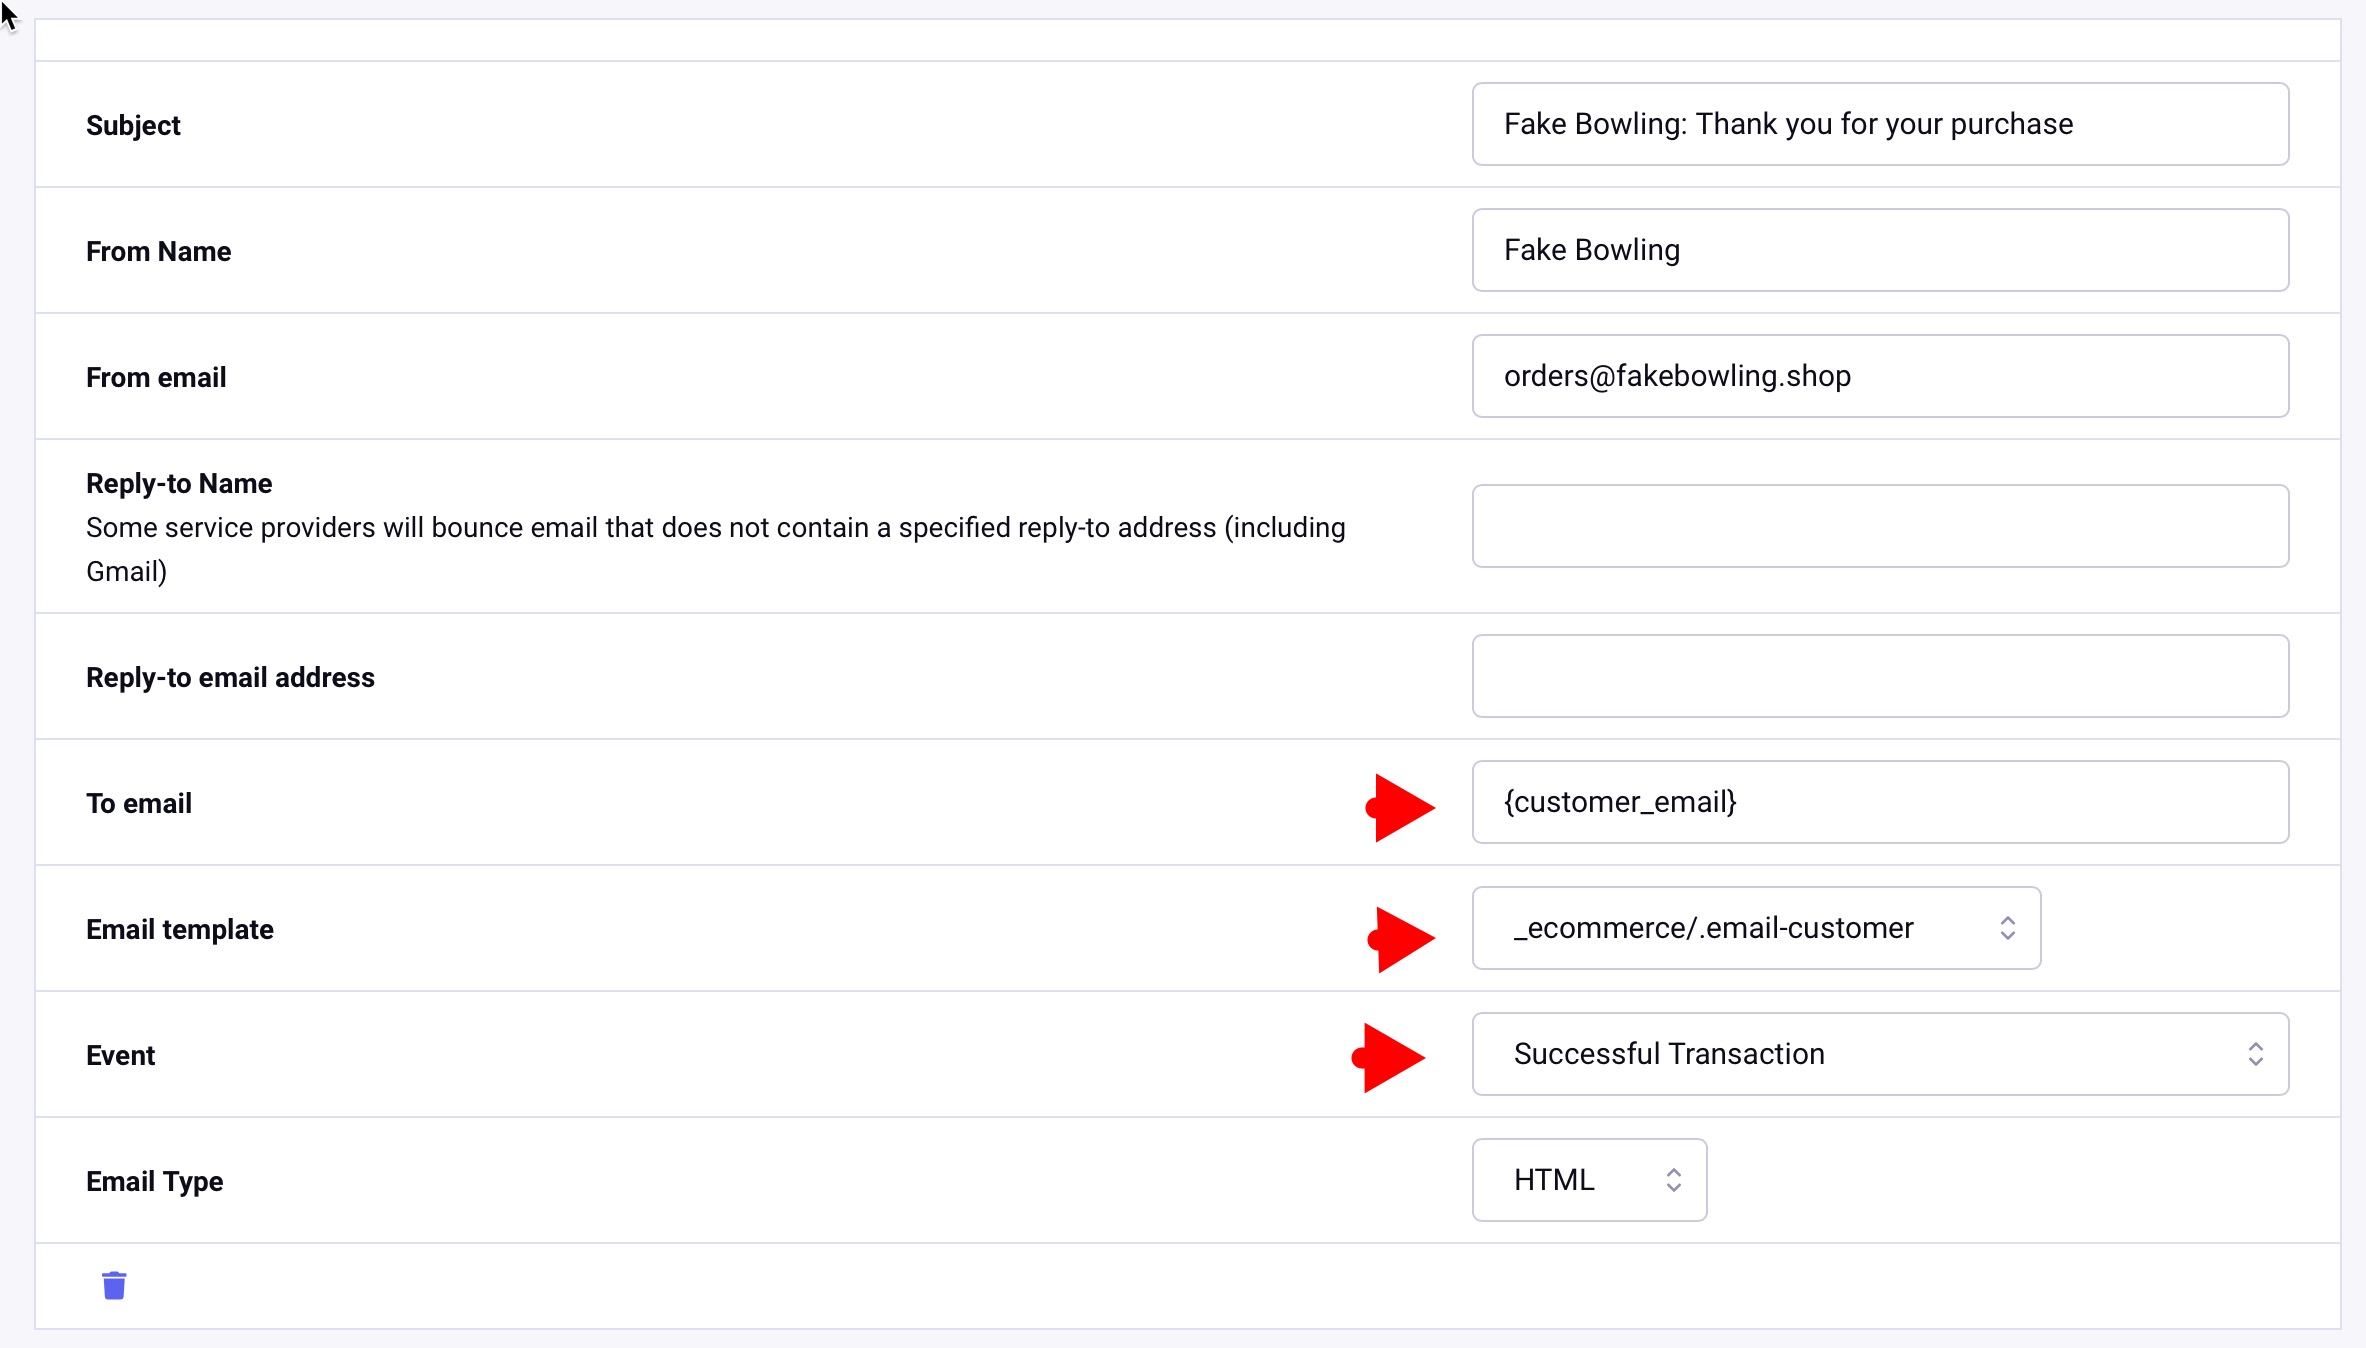
Everything is pretty self-explanatory here. The To email address is dynamically assigned from the order itself using the ExpressionEngine variable.
Next, the Email template needs to point to a standard ExpressionEngine template, in our case a fairly basic HTML table template geared for email delivery.
The Event setting is used to match a CartThrob event that must be triggered to send this email. In this case, a successful transaction.
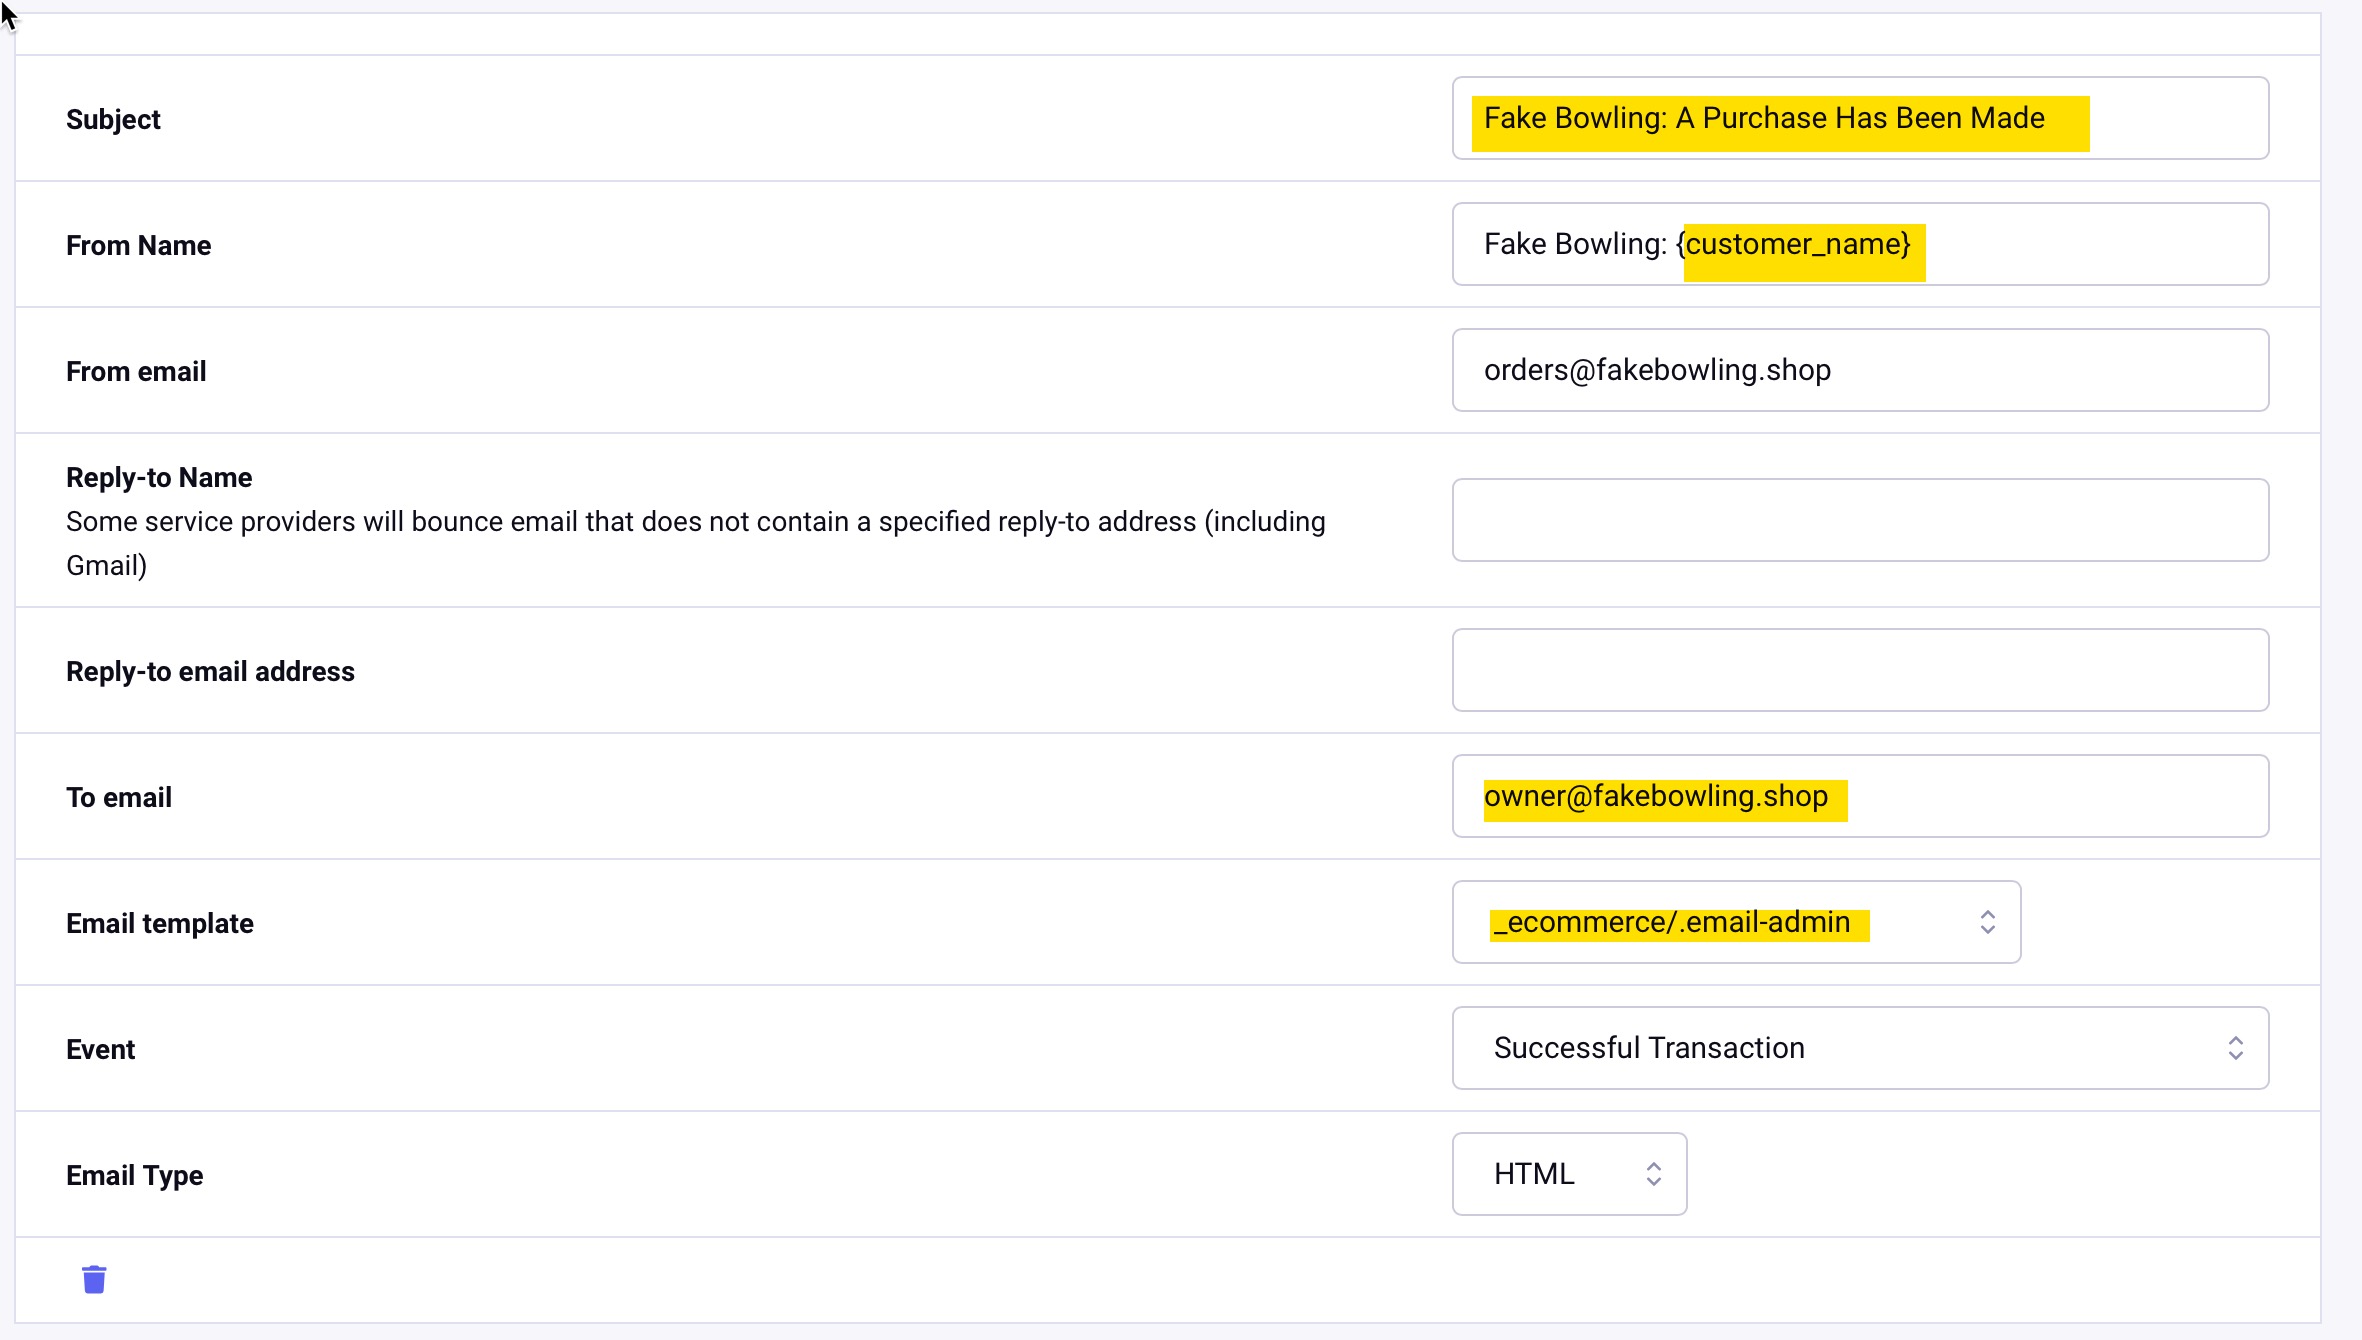
We are ready to move on to the next email block for the store owner. The setup is nearly identical, only differing in subject line, recipient, and email template. The Event setting remains as “Successful Transaction,” which means two emails are sent by CartThrob for each successful order. Marked in yellow, below, are the subtle differences in the owner email compared to customer
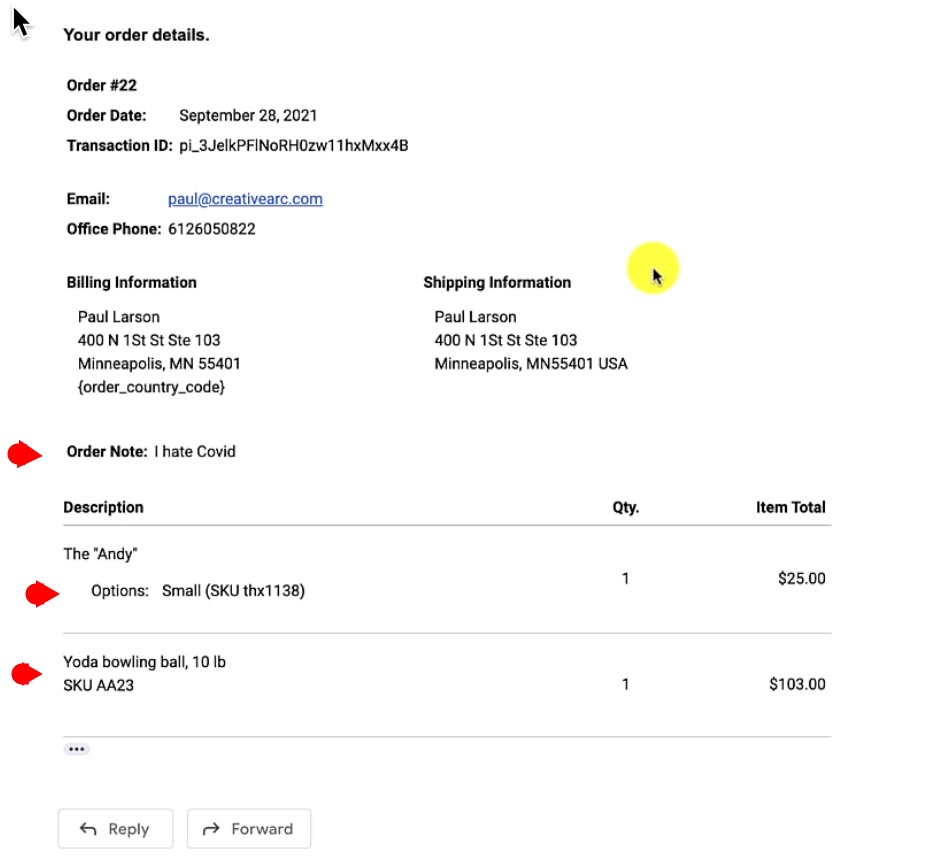
On the frontend, we’re ready to submit a test order to test the notifications. I’ll add a couple of items to my cart, even specifying an order note. Here is what the email notification looks like to the customer:
7b) Order Management
Where does CartThrob store all this?
Order entries
If you remember when we used that installation function within the CartThrob Installation Tab, it created the Coupon Codes and the Orders Channels.
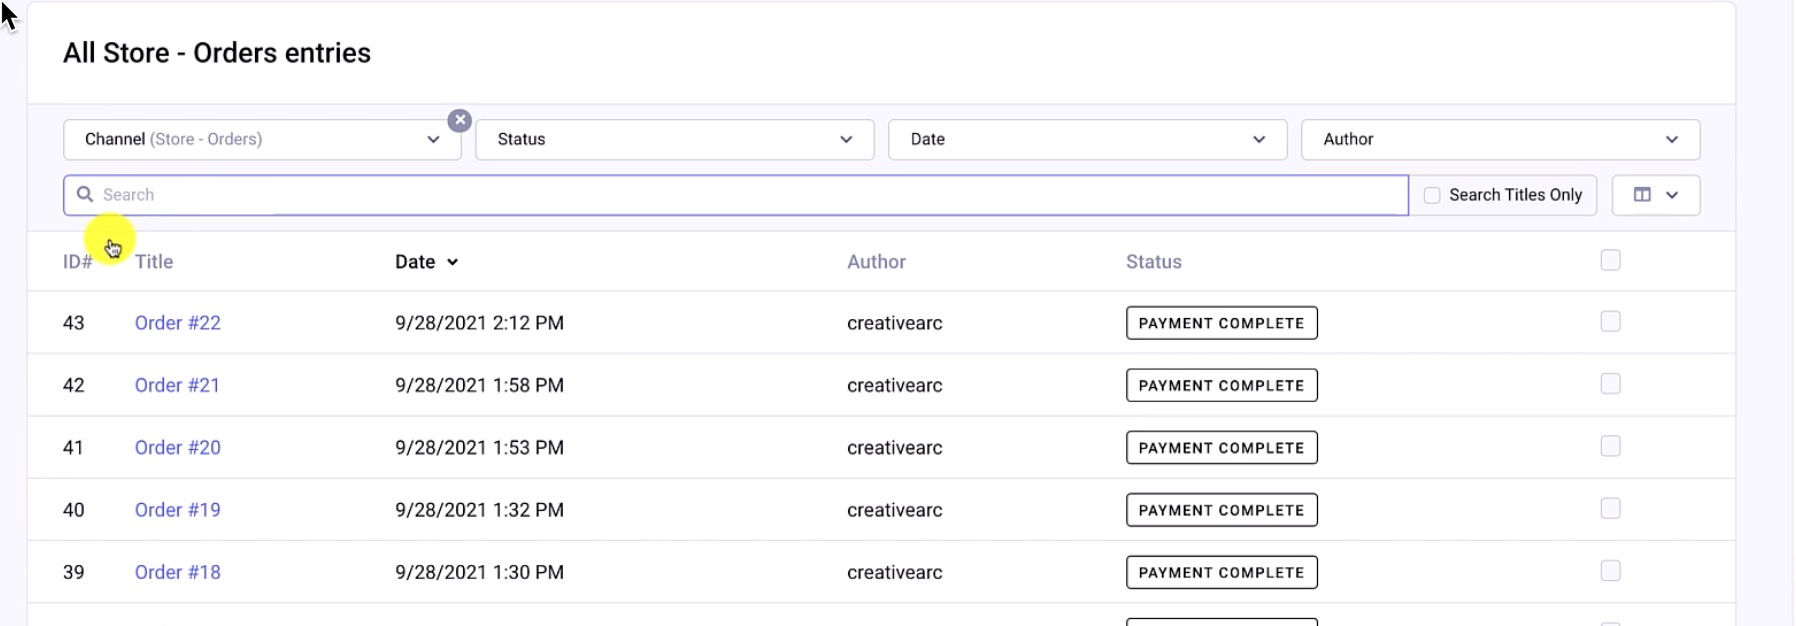
The Orders Channel looks like a standard ExpressionEngine channel with the title being the order number, and then the statuses that we have assigned to the channel.
If I look through a sample Order entry, it’s pretty standard; just a lot of custom fields. In this case, the actual line items for the order appear on the order items CartThrob field.
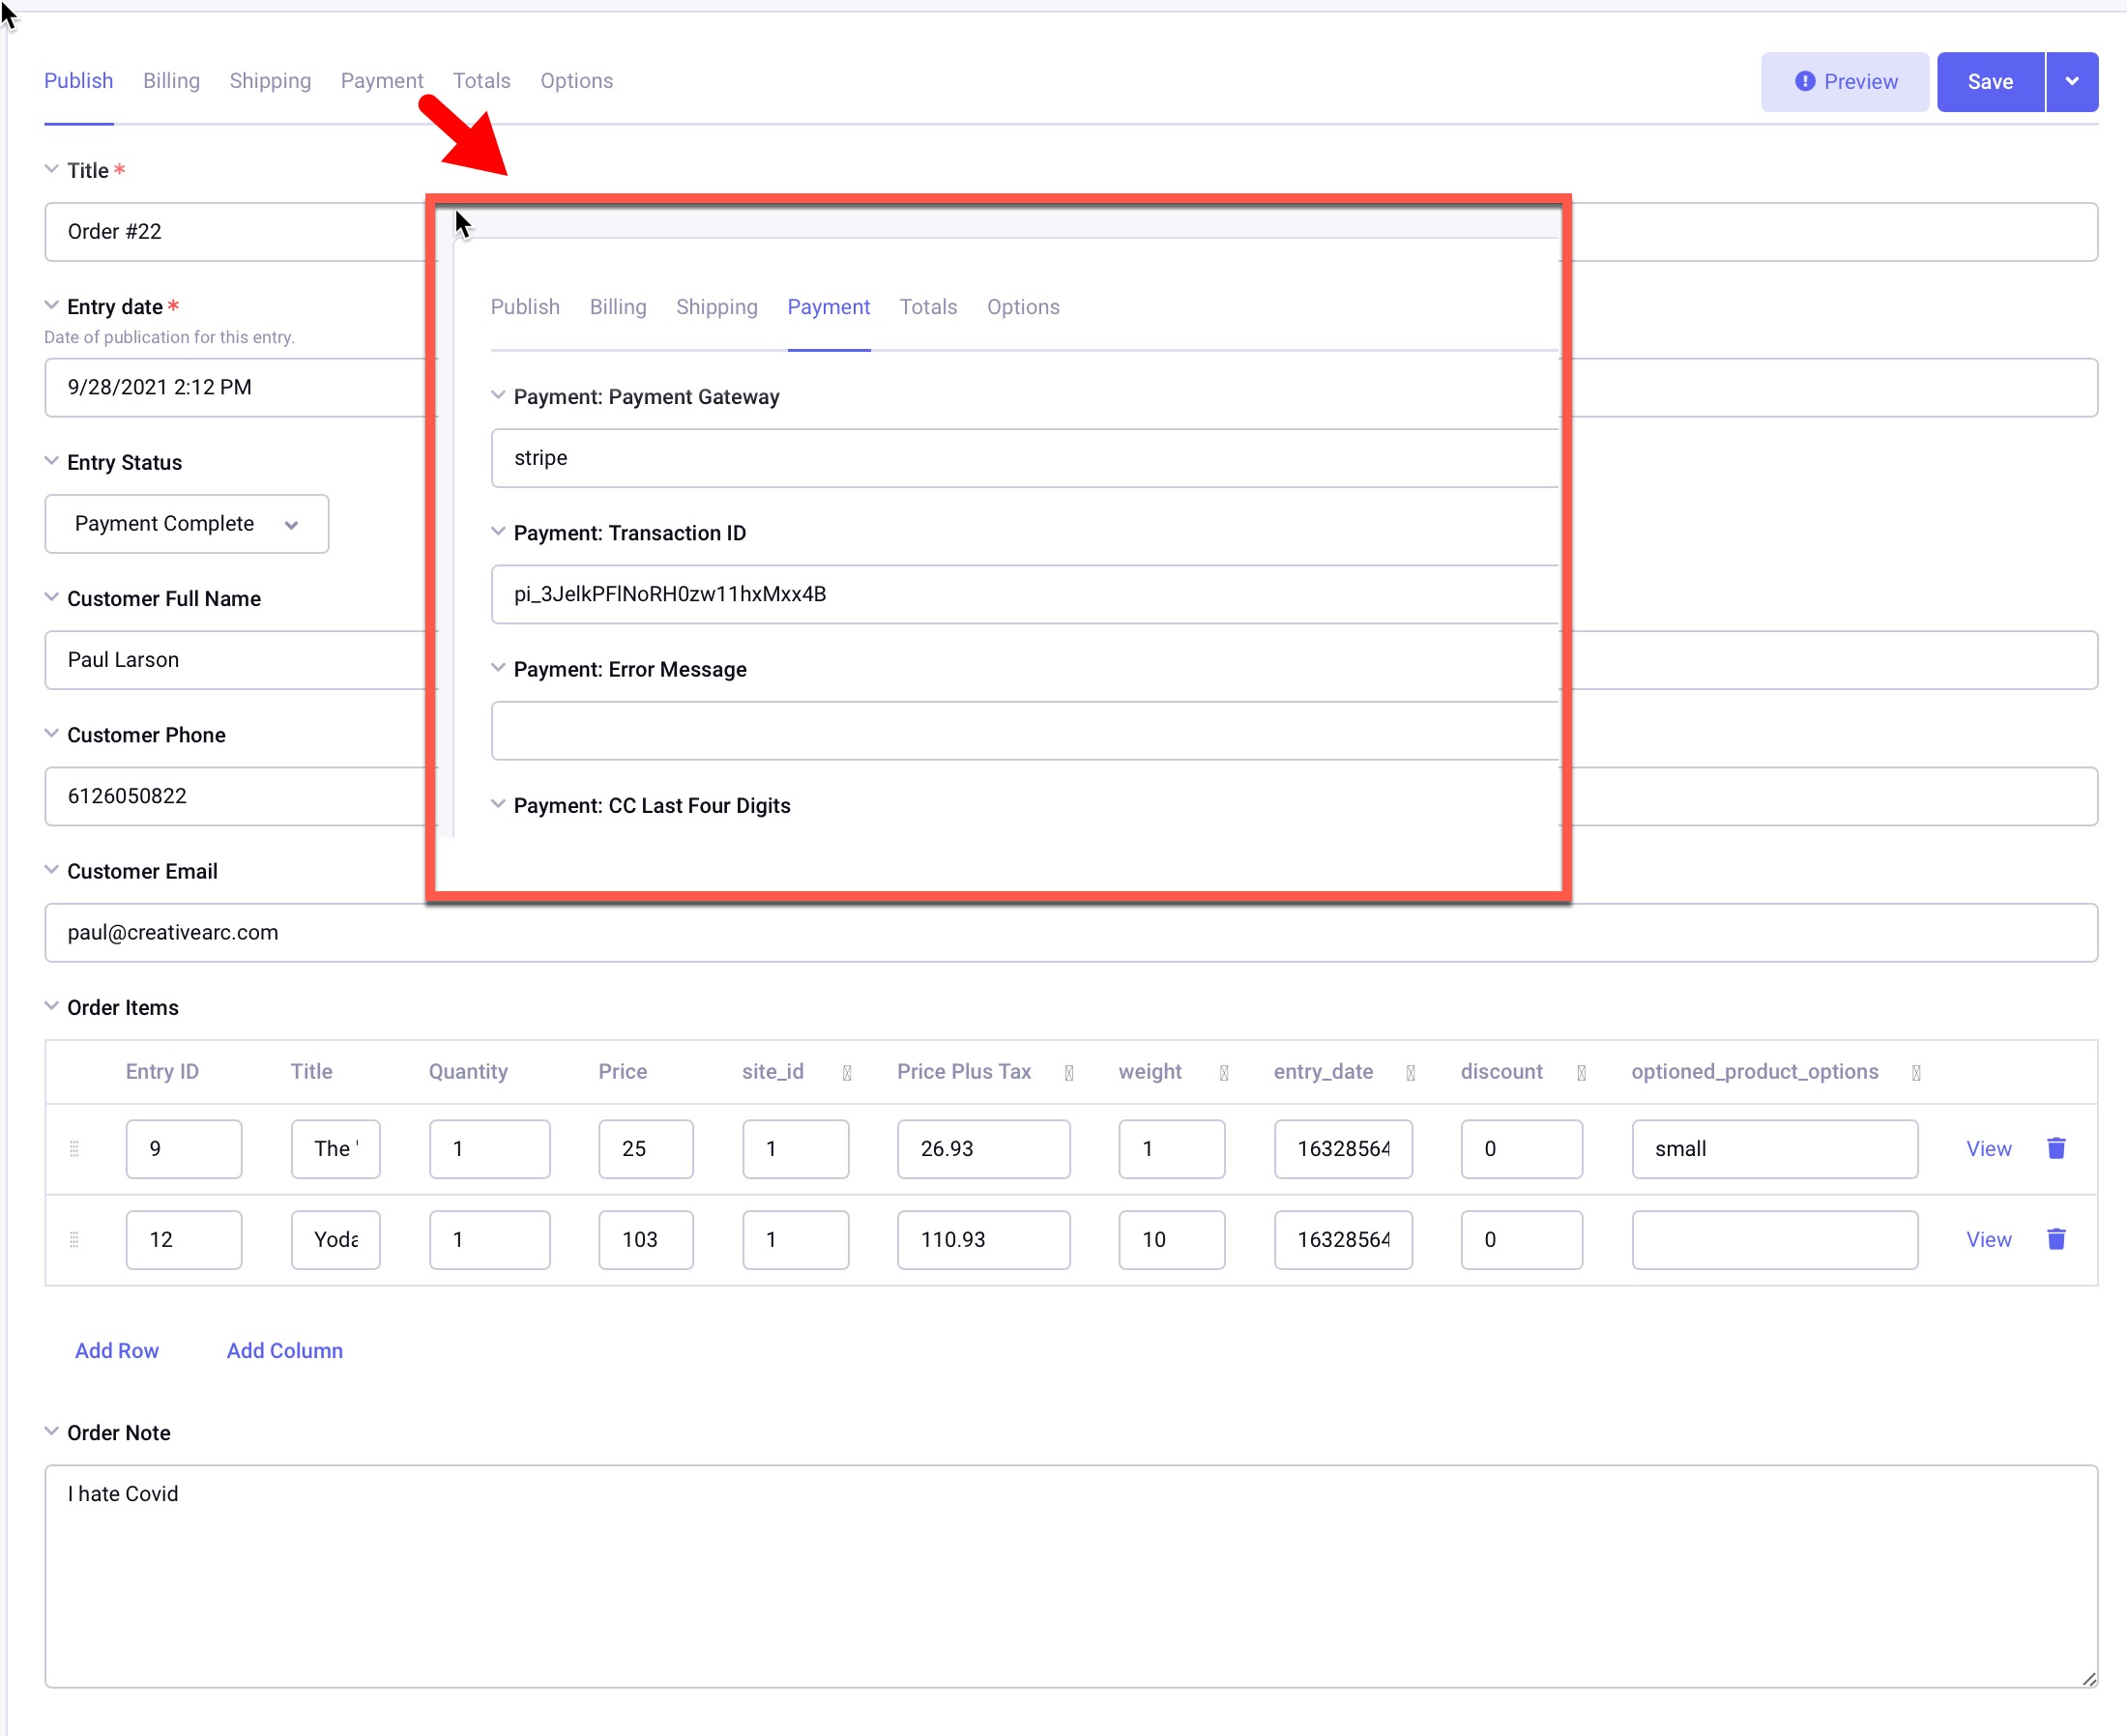
The expected order and customer data is found in the entry fields. Note the layout tabs that capture the billing, shipping payment. It’s all here in the ExpressionEngine Entry!
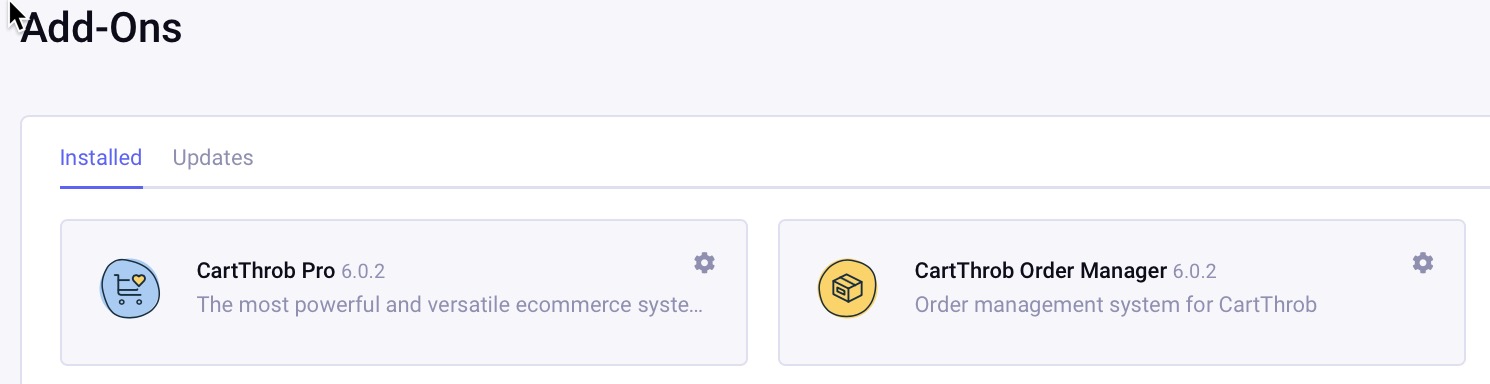
Order Manager
The CartThrob order manager is a separate Add-On; you can add both to your ExpressionEngine control panel menu manager as you see fit.
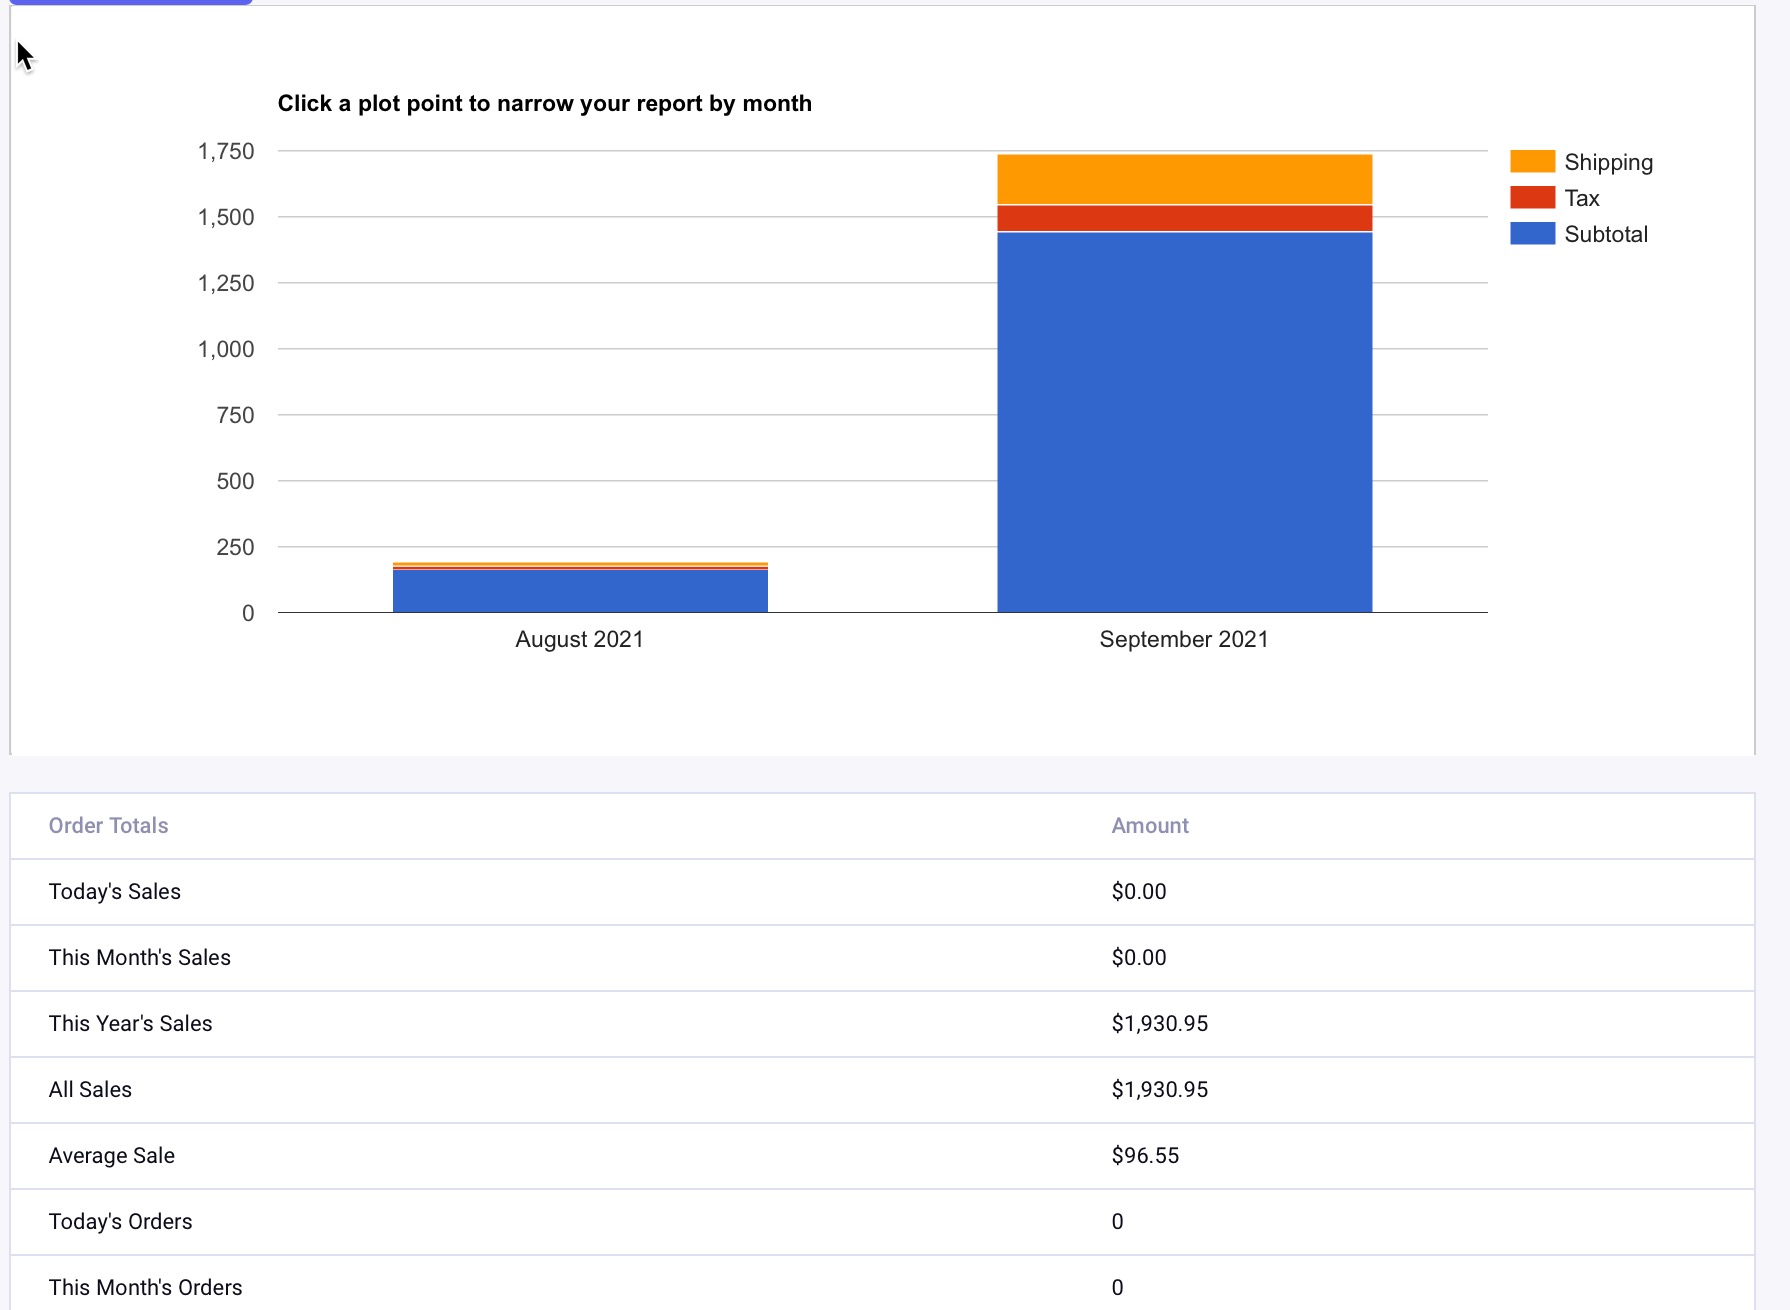
Within Order Manager, you’ll have basic reports around order totals by month, product reports, etc.
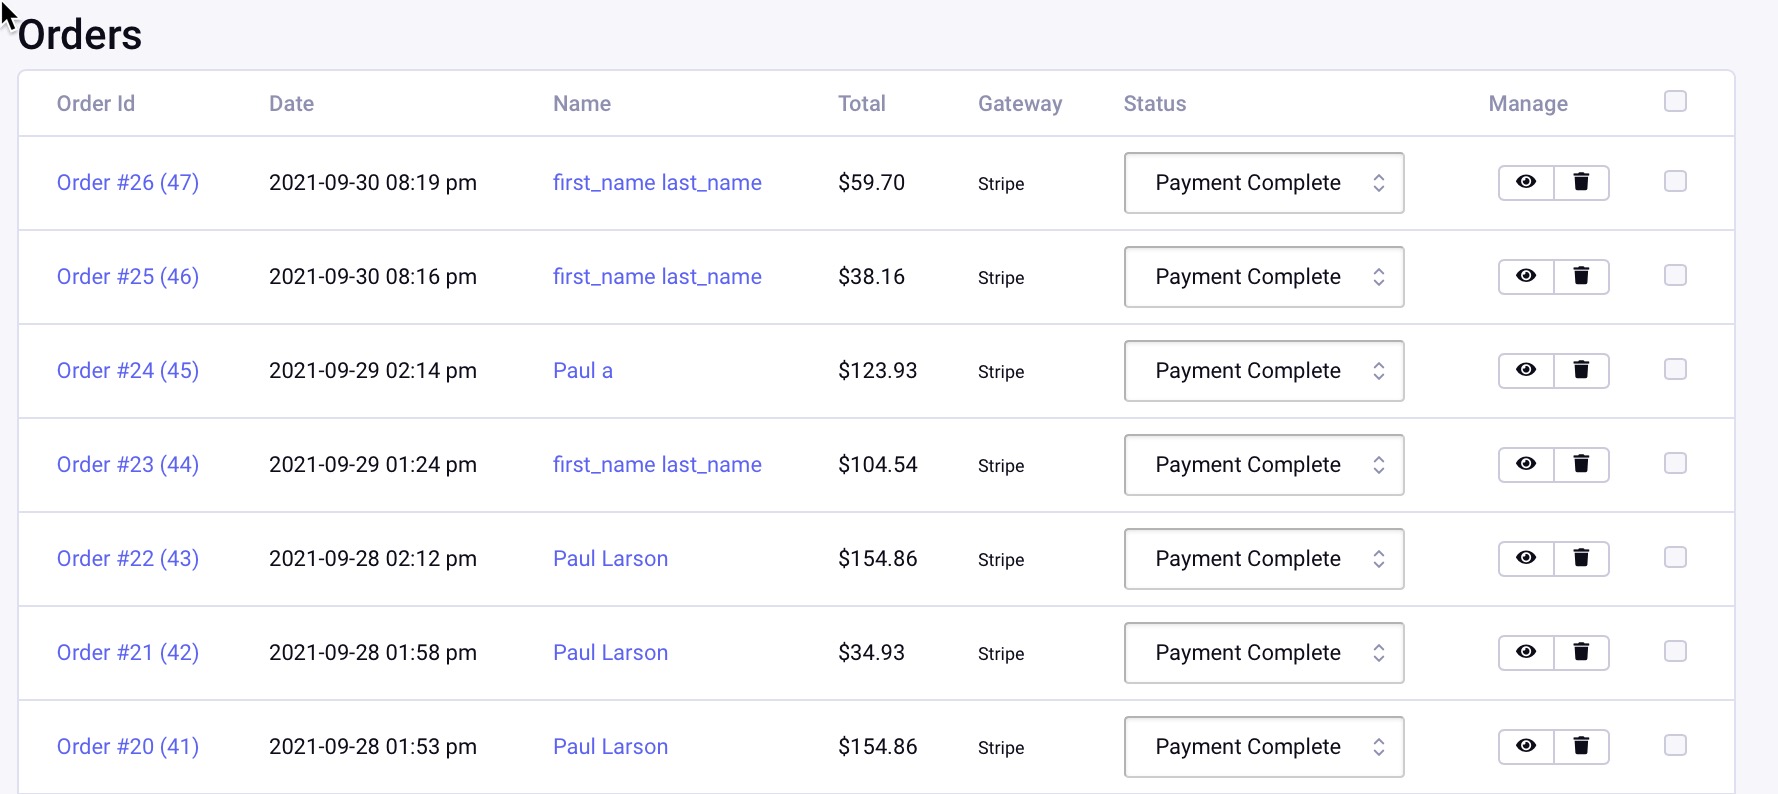
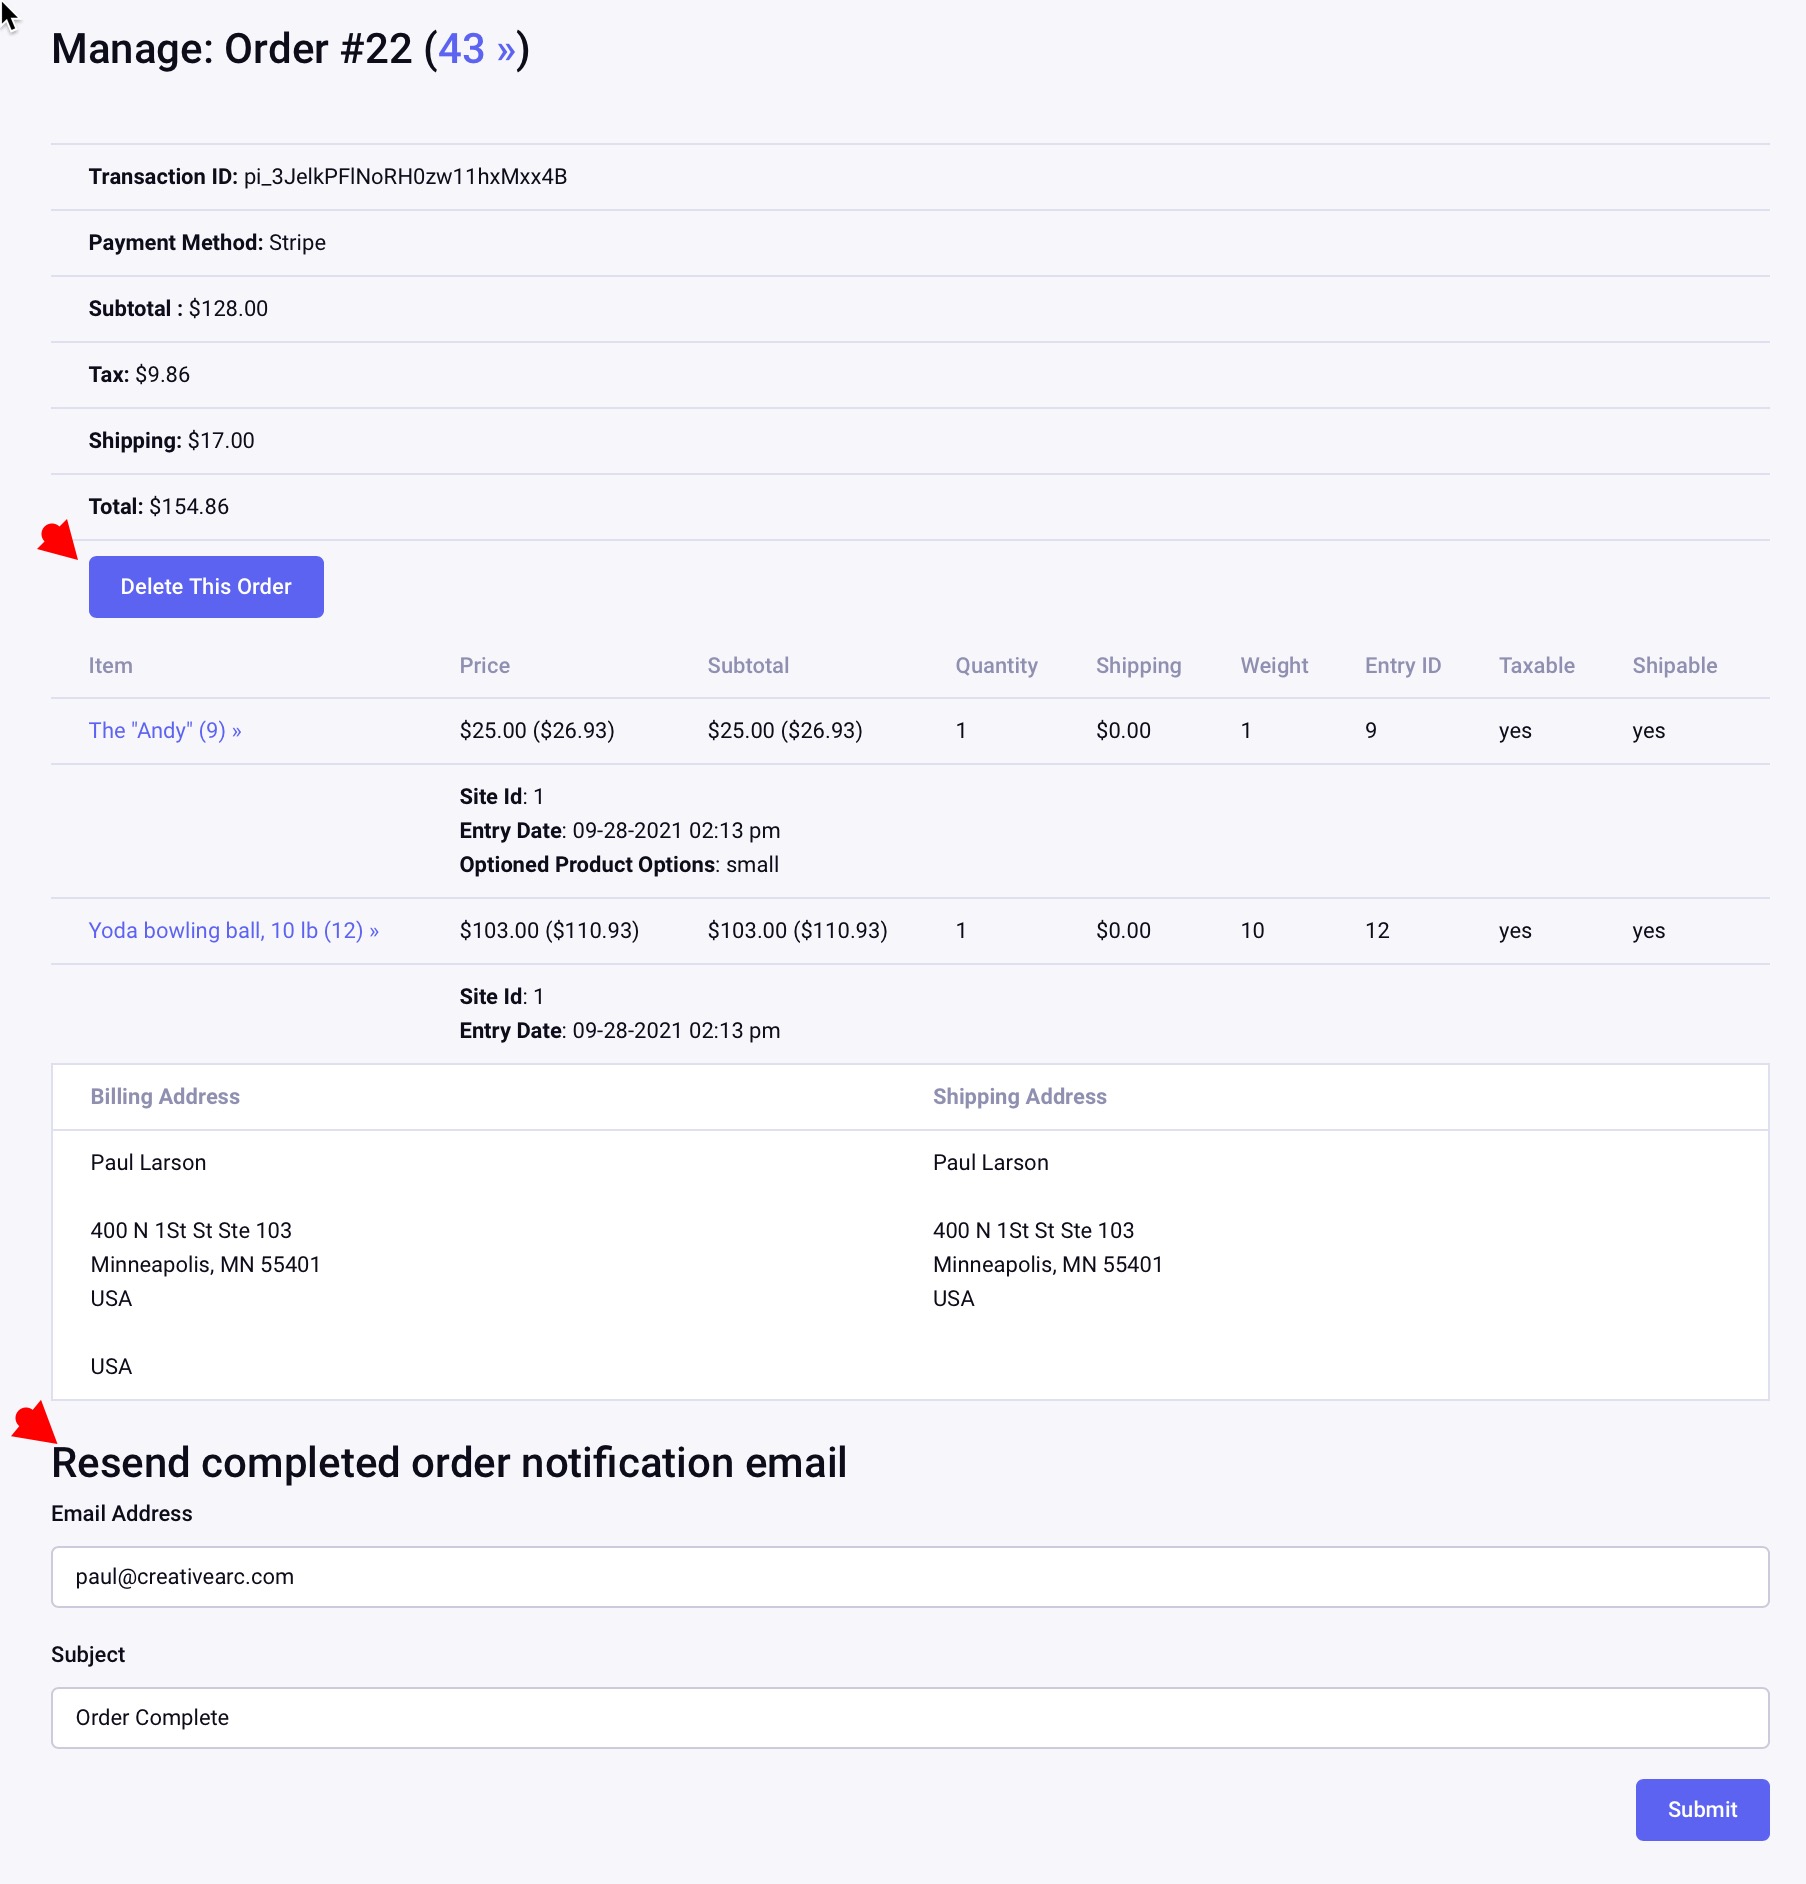
Within Order Manager, the Orders menu appears above the Reports. I’m just going to look at a single order I just made. It looks like an ExpressionEngine channel entries interface but it is slightly different, supplementing with some CartThrob-specific functionality.
Click on a test entry and you’ll see the contents of this order, with functions for deleting the order, re-sending the order notification, or issuing a tracking number.
This concludes our tutorial of the CartThrob setup and frontend review. On to our final installment to cover Templates!
8) Templates
8a) Structure leads the way
To introduce the templates, I want to show how we have our checkout steps configured.
We use the popular Structure add-on to manage the content in our FakeBowling.shop, which has very few Structure pages including “Your Cart,” “Your information,” “Shipping options.” etc, which are tied to the steps of the checkout process as customers progress through their order.
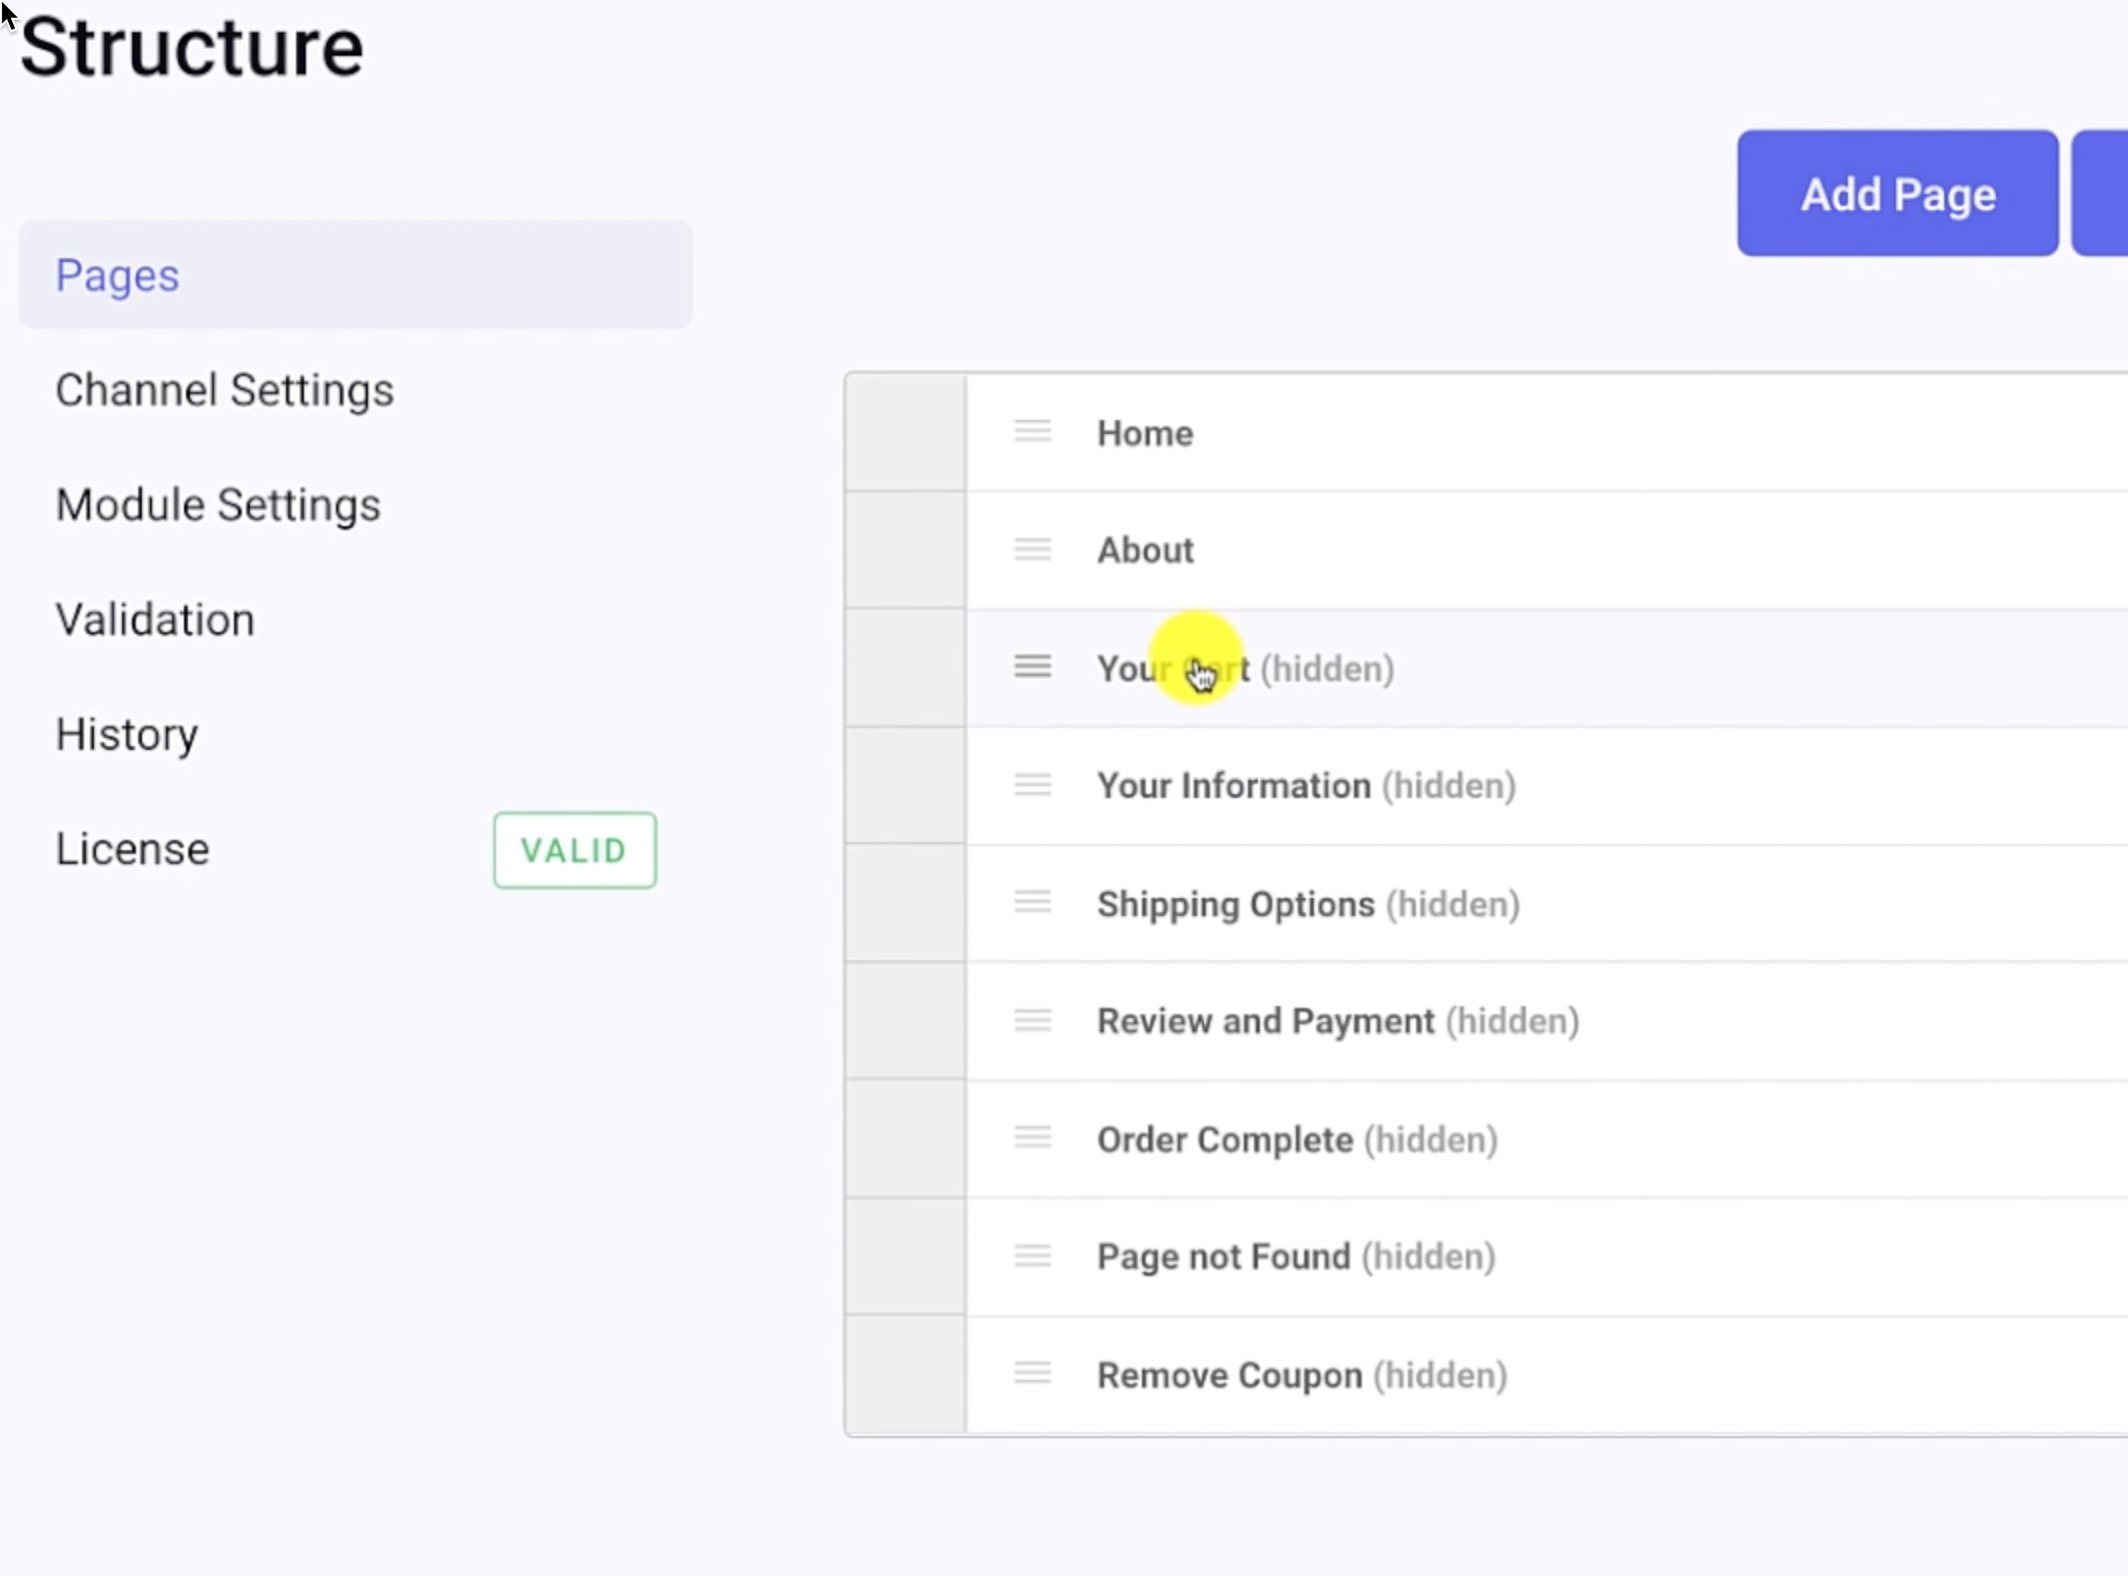
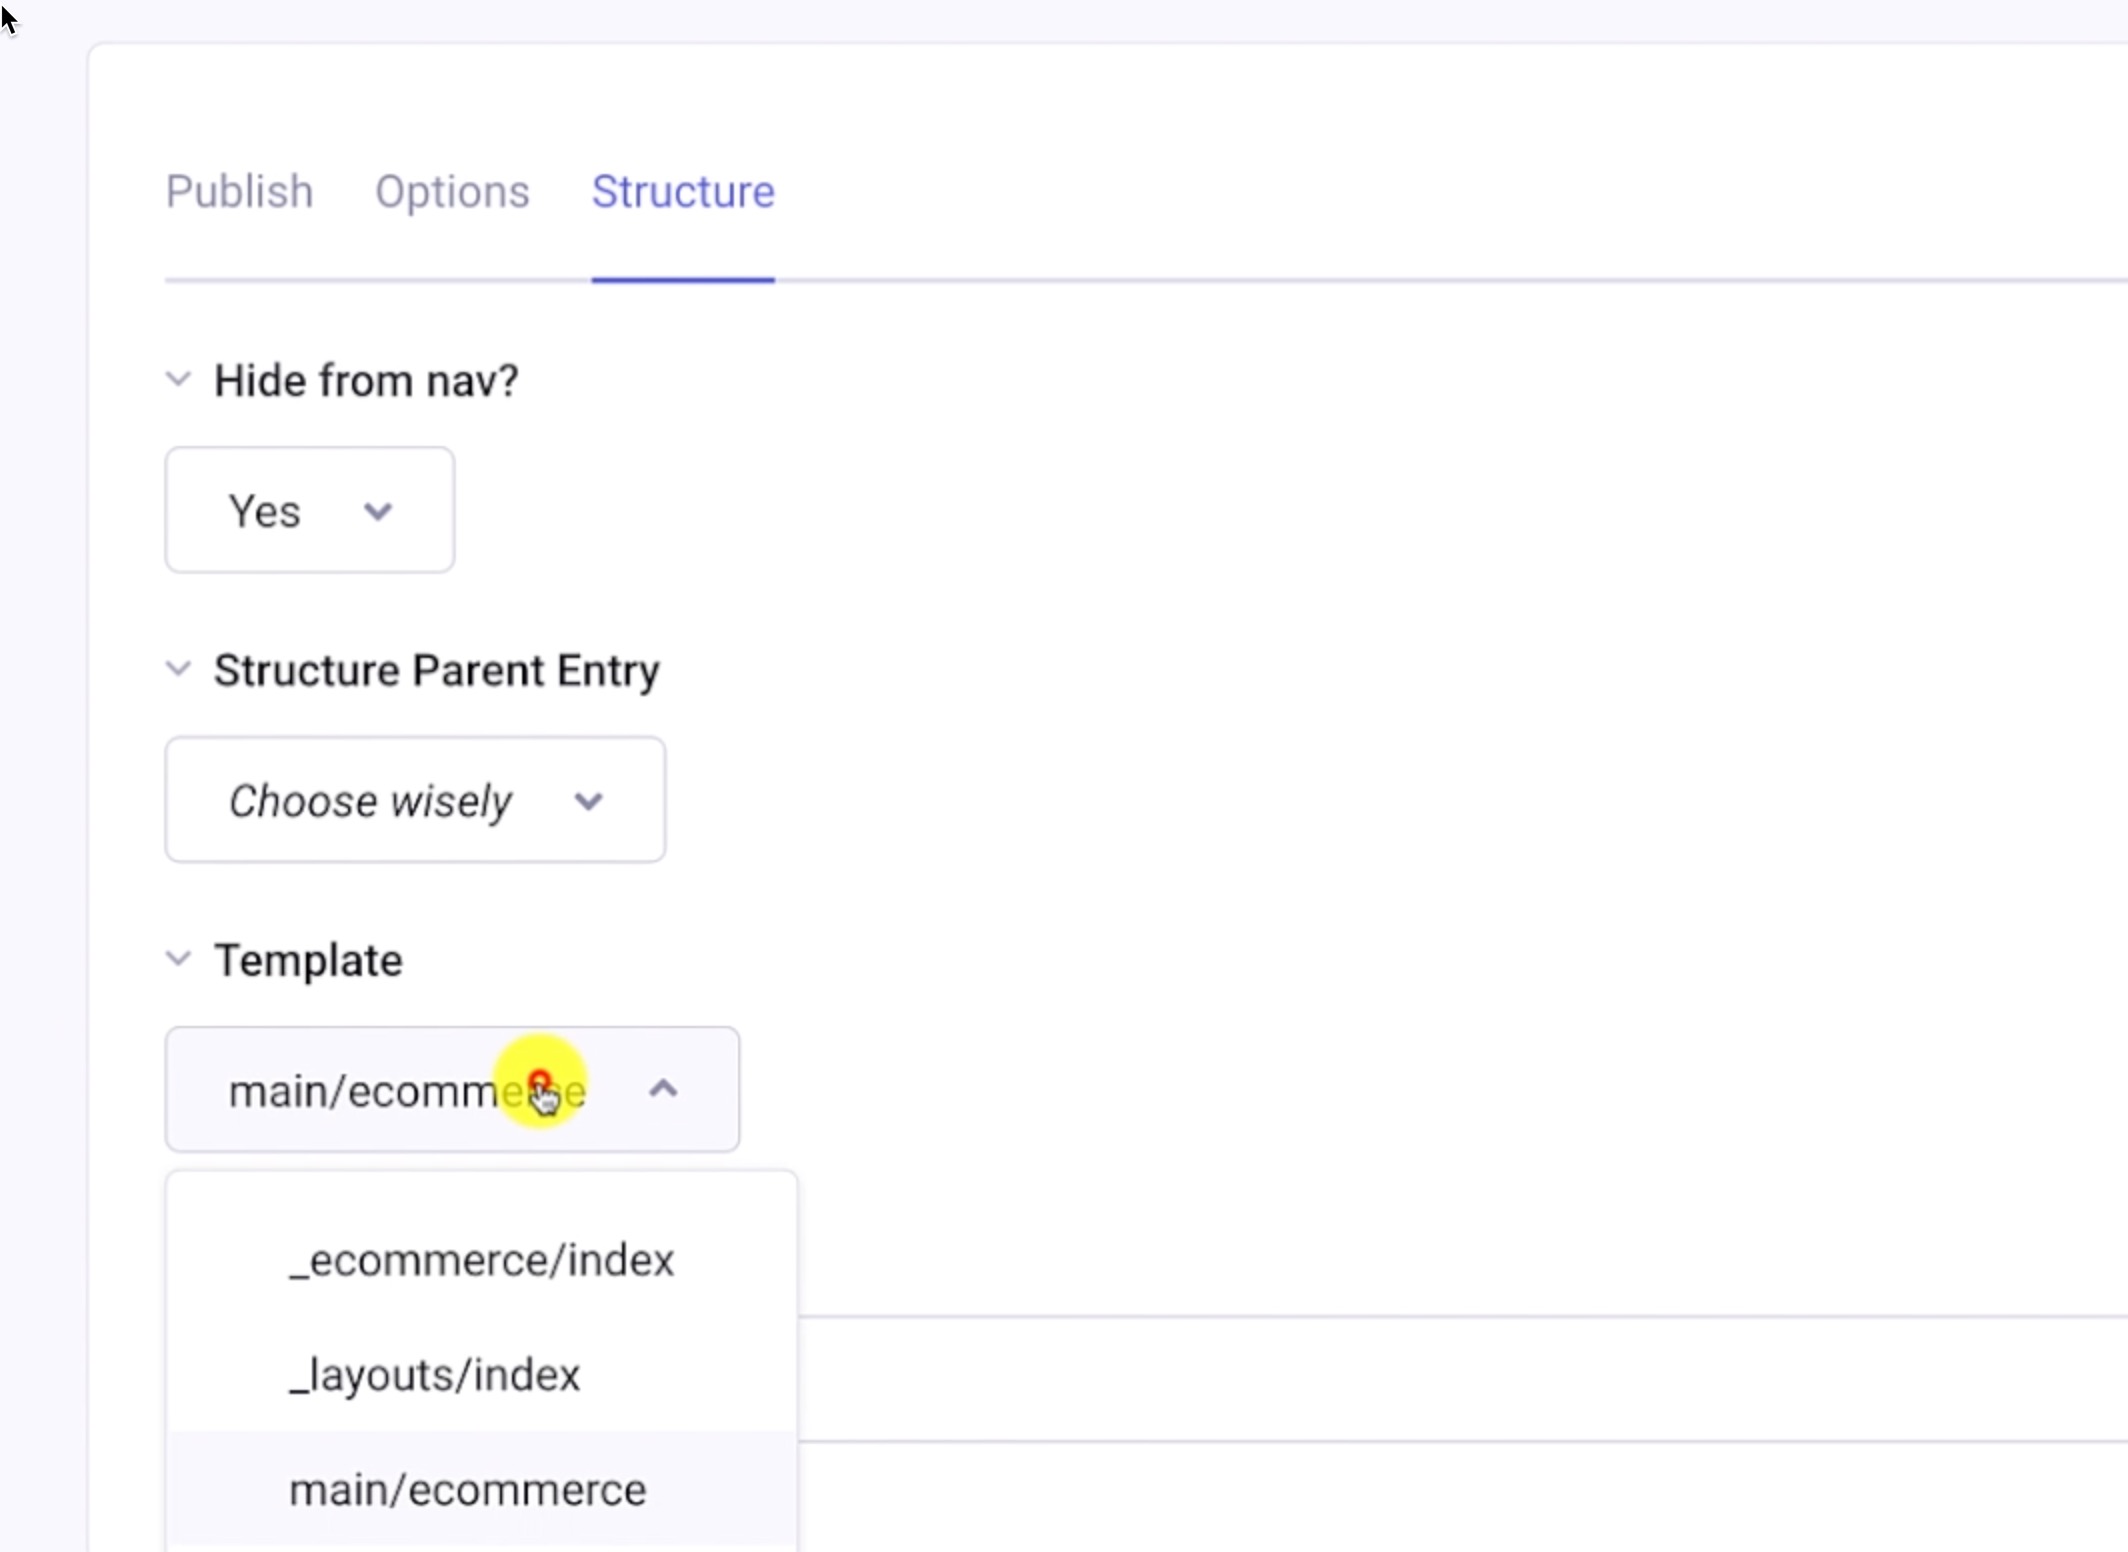
If you look at one of these entries, it’s a blank, placeholder page for with a Structure setting pointing it to our template: main/ecommerce.
In our template groups, you’ll see the ecommerce template, which through a series of embeds looks at the segment of the URL, and then loads the appropriate template code. In other words, we simply pair the Structure page relating to a step in the checkout process to the appropriate master ecommerce template for our site.
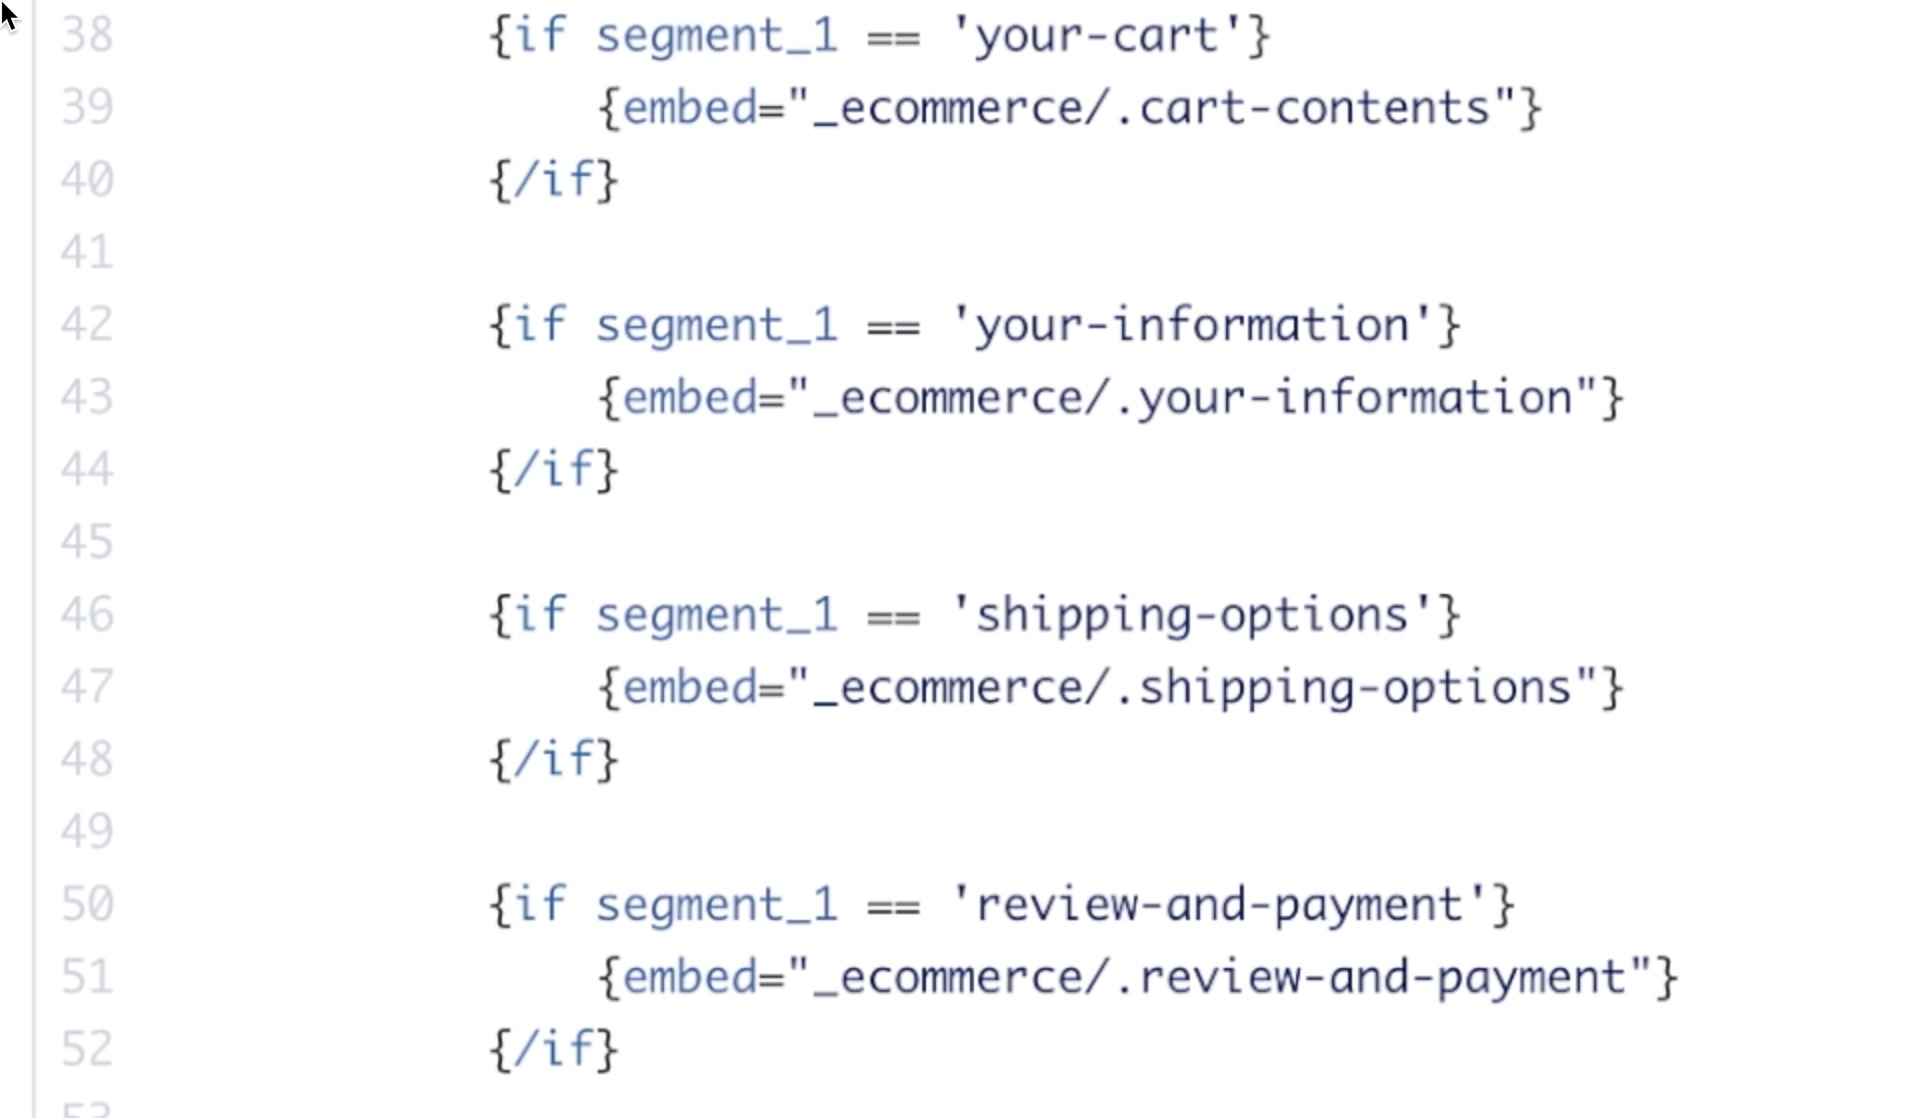
Those embeds intern call a series of hidden templates within a template group called _e-commerce with template code for all the conditions and situations that come up during a checkout.
8b) Template highlights and considerations
Visit the EE:U version of this article to review some template code samples.
We have what we need! All that remains is the final Submit Order action, and we’ll hopefully:
- Send our order to the payment gateway
- Email receipts the customer and store owner
- Deduct any inventory from the products
- Send the user to the Order Complete page
Conclusion
CartThrob is a mature, robust ecommerce platform. Coupled with ExpressionEngine, one can build stores of high complexity, but it’s well-suited for smaller stores as well.
Like ExpressionEngine, CartThrob is built to be customized. That also means it can feel a little “bare” to a beginner. It doesn’t roll out the red carpet to guide you through all the steps of the store build, but when you have command of the template tags, you can scale the features of your store pretty quickly. ERP integration and inventory sync, APIs, and all manner of communication with other systems are possible.
We only scratched the surface of what is possible with CartThrob, but hopefully this walkthrough has you well on your way!
Acknowledgements
I’ll reiterate that Greg Crane developed these example templates, and the general configuration covered in this walkthrough is from his own successful store builds.